
To use a Clarke floor scrubber, first prepare the machine by ensuring the recovery tank is clean and accessible. Fill the solution tank with clean water and avoid harsh chemicals. Power it on and check solution levels. Adjust the vacuum and water settings as needed. Activate the brushes using the triggers, then lower the squeegee for best water pickup. After use, maintain the machine by draining and cleaning both tanks. There's more to discover about proper techniques and care.
Key Takeaways
- Ensure the recovery tank is clean and the float shutoff is in place before starting the scrubber.
- Fill the 13-gallon solution tank with clean water and avoid harsh chemicals.
- Power on the scrubber, check the solution level, and adjust water and vacuum settings.
- Engage the dual triggers to activate brushes and adjust the squeegee for optimal water pickup.
- After use, drain and clean both tanks, and store the machine in a dry area for air circulation.
Preparing the Machine for Use

Before you start cleaning, it's essential to prepare the Clarke floor scrubber properly.
Begin by verifying the recovery tank is clean and accessible through its wide opening. Check the removable float shutoff to prevent any overflow during operation, and make certain the drain hose is pinched for controlled water release.
Tilt the machine back to access components easily for any necessary maintenance. Confirm that the squeegee is properly attached and inspect the squeegee blades to guarantee they're in good condition; use the tool-free blade flipping feature for peak performance.
Finally, familiarize yourself with the simple control interface to adjust the main power, vacuum, and water settings before you commence your cleaning task.
Filling the Solution Tank
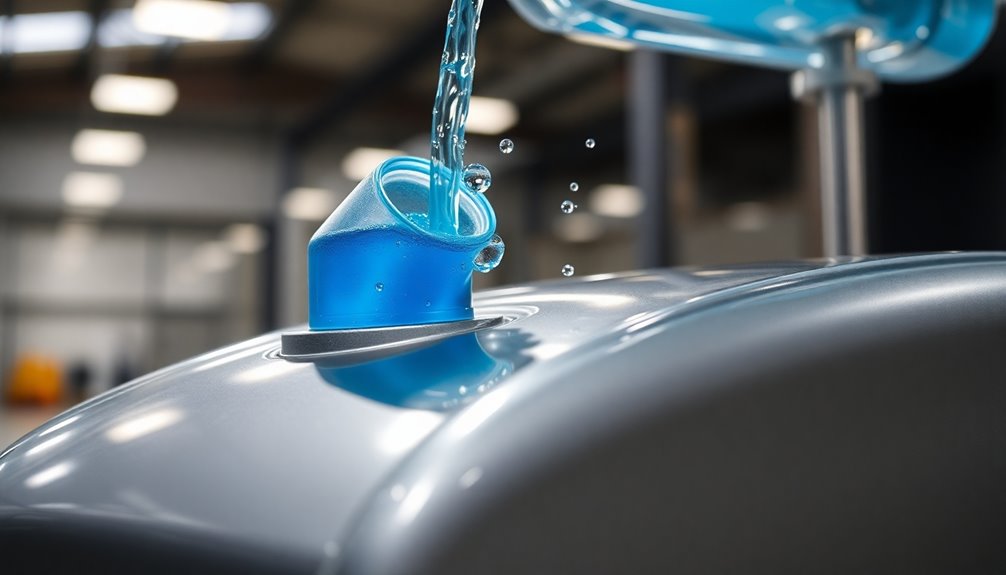
Once you're all set with the Clarke floor scrubber, it's time to fill the solution tank.
First, locate the solution cap at the front for easy access. Make certain the tank is securely positioned and open the cap to fill the 13-gallon solution tank with clean water.
Avoid harsh chemicals as they can damage the internal components of the auto scrubber. After filling, be sure to securely close the solution cap to prevent leaks during operation.
Here are some tips to keep in mind:
- Regularly check the cleanliness of the solution tank.
- Use the drain hose for easy emptying.
- Maintain ideal solution levels for effective recovery.
Following these steps guarantees your machine runs smoothly and efficiently!
Cleaning the Recovery Tank

To maintain your Clarke floor scrubber's efficiency, cleaning the recovery tank is essential.
Start by confirming the machine is powered off. Then, use the wide opening to access the interior for thorough cleaning.
To prevent overflow while emptying the tank, utilize the removable float shutoff feature. This helps manage the water levels effectively.
When you're ready to empty the tank, make use of the drain hose with a pinch feature to control the water release.
Regularly cleaning the recovery tank not only enhances performance but also prevents clogs in the system.
Always follow the maintenance procedures outlined in the owner's manual to guarantee the longevity and efficiency of your recovery tank.
Keeping it clean is key to peak operation.
Powering On the Scrubber

When you're ready to power on the Clarke floor scrubber, start by making sure the main power switch is set to "ON" on the control interface.
Before you engage the machine, take a moment to verify a few key elements:
- Check the solution tank level to confirm you have enough cleaning solution.
- Make sure the water and vacuum settings are adjusted appropriately for effective cleaning.
- Get ready to engage the dual triggers on either side to activate the brush.
Once you've confirmed these aspects, you can safely power on the scrubber.
Adjust the squeegee raise and lower lever as needed for best water pickup.
You're now set to start cleaning efficiently!
Adjusting Vacuum and Water Settings

Adjusting the vacuum and water settings on your Clarke floor scrubber is essential for achieving the best cleaning results. Use the simple control interface to easily modify each setting to suit your needs.
Make certain the main power is turned on before you start adjusting these functions for effective cleaning. Since the vacuum and water settings operate independently, you can customize them based on the surface type and the dirt level.
To optimize cleaning, utilize the dual triggers on the left and right sides of the machine, allowing you to control the water flow while activating the brushes.
Regularly monitor and adjust the water settings to guarantee efficient solution usage and maintain the effectiveness of the recovery tank during operation.
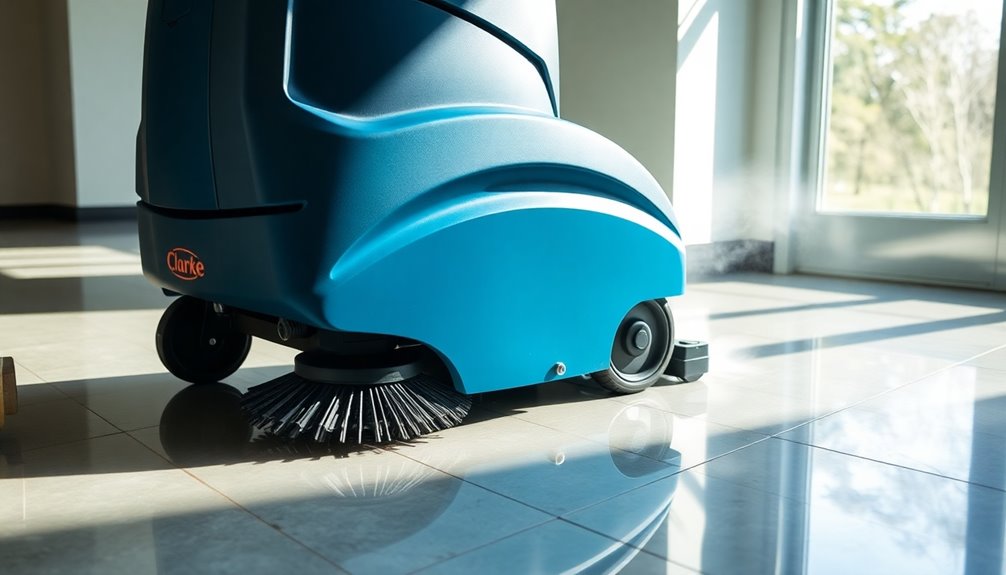
Activating the Brushes
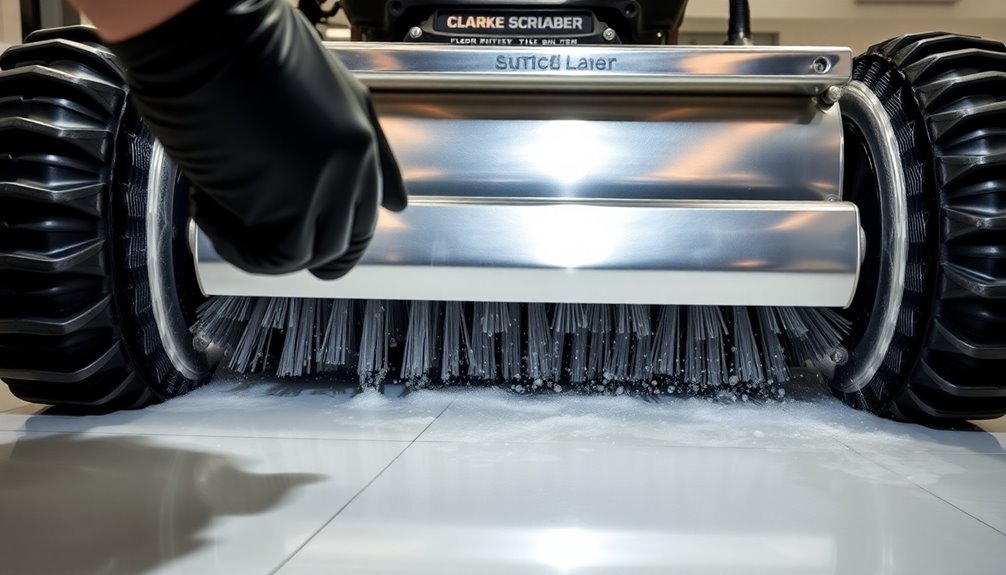
Activate the brushes on your Clarke floor scrubber by simply squeezing the dual triggers located on either side of the machine.
Before you do this, make certain the main power is turned on to guarantee everything runs smoothly.
The intuitive design of the triggers makes it easy for anyone to engage the cleaning mechanism.
For peak performance, consider these tips:
- Adjust the water settings to apply the right amount of solution for your cleaning surface.
- Release the triggers after use to prevent unnecessary wear on the pads and brushes.
- Regularly inspect the brushes to maintain their effectiveness and longevity.
Following these steps will help you achieve a thorough clean every time.
Lowering the Squeegee

Before you start cleaning, it's essential to lower the squeegee on your Clarke floor scrubber for effective water pickup. First, make certain the machine's on and operational. Locate the squeegee raise and lower lever in the middle of the machine. Pull the lever downwards to engage the squeegee, allowing it to make contact with the floor. This step is key to prevent water streaks and maximize efficiency. Remember, the squeegee has a breakaway design, so it'll slide off if it hits any obstructions, protecting both your machine and the surface you're cleaning.
| Importance | Consequence | Emotional Impact |
|---|---|---|
| Effective Pickup | Clean, streak-free | Satisfaction |
| Prevent Damage | Long-lasting equipment | Peace of mind |
| Efficient Cleaning | Time-saving | Accomplishment |
| User Safety | Reduced slips | Confidence |
| Improved Results | Happy customers | Pride in work |
Systematic Cleaning Technique

To achieve ideal results with your Clarke floor scrubber, it's crucial to follow a systematic cleaning technique. Start by filling the solution tank through the front cap, ensuring the recovery tank is clean and free of debris. This promotes effective scrubbing.
Adjust the squeegee height using the raise and lower lever for maximum water pick-up. Activate the scrubber using the dual triggers to start the brush and engage the water flow.
Remember to:
- Utilize the breakaway design of the rear squeegee to maneuver around obstacles easily.
- Regularly check and clean both tanks for sustained performance.
- Flip the squeegee blades using the tool-free clip to maintain efficiency.
Post-Use Maintenance and Storage

After you've finished scrubbing, it's important to focus on post-use maintenance to keep your Clarke floor scrubber in top shape. Start by draining the recovery tank using the drain hose with the pinch feature to avoid standing water. Clean both the solution and recovery tanks through the wide opening to prevent residue buildup. Don't forget to remove and clean the squeegee blades using the single clip mechanism, ensuring effective water pickup. Finally, store the machine in a dry area, tilting it back to promote air circulation.
| Maintenance Task | Frequency |
|---|---|
| Drain Recovery Tank | After each use |
| Clean Tanks | Weekly |
| Clean Squeegee Blades | After every use |
Refer to the owner's manual for further maintenance tips.
Frequently Asked Questions
How Do You Operate a Floor Scrubber?
To operate a floor scrubber, start by filling the solution tank and checking the recovery tank for cleanliness.
Power on the machine and adjust the vacuum and water settings.
Activate the brushes using the dual triggers.
Control the squeegee's height with the middle lever for effective water recovery.
If the squeegee hits an obstruction, detach it easily.
Regularly clean the tanks and consult the owner's manual for maintenance tips to keep it running smoothly.
How Do You Use a Floor Scrubber Ride?
Did you know that using a ride-on floor scrubber can improve cleaning efficiency by up to 50% compared to traditional methods?
To use a floor scrubber ride, start by filling the solution tank and familiarizing yourself with the controls. Adjust the squeegee height, engage the brushes with the dual triggers, and move forward.
After you're done, clean the tanks regularly and maintain the squeegee for peak performance. Enjoy a cleaner space in less time!
Why Is My Floor Scrubber Not Draining?
If your floor scrubber isn't draining, check the drain hose first.
Make certain it's connected properly and isn't pinched.
Next, inspect the removable float shutoff for blockages that could prevent drainage.
Look inside the recovery tank for any debris that might be clogging it and clean as needed.
Finally, verify the squeegee is working correctly, as a malfunctioning one can hinder water collection and drainage efficiency.
Regular maintenance is key!
Do Floor Scrubbers Really Work?
You might say floor scrubbers are like magic wands for your floors. They really do work wonders!
With their powerful brushes and smart water application, they tackle dirt and grime that mops just can't handle. You'll notice a cleaner, shinier surface, and your floors will last longer.
Plus, they keep things safer by reducing slip hazards. So, if you want a cleaner space, investing in a floor scrubber is definitely worth it!
Conclusion
Using a Clarke floor scrubber can transform your cleaning routine, making it more efficient and effective. Did you know that using a floor scrubber can reduce cleaning time by up to 75% compared to traditional methods? By following the steps outlined, you'll not only keep your floors spotless but also extend the life of your machine. So, after you're done, remember to perform regular maintenance and store it properly for the next time you need it!