
To use a Viper floor scrubber, start by filling the solution tank with the right cleaning solution and checking the recovery tank for debris. Power it on and adjust the speed control as needed. Engage the brushes using the foot pedal and tweak the water flow for the type of cleaning you're doing. Utilize the offset brush head for edges, and keep an eye on the battery indicator. There's more to learn about maximizing your scrubber's efficiency, so keep going!
Key Takeaways
- Fill the solution tank with the correct cleaning solution and ensure it is securely closed before starting the machine.
- Power on the scrubber by turning the ignition key while keeping brush and vacuum buttons off, and check the battery indicator.
- Adjust water flow depending on the soil level and surface type, using the control knob for optimal cleaning efficiency.
- Use the offset brush head to clean edges and corners effectively, positioning the machine parallel to walls for maximum contact.
- Monitor and maintain the battery charge and recovery tank, ensuring all components are in good condition for optimal performance.

Cordless Electric Mop, Electric Spin Mop with Water Sprayer, Powerful Floor Cleaner, 300ml Tank Self-Propelled for Hardwood & Tile, Adjustable Handle, 2500mAh Long-Lasting Battery, Pink
- Self-Propelled for Effortless Cleaning: Glides on its own, lightweight design
- Built-In Water Sprayer: 300ml tank for controlled cleaning solution
- Powerful Dual-Spin Heads: Rotates at 160 RPM for deep cleaning
As an affiliate, we earn on qualifying purchases.
Preparing the Machine for Use
Before you start cleaning, it's essential to prepare your Viper floor scrubber to guarantee peak performance.
Begin by making sure the solution tank is filled with the right cleaning solution and check the screen to prevent trash from entering.
Next, verify that the recovery tank is empty and inspect the float ball to confirm it's functioning properly to avoid any liquid overflow.
Charge the standard deep cycle or AGM batteries fully to ensure maximum performance during your cleaning session.
Familiarize yourself with the key ignition and control buttons for brush operation and vacuum motors to streamline your start-up process.
Finally, check the squeegee; make sure it's properly positioned and raised before backing up to protect the rubber under the machine.
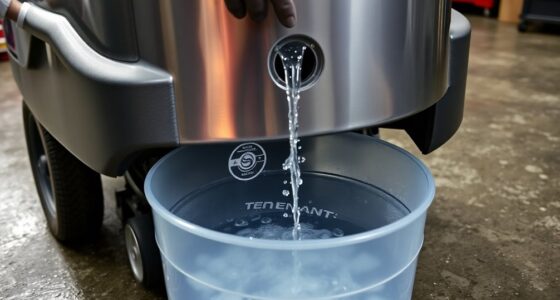
Filling the Solution Tank
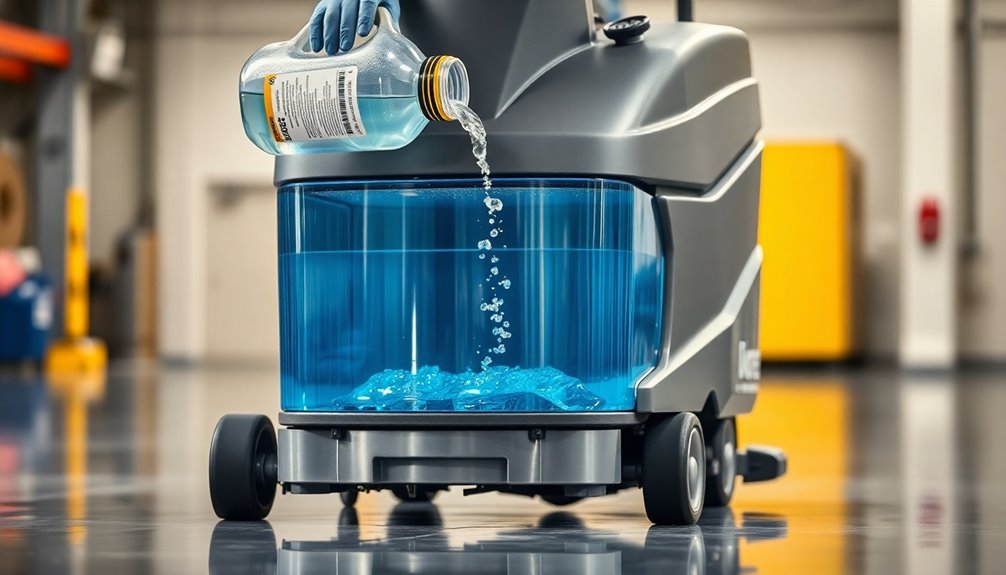
To fill the solution tank of your Viper floor scrubber, start by locating the fill opening for easy access.
Make sure to use clean water mixed with the right cleaning solution, following the manufacturer's guidelines.
After filling, double-check that the tank lid is securely closed to prevent any spills while you clean.
Locate Solution Tank Access
Filling the solution tank of your Viper 51 60 is a straightforward process that starts with locating the access point on the top of the machine. This access point is designed for easy filling and maintenance, guaranteeing you can get back to your scrubbing quickly.
Before you proceed, check the built-in screen to keep the tank free from debris.
Here's what to remember:
- The solution tank holds up to 16 gallons, allowing for extended scrubbing without frequent refills.
- Always use the recommended cleaning solution for peak performance.
- After filling, securely close the tank lid to prevent leakage and maintain efficiency while cleaning your scrub path.
Following these steps will guarantee smooth operation during your cleaning tasks.
Fill With Appropriate Solution
Once you've confirmed the solution tank is empty, it's time to fill it with the appropriate cleaning solution.
Use a cleaning solution specifically designed for auto scrubbers, and make sure to follow the manufacturer's guidelines for dilution ratios. This guarantees effective cleaning results.
Open the tank lid and carefully pour the solution into the tank, using a funnel if necessary to avoid debris contamination.
After filling, inspect the solution tank's screen to verify it's clear of any obstructions, which helps prevent trash from entering the system during operation.
Finally, close the tank lid securely to maintain proper pressure and prevent spillage while you operate the Viper scrubber.
You're now ready to tackle those floors!
Check for Overflow Prevention
Before you start filling the solution tank of your Viper 51 60, verify the float ball in the recovery tank is functioning properly. This step is essential to prevent overflow during operation.
Carefully fill the solution tank, keeping an eye on the following:
- Confirm the screen in the solution tank is clean to block debris.
- Monitor the battery indicator and hour meter for adequate power.
- Regularly inspect and clean the solution tank and its screen for peak performance.
Checking the Recovery Tank

Checking the recovery tank is essential for maintaining your Viper floor scrubber's performance. Start by inspecting the tank for debris and confirm it's properly seated to avoid leaks. Use the visibility window to monitor the liquid level and know when to empty it. Your scrubber features a float ball that prevents overflow, but don't rely solely on it. After each use, clean and inspect the recovery tank to prolong its lifespan. The drain hose makes disposing of dirty water easy, so take advantage of it.
| Task | Frequency |
|---|---|
| Inspect for debris | Before each use |
| Check liquid level | During operation |
| Clean after each use | After every use |
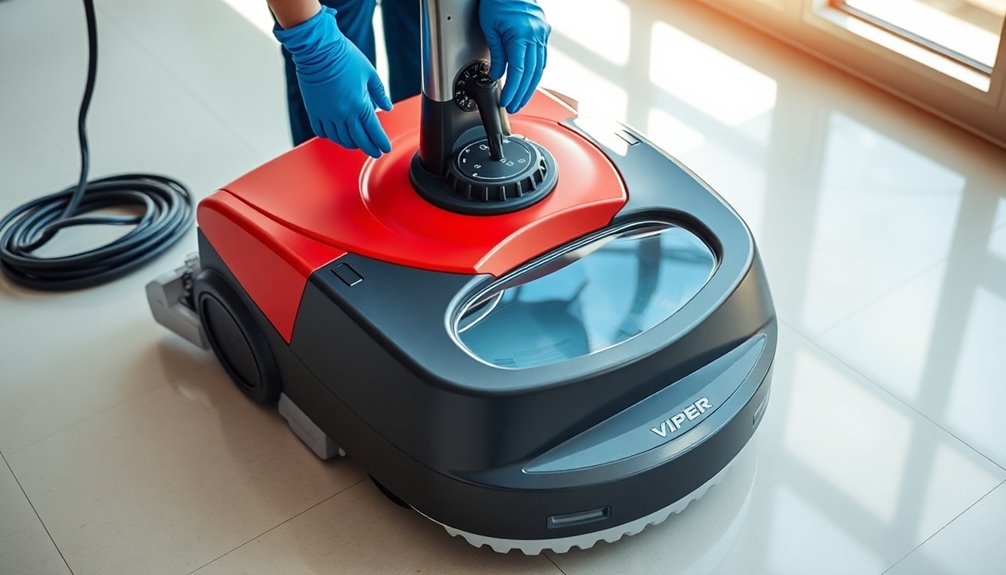
Powering On the Floor Scrubber

To power on the Viper 51 60 floor scrubber, start by inserting the key into the ignition switch on the control panel.
Make certain the brush operation and vacuum motor buttons are off before turning the key to the "on" position, which will light up the LED battery indicator.
This step guarantees you're ready for a safe and effective cleaning session.
Key Ignition Process
When you're ready to power on the Viper 51 60 floor scrubber, simply insert the key into the ignition and turn it to the "On" position.
Before doing this, make sure the following conditions are met:
- The battery is properly connected and charged.
- The key ignition activates the entire system.
- Control buttons for brush and vacuum functions are accessible.
If the machine doesn't start, check the emergency reset buttons for activation due to motor overload protection.
This step is essential for troubleshooting. Once everything checks out, you're set to engage the scrubber and vacuum functions effectively.
Always remember to perform these checks for a smooth operation every time you power on the floor scrubber.
Control Button Functions
Operating the Viper 51 60 floor scrubber is straightforward once you understand the control button functions.
To power on the machine, insert the key into the ignition located on the control panel and turn it. After the scrubber is on, you can control the brush and activate the vacuum motor for effective cleaning.
Keep an eye on the emergency reset buttons; they protect the motor from overloads, ensuring safe operation.
Use the speed control feature to adjust the scrubber's speed for efficient transport and scrubbing.
Finally, always remember to raise the squeegee when reversing to prevent damage to the rubber underneath the machine. This way, you'll maintain ideal performance and extend the life of your floor scrubber.
Adjusting Speed Control

Adjusting the speed control on the Viper 51 60 can greatly enhance your cleaning efficiency. You can easily tweak the speed using the control knob on the user panel. This flexibility allows you to maximize scrubbing based on the surface type and cleaning requirements.
Here are some key benefits of adjusting the speed:
- Improved maneuverability: Navigate tight spaces and around obstacles with ease.
- Enhanced battery life: Using the right speed setting helps conserve energy, especially in larger or heavily soiled areas.
- Thorough cleaning: Matching the speed to your scrubbing needs guarantees you get the best results.
Additionally, it's important to note that the best home security systems often emphasize user-friendly operation, similar to how adjusting speed enhances your cleaning process.
Regularly monitor your speed setting to achieve peak performance during each cleaning session.
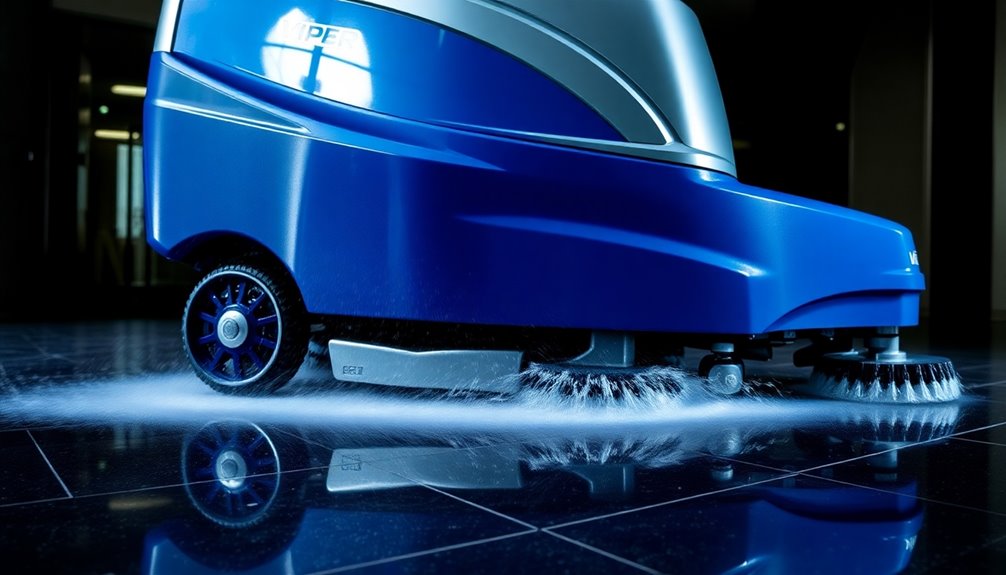
Engaging the Brushes

Engaging the brushes on the Viper 51 60 is a straightforward process that can greatly enhance your cleaning performance.
First, verify the key ignition is turned on to power up the machine. Once you're ready, press the foot pedal designed for brush engagement; this allows for easy activation while you operate.
You can also control the brush operation through designated control buttons, giving you the flexibility to make quick adjustments as needed.
Keep an eye on the battery indicator to confirm there's enough power for brush operation, preventing any interruptions.
Finally, remember to raise the squeegee when backing up to avoid damaging the rubber while the brushes are engaged. This way, you'll maintain both efficiency and equipment longevity.
Adjusting Water Flow

Controlling the water flow on your Viper 51 60 auto scrubber is essential for achieving ideal cleaning results.
The machine's adjustable water flow control lets you customize the output based on the surface type and level of soiling. To adjust the water flow, simply locate the control knob or lever on the dashboard for easy modifications during operation.
- Increase water flow for heavily soiled areas.
- Reduce flow for lighter cleaning tasks.
- Regularly check the solution tank to verify you have enough water.
Utilizing the Offset Brush Head

Once you've set the water flow to match your cleaning needs, it's time to utilize the offset brush head for those tricky areas.
This design allows you to scrub closely along walls and edges, ensuring thorough cleaning in tight spaces. Position the machine parallel to the wall for ideal contact and effective dirt removal.
The brush operates efficiently, enhancing scrubbing power while minimizing water splashing, thanks to the floating splash skirt feature.
Before you start, make sure the solution tank screen is clean to prevent debris from obstructing the brush head.
Also, regularly check the brush's condition and adjust the water flow control to match the cleaning surface for maximum performance with the offset brush head.
Monitoring Battery Levels and Efficiency

Monitoring battery levels is essential for keeping your Viper floor scrubber running efficiently. The built-in battery indicator helps you track the remaining charge, preventing unexpected interruptions.
To enhance performance and lifespan, keep these tips in mind:
- Regularly check batteries, especially if using standard deep cycle or wet acid types.
- Consider AGM batteries for longer run times and quicker charging.
- Maintain the battery compartment by cleaning and ensuring proper connections.
Additionally, the scrubber features an hour meter that tracks usage time, allowing you to schedule timely maintenance and charging.
Frequently Asked Questions
How Do You Operate a Floor Scrubber?
To operate a floor scrubber, you'll first power it on and check the battery level.
Engage the brushes with the foot pedal and adjust the water flow based on the surface type.
Use the self-propelled feature to navigate, raising the squeegee when reversing.
Keep an eye on the recovery tank to avoid overflow and check the solution tank for debris.
After cleaning, drain the recovery tank for easy disposal and inspect the machine regularly.
How to Fill a Viper Floor Cleaner?
Filling a floor cleaner's tank can be a simple task!
First, flip open the hinged lid and lift the tank cover. Make sure the solution tank screen's snugly in place to block any debris while you fill.
Use a clean water source to fill that 16-gallon tank, steering clear of contaminants.
After you've filled it, tweak the water flow control to suit your scrubbing style, and don't forget to check the recovery tank!
Why Is There No Water Coming Out of My Viper Floor Scrubber?
If there's no water coming out of your scrubber, start by checking the solution tank for sufficient water.
If it's empty or low, refill it.
Then inspect the tank screen for clogs.
Make sure the water flow control is set correctly and that you're fully pressing the foot pedal for brush engagement.
Finally, look for any blockages or damage in the hoses leading to the brush head that might be obstructing water flow.
Do Floor Scrubbers Really Work?
Think of floor scrubbers as the knights in shining armor for your floors. Yes, they really work!
You'll notice a significant difference in cleanliness compared to traditional mopping. Their scrubbing brushes and suction effectively tackle dirt and grime, leaving surfaces spotless.
Plus, with adjustable water flow, you can tailor the cleaning process to suit different flooring types. Regular use enhances floor longevity, making it a smart choice for maintaining your spaces.
Conclusion
Now that you know how to use a Viper floor scrubber, you're ready to tackle those tough cleaning jobs with ease. Just remember, like a well-oiled machine, each step you take enhances your efficiency and results. Keep an eye on those battery levels and adjust as needed, letting your scrubber glide across the floor. With practice, you'll transform any surface into a sparkling clean canvas, making your cleaning routine smoother than ever. Happy scrubbing!