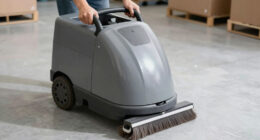
To set up your push sweeper for classrooms, start by adjusting the brush height so it just lightly touches the floor—this maximizes debris pickup without causing damage. Use the lever or knob to raise or lower the brush as needed, and double-check the setting before starting. Make sure the handle is comfortable and secure for easy control. Properly configured, your sweeper will work efficiently—and if you keep going, you’ll learn even more tips to optimize your setup.
Key Takeaways
- Adjust the brush height so it lightly touches the classroom floor for effective debris collection without damage.
- Use the adjustment lever or knob to set the correct height and double-check after initial use.
- Position the handle for comfortable, ergonomic use with elbows slightly bent and secure it tightly.
- Perform final setup checks before cleaning, ensuring both brush contact and handle stability.
- Regularly inspect and fine-tune brush height and handle position during use for optimal performance.

Setting up a push sweeper for your classroom is a straightforward process that can substantially improve cleaning efficiency. The first step is to ensure the brush height is properly adjusted. When the brush is set too low, it can drag on the floor, causing unnecessary wear and making it harder to pick up debris efficiently. Conversely, if the brush is too high, it won’t make adequate contact with the surface, leading to poor cleaning results. To find the right height, look for the adjustment mechanism—usually a lever or knob—that allows you to raise or lower the brush. Position the brush so it just touches the floor lightly, ensuring it makes consistent contact across the entire width of the sweeper. This balance helps you maximize debris collection without damaging the floor or the brush itself. Always double-check the adjustment after the first few pushes, as the brush may settle into a different position during use. Properly adjusted brushes are essential for effective cleaning and durability.
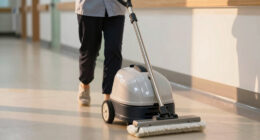
Next, focus on handle positioning, which directly impacts your comfort and control during cleaning. Adjustable handles are common on push sweepers, so take advantage of this feature. Stand behind the sweeper and adjust the handle until it feels natural in your hands, with your elbows slightly bent and your back straight. Proper handle height reduces strain on your wrists, shoulders, and back, making the task less tiring and more effective. If the handle is too high or too low, you’ll find yourself leaning forward or hunching over, which can lead to fatigue or poor cleaning posture. Secure the handle tightly once you’ve found the ideal position, ensuring it doesn’t shift during use. Remember, a comfortable handle position allows for smooth, controlled pushes, helping you cover more ground with less effort. Regularly inspecting the brush and handle adjustments ensures optimal performance over time.
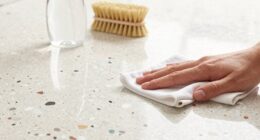
As you finalize your setup, double-check both the brush adjustment and handle positioning before starting your cleaning session. A well-adjusted brush will sweep debris efficiently, and a properly positioned handle will give you maximum control and comfort. Keep in mind that adjusting these components isn’t a one-time task; as you use the sweeper over time, you may need to fine-tune the brush height or handle position to accommodate different floor types or personal preferences. Regular maintenance and adjustments will help your push sweeper perform at its best, ensuring your classroom stays clean with minimal effort. By taking the time to get these settings right, you’ll make your cleaning routine more effective, less tiring, and ultimately more satisfying. Proper maintenance and adjustments are key to longevity and optimal cleaning results.

CLEANHOME Manual Carpet Sweeper for Pet Hair – Rotating Brush Floor Sweeper, Lightweight Push Broom for Classroom Rugs, Non-Electric Lint & Crumb Cleaner, Easy-Dump Dustbin, No Batteries Needed
Pet Hair Removal Broom Pro: Deeper than carpet rakes: extracts embedded fur from rugs & carpets like a…
As an affiliate, we earn on qualifying purchases.
As an affiliate, we earn on qualifying purchases.
Frequently Asked Questions
Can the Brush Height Be Adjusted While the Sweeper Is in Use?
Yes, you can adjust the brush height while the sweeper is in use, but only if your model allows it. Always follow safety procedures before making adjustments to avoid injuries. Make certain the sweeper is turned off and unplugged if applicable. Carefully perform the brush height adjustment, using the designated controls, to maintain maximum cleaning performance. Remember, safety first—never attempt adjustments while the machine is running.
What Safety Precautions Should Be Taken During Brush Height Adjustment?
Adjusting the brush height is like threading a needle—you need focus and caution. Always wear appropriate safety gear, including gloves and eye protection, before making adjustments. Turn off the sweeper and disconnect it from power to prevent accidents. Follow your emergency procedures if something unexpected happens. Never adjust the brush while the machine is running, ensuring your safety and avoiding damage to the equipment.
Is There a Recommended Schedule for Checking and Maintaining the Brush Height?
You should follow a regular maintenance schedule, checking your push sweeper’s brush height at least once a week. Adjustment frequency depends on usage and floor conditions; more frequent checks are needed in high-traffic areas. Make sure to inspect and adjust the brush height whenever you notice decreased cleaning performance or uneven wear. Consistent maintenance helps extend your sweeper’s lifespan and keeps it working efficiently.
How Do Different Floor Types Affect the Optimal Brush Height?
Different floor types demand dynamic adjustments to your brush height. For smooth surfaces like tile or hardwood, keep the brush close to pick up fine dust. For textured floors, like carpets with thick fibers, raise the brush slightly to avoid damage and improve sweeping. You’ll want to carefully customize the contact to match the floor’s texture, ensuring thorough cleaning without compromising the sweeper’s efficiency or longevity.
Can the Brush Height Be Customized for Specific Classroom Cleaning Needs?
Yes, you can customize the brush height for specific classroom cleaning needs. Adjusting the brush height enhances cleaning efficiency by ensuring the sweeper effectively picks up dirt and debris on different floor surfaces. With brush customization, you can set the height precisely, whether you’re cleaning carpeted areas or hard floors. This flexibility helps you achieve ideal cleaning results, making your efforts more effective and tailored to each classroom’s unique flooring.

VEVOR Walk-Behind Hand Push Floor Sweeper, 25.6" Sweeping Width Floor Sweeper Manual Non-Electric, 5-Gallon Waste Container, Angle & Height Adjustable Folding Handle for Walkway, Yard, Garage, Patio
Sweeping Faster and Smarter: VEVOR walk-behind hand push floor sweeper adopts human-powered sweeping mechanism, breaking free from the…
As an affiliate, we earn on qualifying purchases.
As an affiliate, we earn on qualifying purchases.
Conclusion
Setting up your push sweeper for classrooms is quick, simple, and essential. Adjust the brush height to suit your flooring, verify the brush spins freely, and test the sweeper on different surfaces. Keep your tools clean, check for obstructions, and stay consistent with maintenance. When you follow these steps, you’ll sweep smoothly, clean efficiently, and create a healthier environment. With the right setup, your classroom stays spotless, your work becomes easier, and your day runs more smoothly.

PPOLB 26" Push Lawn Sweeper, 7 cu.ft Large Capacity Yard Sweeper Push, 5:1 High-Density 4 Brushes, Adjustable Height, Heavy Duty Leaf Collector with Detachable Hopper, Rubber Wheels, Ergonomic Handle
Wide Coverage for Fast Cleanup – This green push lawn sweeper features a 26-inch wide cleaning path, making…
As an affiliate, we earn on qualifying purchases.
As an affiliate, we earn on qualifying purchases.
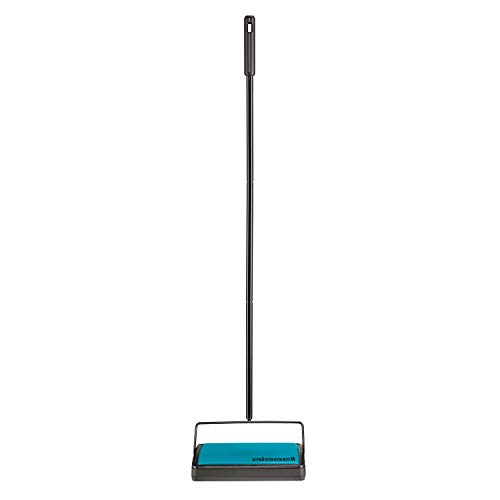
Bissell Easy Sweep Compact Carpet & Floor Sweeper, 2484A, Teal
Multi Surface Cleaning – sweeps hair, dirt and other debris from area rugs, low carpet and hard floors
As an affiliate, we earn on qualifying purchases.
As an affiliate, we earn on qualifying purchases.