
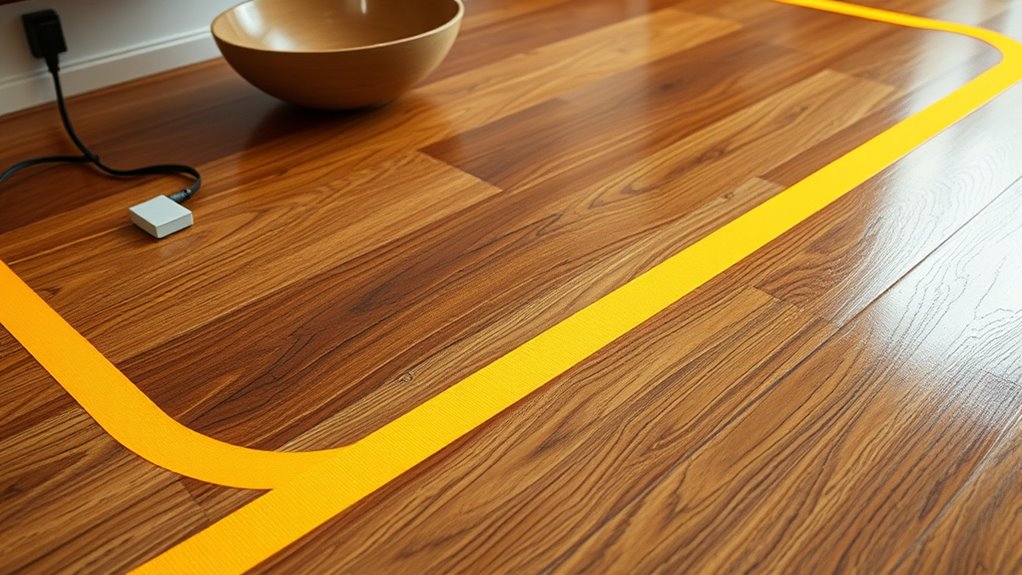
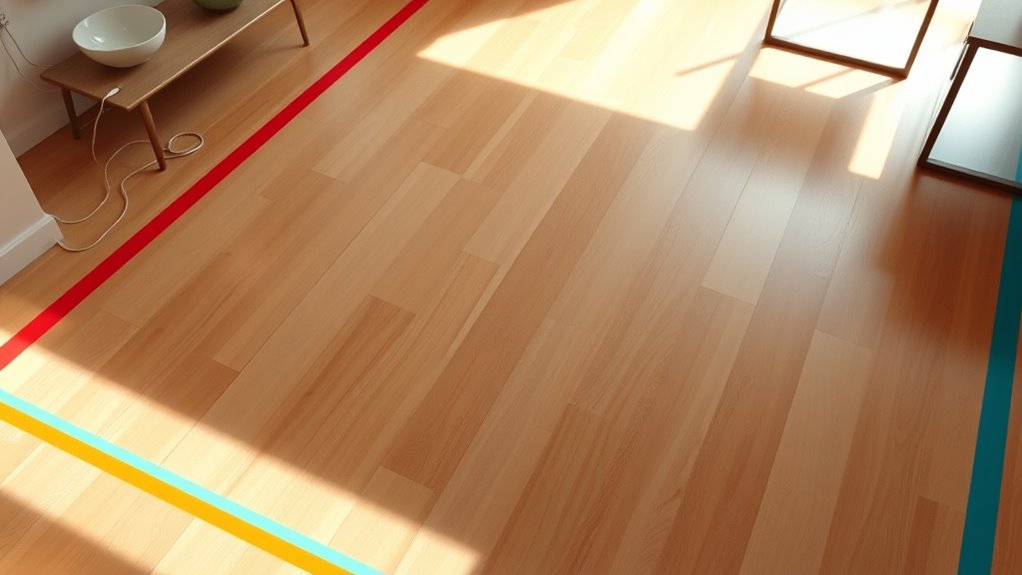
To keep cords and bowls safe from damage, mark no-go zones on your sealed hardwood floors using bright, durable lines in high-visibility colors like red or yellow. Focus on areas near furniture, counters, and high-traffic spots, and use materials like vinyl or weather-resistant tape for longevity. Secure the boundaries with strong adhesives or fasteners, regularly maintain the lines, and clearly communicate their purpose. If you want to create effective boundaries and keep your floors protected, continue exploring these simple yet effective strategies.
Key Takeaways
- Mark no-go zones with bright, durable lines using high-quality paint or tape to prevent cords and bowls from entering protected areas.
- Identify high-risk spots near furniture, counters, and doorways to strategically place no-go boundaries for added safety.
- Secure boundary markers with weather-resistant fasteners, adhesives, or stakes to ensure they stay in place over time.
- Clearly communicate no-go zones with signs or visual cues, and reinforce boundaries during gatherings or with new visitors.
- Regularly inspect and maintain lines and markers to ensure visibility and effectiveness in safeguarding hardwood floors.

Oreck Commercial Orbiter Hard Floor Cleaner Machine, Multi-Purpose Floor Cleaning, Random Orbital Drive, Wide Cleaning Path, 50-Foot Long Cord, ORB550MC, Gray/Red
MULTI-PURPOSE CLEANING: Commercial grade cleaner and effective on all types of flooring surfaces. Sand, refinish, strip, scrub, wax,...
As an affiliate, we earn on qualifying purchases.
Identifying High-Risk Areas for Cord and Bowl Placement

To effectively prevent damage to sealed hardwood floors, you need to identify areas where cords and bowls are most likely to be placed. Typically, these high-risk zones include near furniture, kitchen counters, dining tables, and entertainment centers. Look for spots where people often move or gather, as these are prime locations for placing cords or bowls. Pay attention to corners, edges, and areas adjacent to electrical outlets, where cords are frequently stretched or draped. Also, consider places where spills or crumbs happen often, making bowls more common. Recognizing these hotspots helps you plan safer zones and minimizes the chance of accidental damage. Additionally, using protective accessories can further reduce the risk of scratches or stains on your floors. By staying vigilant in these areas, you can better protect your floors from scratches, stains, or warping caused by misplaced cords or bowls.

HHQ Commercial Floor Scrubber Machine with Brushes and Pads, Heavy Duty Floor Cleaner Polisher and Buffer- Deep Cleaning Tile and Grout, Hardwood Floors and Carpets without Getting on Hands and Knees
Kit Included: 1 Orbital Floor Buffer & Scrubber Machine, 2 Polishing/ Stripping Pads, 3 Scrub Brushes, 1 Microfiber...
As an affiliate, we earn on qualifying purchases.
Choosing Effective Visual Markers for No-Go Lines

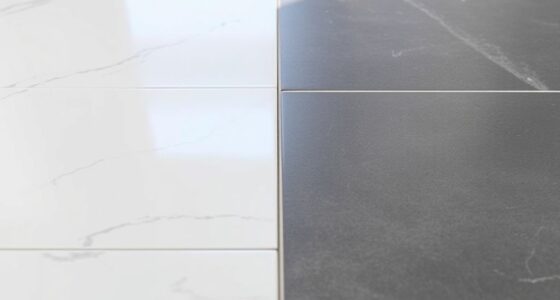
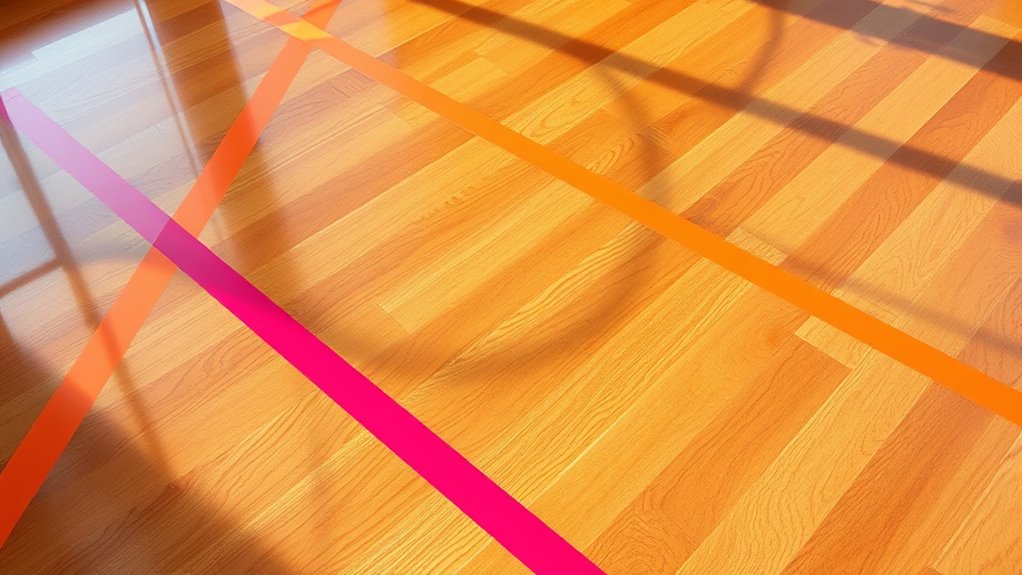
Selecting the right visual markers for no-go lines is essential to clearly communicate restricted areas on your hardwood floors. You want markers that catch attention without being overwhelming. Bright colors like red or yellow work well, as they’re easily visible against wood surfaces. Use bold patterns, such as stripes or zigzags, to reinforce the boundary’s importance. Symbols or icons—like a “no” sign—can also help convey restrictions quickly. Confirm the markers are large enough to be seen from a distance and positioned at eye level or slightly above. Consistency matters; use the same style and color scheme throughout your space. Clear, eye-catching visuals prevent accidental crossings and keep cords and bowls safely out of restricted zones. Effective markers make your no-go lines unmistakable and easy to follow. Incorporating visual contrast between the markers and the floor enhances visibility and effectiveness.
Bissell Commercial BigGreen BGFS650 Hercules Scrub and Clean Floor Machine, Green
Brush Speed (Rpm): 2200 Rpm
As an affiliate, we earn on qualifying purchases.
Materials and Tools for Creating Durable Boundaries
To create long-lasting no-go lines on sealed hardwood, you need durable boundary materials like metal or heavy-duty plastic. You should also use secure fastening techniques such as corrosion-resistant screws or strong adhesives to guarantee stability. Don’t forget to choose weather-resistant supplies if your boundaries will face outdoor conditions. Incorporating body awareness techniques can help you monitor and adjust the boundary setup to ensure safety and effectiveness.
Durable Boundary Materials
Creating durable boundaries for sealed hardwood requires choosing the right materials and tools that can withstand foot traffic, moisture, and regular wear. You need sturdy options like rubber, metal, or high-quality vinyl that resist damage and maintain their shape over time. Selecting the appropriate tools, such as adhesive, sealants, and cutters, assure your boundary stays secure and seamless. Consider this table to understand material qualities:
| Material | Durability | Flexibility |
|---|---|---|
| Rubber | High resistance | Moderate |
| Metal | Very durable | Low |
| Vinyl | Weatherproof | High |
| Composite | Balanced strength | Moderate |
Choosing the right combination of these materials and tools guarantees a long-lasting, safe boundary. Additionally, selecting appropriate finishing techniques can enhance the longevity of your boundary and prevent future damage.
Secure Fastening Techniques
Ever wonder how to guarantee your boundary stays securely in place on sealed hardwood? The key is using effective fastening techniques. Start with double-sided carpet tape or heavy-duty adhesive strips designed for smooth surfaces. Apply the tape evenly along the edges of your boundary material, pressing firmly to ensure full contact. For added security, use small finishing nails or upholstery pins at regular intervals, but be careful not to damage the finish. You can also use cable clips or zip ties to hold cords in place, attaching them to nearby furniture or wall anchors. Always test your fastening method before fully committing, to avoid slipping or damage. Properly secured boundaries prevent accidental movement, keeping cords and bowls safe while preserving your hardwood’s polished look.
Weather-Resistant Supplies
When building boundaries on sealed hardwood, choosing weather-resistant supplies is essential for durability and longevity. Use materials like stainless steel or galvanized metal stakes that resist rust and corrosion over time. Opt for weatherproof ropes or cables made from UV-resistant synthetic fibers, ensuring they won’t degrade in sunlight or rain. For anchors, select heavy-duty plastic or sealed concrete bases that won’t weaken with exposure to moisture. If attaching signage or markers, choose waterproof adhesives and laminated signs to prevent water damage. These supplies help your boundary system withstand outdoor conditions, maintaining safety and clarity. Additionally, selecting corrosion-resistant hardware ensures that the components remain intact and functional despite exposure to the elements. Investing in weather-resistant tools and materials saves you time and effort by reducing replacements and repairs, keeping your boundaries effective and looking sharp longer.

Battery Powered Walk Behind Mini Automatic Floor Scrubber Machine – Compact & Portable, 15” Cleaning Width, 90-Minute Runtime, 170 RPM – Ideal for Small Commercial Spaces, Offices, Retail & More
Compact & Efficient Cleaning – Designed for small commercial spaces, this mini automatic floor scrubber features a 15-inch...
As an affiliate, we earn on qualifying purchases.
Step-by-Step Guide to Painting or Applying No-Go Lines
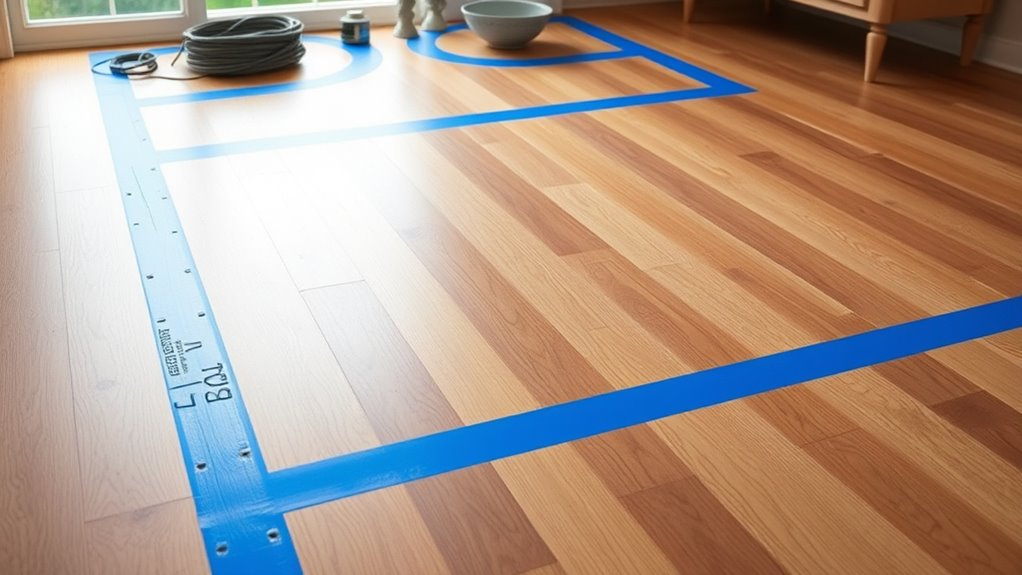
To successfully apply no-go lines on sealed hardwood, you need to plan your layout carefully and gather the right tools. Start by measuring the areas where cords or bowls shouldn’t go, and mark these spots with painter’s tape. Use a ruler or straightedge to draw clean, straight lines where you want the no-go zones. Choose a high-quality, durable paint or tape designed for hardwood surfaces. Wear gloves and apply painter’s tape along the edges of your lines to keep them neat. Use a fine brush or paint pen to carefully fill in the designated no-go areas, ensuring even coverage. For added durability, consider selecting a vetted product specifically formulated for hardwood floors. Let the paint dry completely before removing tape or placing objects on your floor. This method guarantees clear, effective boundaries that keep cords and bowls safely out of harm’s way.
Tips for Maintaining and Refreshing Your No-Go Lines

Maintaining the clarity and effectiveness of your no-go lines guarantees they continue to serve their purpose over time. Regularly inspect the lines for fading, peeling, or damage, and touch them up as needed. Use the same paint or tape you initially applied to ensure consistency. Clean the lines gently with a damp cloth before reapplying to remove dust or dirt that could compromise adhesion. If the lines become less visible, consider reapplying a fresh coat of paint or replacing sections of tape for sharper edges. Keep the lines clear of debris and avoid placing furniture or objects directly over them, which can cause smudging or damage. Additionally, understanding the contrast ratio of your projector can help you optimize your home setup for better image quality. Consistent upkeep ensures your no-go zones remain obvious, helping everyone respect your boundaries and keep cords and bowls safe.
Encouraging Family and Guests to Respect No-Go Zones
Clearly communicating the purpose of your no-go zones helps guarantee that family members and guests understand and respect them. Explain why certain areas are off-limits, emphasizing safety and the integrity of your hardwood floors. Use simple, direct language and consider posting clear signs or colorful markers to catch attention. Reinforce your message gently but firmly, especially during gatherings or when new guests arrive. Remind everyone of the importance of respecting these boundaries to prevent accidental damage or safety hazards. Lead by example—avoid crossing into no-go zones yourself. When people see you consistently honoring the boundaries, they’ll be more likely to follow suit. Consistent reminders and clear explanations foster understanding, making it easier for everyone to respect the designated areas. Additionally, understanding the importance of behavior management can help caregivers effectively communicate boundaries and maintain a safe environment.
Frequently Asked Questions
How Often Should No-Go Lines Be Re-Applied for Maximum Safety?
You should re-apply no-go lines every 3 to 6 months for maximum safety. Regular reapplication guarantees the lines stay visible and effective, especially in high-traffic areas or if they experience wear and tear. Keep an eye on their visibility and integrity, and reapply sooner if you notice fading or damage. Consistent reapplication helps prevent accidents by clearly marking off-limits areas and keeping cords and bowls safe.
Are There Eco-Friendly Options for Creating No-Go Lines?
Yes, you can choose eco-friendly options for creating no-go lines. Use natural materials like chalk or biodegradable tape, which are safe for your flooring and environment. You might also consider using reusable fabric or adhesive pads made from sustainable materials. These options help you maintain safety without harming the planet. Regularly reapply or replace them as needed to guarantee continuous protection and eco-consciousness.
Can No-Go Lines Be Removed Easily if Needed?
Yes, no-go lines can be removed easily if needed. You might be surprised how simple it is to peel or lift them without damaging your hardwood floor. Using removable adhesive options, you can confidently create boundaries that won’t leave a sticky mess behind. When you decide it’s time to change, just gently peel them away, revealing your beautiful floor once again—no fuss, no damage, just effortless flexibility.
What Are the Best Colors to Increase Visibility of No-Go Zones?
Bright colors like neon yellow, orange, or lime green make no-go zones highly visible. You should choose colors that contrast sharply with your flooring and decor to catch attention quickly. Reflective or glow-in-the-dark options are also effective, especially in low light settings. By selecting vibrant, eye-catching hues, you guarantee everyone notices the boundaries and keeps cords and bowls safe from accidental trips or spills.
How Can I Customize No-Go Lines to Match My Home Decor?
You can customize no-go lines to match your home decor by choosing colors that complement your existing palette. Opt for paint or tape in shades like soft pastels, neutral tones, or even metallics for a subtle look. Use patterned or textured options for a stylish touch. You can also add decorative accents, like floral or geometric designs, to blend seamlessly with your decor while still clearly marking restricted areas.
Conclusion
By clearly marking your no-go lines, you create a safer environment for your hardwood floors and loved ones. But remember, these boundaries are only effective if everyone respects them. Will a simple visual cue be enough to prevent accidents, or will you need to reinforce your no-go zones over time? Keep an eye on your boundaries, stay vigilant, and your floors will thank you. The true test of your efforts is yet to come—are you ready?