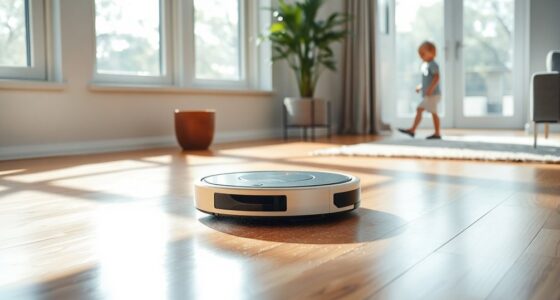
You know the quiet frustration: your robot vacuum returns with a patchy map, rooms merged, or a ghost wall where a doorway should be. Maybe your ebony hardwood or deep charcoal tile looks great under the sunlight, but it confounds sensors at night. I’ve stood in that same doorway, watching a top-tier robot hesitate as if the floor were a mystery it couldn’t solve.
This guide walks you through practical dark floor mapping steps so your robot mapping dark floors becomes predictable and fast. You’ll learn to avoid common pitfalls in robot vacuum mapping and SLAM navigation, use LiDAR mapping effectively, and produce accurate floor plans and reliable room zones without guesswork.
Whether you’re a homeowner or a professional, you’ll get clear, repeatable techniques: prepping the space, choosing the right hardware, tweaking app settings, and using temporary contrast aids. The workflow emphasizes tools like LiDAR-equipped robots and free floor plan creators such as RoomSketcher and Planner 5D to refine maps and measurements.
Key Takeaways
- Dark floor mapping often fails due to low sensor returns—preparation fixes most issues.
- LiDAR mapping and good SLAM navigation produce more accurate floor plans on dark surfaces.
- Simple contrast aids like tape or mats can save time and reduce remaps during robot vacuum mapping.
- Choosing the right robot and app settings matters more than guesswork when creating reliable room zones.
- Use free floor plan tools to visualize, edit, and back up maps for long-term accuracy.
Why robot mapping dark floors is challenging and how to overcome it
Mapping dark floors can trip up many household robots. Your robot depends on light and reflectivity to see edges and obstacles. When floors soak up light, sensors report sparse or noisy data. You can fix most issues with simple prep and the right settings.

How dark surfaces interfere with optical and IR sensors
Dark finishes absorb visible light and increase IR absorption from near-infrared emitters. That reduces return signal strength for depth cameras and time-of-flight systems. When the sensor sees little contrast, camera low-light performance drops and feature tracking fails.
Optical cameras produce grainy frames in low contrast. IR-based cliff sensors give inconsistent readings on matte black or glossy dark varnish. The result is fewer reliable points in the map and a weaker base for localization.
Typical failure modes: missed edges, ghost walls, and inaccurate SLAM
Missed edges happen when the robot cannot detect room boundaries or stair edges. That risk grows with deep shadows and low reflectivity. Ghost walls appear when reflections or sparse returns create phantom obstacles that the software treats as real.
Inaccurate SLAM shows up as map drift, warped rooms, or broken loop closures. SLAM errors occur when the system lacks stable features to match during travel. Intermittent sensor returns confuse pose estimates and lead to misaligned maps.
Practical fixes you can apply before mapping
Give your robot more light. Daylight or soft lamps help cameras and reduce camera low-light problems. Avoid direct glare that causes reflections; you can close curtains or adjust lamp angles to tame shiny spots.
Add temporary high-contrast markers where the robot needs them. Tape, light rugs, or small sheets of cardboard boost return signals and cut down on missed edges. Remove highly reflective decor and wipe cliff sensors and bumpers to clear false readings.
| Problem | Likely cause | Quick fix |
|---|---|---|
| Missed edges | Low reflectivity and poor contrast | Place light-colored tape or temporary mats along thresholds |
| Ghost walls | Sparse point clouds and reflections | Remove reflective objects and map in diffused light |
| Inaccurate SLAM | Insufficient stable features for loop closure | Add contrast markers and map during the day |
| IR sensor inconsistency | High IR absorption by dark finishes | Clean sensors and avoid matte-black areas where possible |
| Poor camera performance | Camera low-light limitations | Increase ambient light and reduce glare |

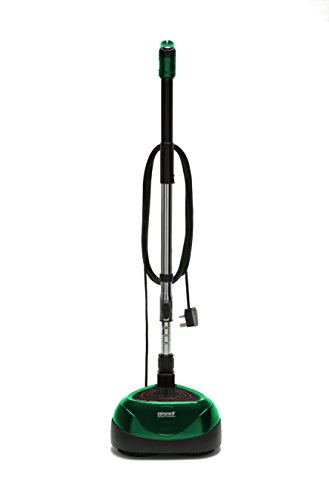
Oreck Commercial Orbiter Hard Floor Cleaner Machine, Multi-Purpose Floor Cleaning, Random Orbital Drive, Wide Cleaning Path, 50-Foot Long Cord, ORB550MC, Gray/Red
MULTI-PURPOSE CLEANING: Commercial grade cleaner and effective on all types of flooring surfaces. Sand, refinish, strip, scrub, wax,...
As an affiliate, we earn on qualifying purchases.
Preparing your space for successful mapping
Before you start a mapping run, take a few minutes to prepare mapping space so your robot can work without surprises. Small obstacles, loose cords, and scattered toys confuse sensors and hurt SLAM performance. A quick tidy reduces retries and speeds up the process.

Clearing clutter and optimizing lighting for better scans
Begin by decluttering robot mapping areas. Remove low-profile items that sit near baseboards and under furniture. Coil cables, lift pet bowls, and clear pathways so the robot can map edges and corners reliably.
Next, optimize lighting mapping by opening blinds and adding soft lamps to reduce harsh shadows. Aim for even illumination. Avoid pointing bright lights at the robot’s cameras or IR sensors to prevent glare and saturation. A clean floor free of dust and streaks helps camera-based systems read surfaces more accurately.
Marking reflective or very dark areas to improve sensor returns
Identify glossy tiles, polished wood, or very dark rugs that might give weak returns. Mark trouble spots so the robot can avoid getting stuck during mapping. Low-profile, non-slip markers provide the visual or LiDAR contrast sensors need to detect boundaries reliably.
Test a small patch before you mark large areas. Choose materials that won’t scratch or leave residue on finishes. That simple step prevents map errors like ghost walls or missed edges when the robot scans reflective zones.
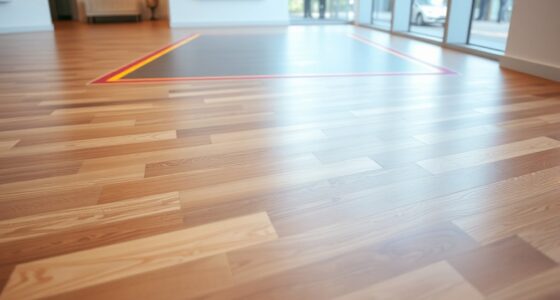
Using temporary contrast aids (tape, mats) without damaging floors
Use temporary contrast aids such as blue painter’s tape, thin rubber-backed rugs, or cardboard to create visible boundaries for sensors. Blue painter’s tape is gentle on wood and leaves little residue. Low-tack gaffer’s tape works on tile and concrete when you need stronger adhesion.
Prioritize safe floor tape and felt-backed mats for delicate finishes. Test tape on a hidden corner to confirm no discoloration. When you place temporary contrast aids, keep them flat and low to the floor so they don’t trip the robot’s bump sensors or snag wheels.
After mapping, remove contrast aids promptly and inspect floors for residue. Proper prep makes future maps more stable and reduces the need for repeated mapping sessions.

HHQ Commercial Floor Scrubber Machine with Brushes and Pads, Heavy Duty Floor Cleaner Polisher and Buffer- Deep Cleaning Tile and Grout, Hardwood Floors and Carpets without Getting on Hands and Knees
Kit Included: 1 Orbital Floor Buffer & Scrubber Machine, 2 Polishing/ Stripping Pads, 3 Scrub Brushes, 1 Microfiber...
As an affiliate, we earn on qualifying purchases.
Choosing the right robot and sensors for dark floors
You want a robot that sees where your eyes struggle. Picking the right navigation tech and extras can cut mapping time and frustration. Below are clear choices and practical tips to match your space and budget.

LiDAR vs camera systems matter most on matte, black, or uniform floors. LiDAR emits laser pulses and reads time-of-flight data. It often finds edges and walls where cameras lose contrast. A robot vacuum LiDAR setup gives more reliable SLAM in low-reflectance rooms.
Camera depth sensor approaches use visual texture and lighting to build maps. They work well on patterned or well-lit surfaces. On very dark floors, a camera depth sensor can fail to detect boundaries or produce ghost walls. Hybrid designs that pair LiDAR with visual odometry reduce those risks.
When you hunt for the best robot for dark floors, check for rotating or solid-state LiDAR, strong cliff sensors, and firmware that supports manual map editing. Roborock S-series models and select iRobot Roomba units with improved vSLAM combine practical navigation with helpful app tools for multi-floor layouts.
Prioritize features that keep maps accurate over time. Look for an updatable app, room naming, no-go zones, and reliable bumpers. Good obstacle detection and robust firmware updates prevent repeated remaps and lost zones.
Sensor upgrades make sense when your space has large, open areas with minimal visual features or when repeated mapping failures disrupt daily cleaning. External beacons or advanced sensor packs are worthwhile for big homes or professional installs.
If mapping errors are occasional, try low-cost fixes first. Temporary contrast aids, adjusted app settings, or moving lightweight rugs often beat the expense of permanent sensor upgrades. Save bigger investments for persistent problems that slow your routine.
Bissell Commercial BigGreen BGFS650 Hercules Scrub and Clean Floor Machine, Green
Brush Speed (Rpm): 2200 Rpm
As an affiliate, we earn on qualifying purchases.
Best mapping modes and app settings to improve accuracy
Pick the right mode in your robot app to get the most accurate map on dark floors. Many devices include a dedicated survey or mapping path that forces slow, systematic coverage. A high-resolution scan mode boosts point density so walls and small obstacles appear clearer. Expect longer runs and more battery use when you choose that option.

Survey mode is useful when you want a full pass without interruptions. It reduces missed edges and gives a reliable baseline map. Use mapping modes survey scan when you are creating the first detailed layout of a home.
Mapping mode runs more autonomously and balances speed with detail. It works well for routine updates after the initial survey. Switch to the high-resolution scan mode for problem areas where walls or furniture sit on shiny or black surfaces.
If your app exposes camera exposure or sensor gain, raise exposure and lower motion to improve returns on dark surfaces. Adjusting app sensitivity robot settings can help cameras and infrared sensors pick up faint returns. When offered, reduce SLAM aggressiveness or scan frequency to limit drift and false loop closures.
Save early and often. Use export and cloud features to backup robot maps before you make big edits or reset a device. Keeping a safe copy of each layout means you can restore your floor plan without re-mapping from scratch.
- Run a slow survey pass first to lock down walls and room edges.
- Switch to high-resolution scan mode where detail matters most.
- Tweak app sensitivity robot settings to match your floor finish.
- Export maps and keep backup robot maps in the cloud or local storage.

Battery Powered Walk Behind Mini Automatic Floor Scrubber Machine – Compact & Portable, 15” Cleaning Width, 90-Minute Runtime, 170 RPM – Ideal for Small Commercial Spaces, Offices, Retail & More
Compact & Efficient Cleaning – Designed for small commercial spaces, this mini automatic floor scrubber features a 15-inch...
As an affiliate, we earn on qualifying purchases.
Using temporary contrast enhancements during mapping
You can get much better results when your robot maps dark floors by adding short-term contrast in key spots. Small changes help cameras and LiDAR find edges and corners that would otherwise disappear on matte black or deep walnut surfaces.

How tape, rugs, or cardboard can help sensors detect boundaries
Place strips of tape for robot mapping across door thresholds, around low platforms, and beside stairs to give sensors a clear reference. Thin cardboard or a low-profile rug near a tricky edge boosts reflections for IR and LiDAR, while contrasting tape helps visual cameras pick up lines and junctions.
Use short lengths rather than full-room coverage. That keeps cliff sensors working and avoids creating tripping hazards while still improving temporary contrast mapping where it matters most.
Safe, non-permanent materials to create contrast on dark floors
Choose painter’s tape or gaffer’s tape for delicate hardwoods. Both are low-tack and come off cleanly when tested first in an unseen spot. Thin rubber-backed rugs and felt pads add texture without adhesive, and lightweight cardboard strips work well under supervised mapping sessions.
Prioritize safe floor materials that leave no residue. Test the product on a corner of your floor before wide use. Avoid heavy adhesives on finished oak, maple, or engineered wood to protect the surface.
When to remove contrast aids after the map is completed
Keep mapping aids dark floors in place only until your robot saves a stable map and room zones look correct. Run a validation pass in each room before peeling tape or picking up rugs. If you see residue, remove it promptly with a mild cleaner approved for your floor finish.
Reapply tape for robot mapping when you need a re-map after moving furniture or changing lighting. Temporary contrast mapping is a quick, reversible step that cuts remapping time and improves reliability.
| Material | Best Use | Floor Safety | Notes |
|---|---|---|---|
| Painter’s tape | Thresholds, short strips | High — low residue | Test first on hidden area; removes cleanly |
| Gaffer’s tape | Temporary path marking | High — designed for stage use | Sticks well, peels without finish damage if tested |
| Thin rubber-backed rug | Near stairs, platforms | Very high — non-adhesive | Provides texture and contrast without glue |
| Cardboard strips | Short runs under sensors | High — non-adhesive | Lightweight and disposable; avoid wetting |
| Felt pads | Protects finish; adds contrast | Very high | Great for furniture legs and small zones |
Room zoning strategies for faster, more accurate maps
Good zoning helps your robot map faster and clean smarter. Start with zones that match how you use rooms. That approach cuts overlaps and makes navigation predictable when floors are dark or reflective.

Logical zone creation by function, traffic flow, or furniture layout
Define kitchens, living spaces, and bedrooms based on purpose. Place zone boundaries along natural walkways and furniture lines so the robot follows real traffic patterns. High-traffic areas like entryways and living rooms should be separate from low-traffic bedrooms.
Combining auto-zoning with manual edits in a floor plan app
Let the auto-zone robot make an initial pass to save time. Review its work in your app and use a manual zone edit to fix splits or merges caused by dark flooring. Apps such as RoomSketcher or Planner 5D make it easy to move walls and redraw boundaries.
Tips for naming, grouping, and prioritizing room zones
Choose clear, consistent names like Kitchen, Living Room, and Primary Bedroom. Group small adjacent areas, such as an entry and mudroom, to reduce needless passes. When you prioritize cleaning zones, set high-traffic spaces to clean more often and schedule low-use rooms less frequently.
- Keep names short so voice assistants and apps read them cleanly.
- Group thoughtfully to minimize transitions and save battery life.
- Use manual zone edit sparingly to fine-tune boundaries after auto zoning.
Integrating floor plan tools to refine your robot’s map
When your robot finishes a mapping run, you can refine that map with dedicated floor plan tools. Using a free floor plan creator helps you spot misaligned walls, misplaced doors, and odd room sizes fast. You get a clear visual that makes editing simple and precise.

Using free floor plan creators to visualize and adjust maps
Try Planner 5D or RoomSketcher to recreate or import your robot map in 2D and 3D. These apps let you trace walls, move doors, and test furniture layouts without risking the original map. You will find errors faster when you can switch between top-down and rendered views.
Both tools offer basic features at no cost so you can try edits before committing to a paid plan. Use these edits to correct the robot’s zones and improve future navigation.
How automated measurements speed up edits and ensure precision
Automated measurements remove hand-calculation and reduce guesswork when you redraw a map. Wall lengths, room areas, and ceiling heights update as you edit, so your changes stay accurate.
RoomSketcher highlights precise dimensions during edits, which helps when you place furniture or set zone boundaries. Planner 5D gives quick area readouts that you can use to verify the robot’s estimates.
Exporting maps between your robot app and third-party floor plan software
If your robot app supports exporting, you can export floor plans as images or data files and import them into your floor plan tool. When direct export isn’t available, take a screenshot with a known scale and trace it in Planner 5D or RoomSketcher.
After refining the layout, export floor plans back to share with contractors or for documentation. That round-trip workflow helps you keep the robot’s navigation aligned with any physical changes you make.
Optimizing cleaning schedules and navigation for dark floors
Dark floors demand a mix of planning and testing to keep cleaning efficient. Set up routines that match how you use each room. Small tweaks to schedule and navigation cut down on missed spots and needless repeats.

Setting zone priorities to minimize repeat passes
Assign higher frequency to high-traffic areas like the kitchen and entry. Mark low-traffic rooms, such as guest bedrooms, for weekly runs. Group small adjacent zones so the robot avoids back-and-forth transitions when the map isn’t perfect.
Scheduling and mode choices to match room usage patterns
Pick daytime mapping windows if you plan to update a map, since light helps sensors on dark surfaces. Use eco mode for daily maintenance and reserve deep or max-suction for kitchens and dining areas. When you schedule robot vacuum runs, stagger times so the unit cleans problem zones when foot traffic is low.
Monitoring performance and making iterative adjustments
Watch your robot for several runs to spot drift, ghost walls, or missed corners. Tweak zone boundaries, reapply short-term contrast aids, or adjust app sensitivity for better returns. Save a working map version once coverage is consistent to avoid losing progress during future iterative mapping improvements.
Keep the cleaning schedules robot settings and zone priorities updated after furniture moves. Periodic reviews help you fine-tune when to schedule robot vacuum cycles and when a full re-map is necessary.
Troubleshooting common mapping errors on dark surfaces
Dark floors can confuse sensors and create strange artifacts in your robot map. You can fix most issues quickly with a few targeted steps. Use the app tools first, then move to export/import options if needed.

Fixing gaps, overlaps, and misaligned walls
Open your robot app and try the manual edit tools. Draw missing walls, erase stray lines, and nudge doors into place. Small edits often solve map gaps overlaps without a full re-map.
If the app lacks precise editing, export the floor plan to a third-party editor such as RoomSketcher or Planner 5D. Correct dimensions and wall positions there, then use the adjusted layout as a reference to update the robot map or re-import if your system supports it.
Splitting merged areas and restoring vanished zones
When rooms merged robot map, look for natural break points like doorways or flooring changes. Use the split function to separate zones along those thresholds.
If zones disappear after an update or power cycle, check your cloud backups for saved versions. Restore an earlier map when available. For stubborn boundaries, place contrast aids and run a targeted scan over the affected area to force correct detection.
Resetting and re-mapping while keeping custom settings
Before any reset, export saved maps or capture screenshots of your zones and virtual no-go areas. Note scheduled routines so you can rebuild them later.
Back up map files and app settings when the platform allows it. If you must reset, re-map with the same landmarks and contrast aids in place. Then re-import or manually recreate zones using your saved floor plan references to re-map robot without losing settings.
| Problem | Quick fix | When to export |
|---|---|---|
| Map gaps overlaps | Use app draw/erase tools; add temporary contrast strips | If edits require accurate dimension adjustments |
| Rooms merged robot map | Split at doorways or flooring changes; rerun focused scan | If split tools are missing or merge recurs |
| Zones disappeared after update | Restore cloud backup or reapply saved zone screenshots | Always, before full factory reset |
| Misaligned walls and doors | Manually nudge walls in app; correct doors and no-go lines | If alignment affects navigation or virtual barriers |
| Need to re-map robot without losing settings | Export maps, save schedules, re-import edited map or rebuild from reference | Prior to factory reset or major firmware changes |
Maintaining map accuracy over time
Keeping your robot’s map current saves time and prevents navigation errors. Small moves like shifting chairs or adding a rug rarely require a full re-map. You can often apply quick fixes that keep the robot on track and help maintain robot maps without interrupting your routine.

When to re-map after furniture changes or renovations
Re-map after major layout changes such as moving walls, installing built-in cabinets, or changing floor finishes. These alterations can affect sensor returns and SLAM accuracy. For minor furniture swaps, try an incremental map update first.
Using incremental updates versus full re-maps
Run incremental map updates when you add rugs, shift sofas, or rearrange a room. Many brands, like iRobot and Roborock, support guided or partial mapping runs to update sections. Save a full re-map for remodels, large finish changes, or persistent SLAM drift that incremental updates cannot fix.
Backing up map versions and restoring previous layouts
Export maps and keep dated backups so you can restore a known-good layout if an update or mistake overwrites your settings. Tools such as RoomSketcher and Planner 5D store floor plans and measurements you can reference. Regularly saving backup map versions protects zone names, no-go lines, and custom schedules.
- Perform a quick mapping run after small moves to capture incremental map updates.
- Schedule a full re-map after structural work or large floor changes to re-establish accuracy.
- Export and archive backup map versions before firmware updates or major edits.
Leveraging user-friendly apps for precise floor plans and measurements
Start with a tool that fits your project. Free floor plan apps let you draft layouts, test furniture placement, and refine robot maps without calling a pro. They speed up decisions and save time when you need quick, clear visuals.

Many users find Planner 5D free and RoomSketcher free handy for basic work. Planner 5D free gives accessible 2D and 3D views you can share with clients or family. RoomSketcher free focuses on accurate room shapes and clear measurement readouts you can trust.
Automated floor measurements remove guesswork. When wall lengths and window locations are calculated automatically, you get consistent data for estimates, staging, or remodeling. These measurements cut errors from manual tape work and help you compare options faster.
Try feature tiers before you commit. A floor plan subscription often unlocks advanced textures, export formats, and higher-resolution renders. Test the free tier to confirm the core functionality meets your needs, then use a short-term subscription to access premium assets for a single project.
Use the apps to cross-check your robot map. Exported plans help you spot missed walls or odd angles and make targeted edits in the drawing tool. That workflow improves accuracy and reduces the need to re-map physical spaces.
Think about scale and collaboration. If you work with agents, contractors, or event planners, share editable files from RoomSketcher free or Planner 5D free so teams can comment and refine details. This keeps everyone aligned and speeds approvals.
Below is a compact comparison to help you pick the right path based on needs and budget.
| Need | Best starter option | Why it helps | Upgrade benefit |
|---|---|---|---|
| Quick layout drafts | Planner 5D free | Fast 2D/3D views for placing furniture and testing flow | More assets and custom textures |
| Accurate measurements | RoomSketcher free | Clear automated floor measurements and wall reports | High-res exports and professional prints |
| Collaborative projects | Either free tier | Shareable plans for clients, agents, and contractors | Multi-user access and cloud storage with floor plan subscription |
| One-off professional deliverables | Free trial then short subscription | Test tools, then unlock premium exports for client-ready files | Full asset libraries and advanced editing tools |
Conclusion
You can get reliable robot mapping dark floors conclusion by following a few clear steps: prepare your space, choose suitable hardware, and use temporary contrast aids safely. Prioritize LiDAR or hybrid systems when possible, run dedicated mapping modes, and apply simple fixes like low-profile tape or rugs to help sensors find edges. These mapping best practices reduce ghost walls and missed zones so your robot navigates confidently.
After the initial map, refine room zones with manual edits alongside auto-zoning and use free floor plan tools such as RoomSketcher or Planner 5D for precise measurements. Exporting and adjusting maps with automated measurements speeds small edits and keeps layouts accurate. These room zones final tips make routines faster and cleaning more consistent across dark surfaces.
To maintain long-term accuracy, back up maps regularly, monitor performance, and re-map after major furniture moves or renovations. Learning how to maintain robot maps includes incremental updates when possible and full re-maps when the layout changes significantly. With the right robot, simple pre-mapping prep, tuned app settings, and user-friendly floor plan creators, you’ll achieve fast, accurate room zones with minimal fuss so your robot cleans efficiently and reliably.