
To map polished concrete like a pro, start by gathering precise tools like tape, markers, and laser lines to mark room zones accurately. Prepare your surface to guarantee clean, clear markings, and plan your layout carefully. Use tape and stencils for initial outlines, then boost accuracy with laser tools. Verify your boundaries regularly and protect zones during polishing. Keep lines sharp and clean for a professional finish—continue to learn the key steps to perfect your zones.
Gathering the Right Tools for Precise Mapping

To achieve precise mapping of polished concrete, you need to start with the right tools. First, grab a high-quality tape measure or laser distance meter to guarantee accurate measurements of room dimensions. A chalk line or marking tool helps create clear, straight guidelines on the surface. You’ll also want a durable pencil or marker designed for concrete to label zones clearly. For detailed work, consider using a straightedge or ruler for straight lines and a level to maintain accuracy. A measuring wheel can be handy for larger spaces. Make sure all your tools are clean and in good condition to prevent errors. Additionally, understanding measurement accuracy is crucial to ensure your zones are correctly mapped. With the right equipment, you’ll set a solid foundation for precise, professional mapping of your concrete surface.

Oreck Commercial Orbiter Hard Floor Cleaner Machine, Multi-Purpose Floor Cleaning, Random Orbital Drive, Wide Cleaning Path, 50-Foot Long Cord, ORB550MC, Gray/Red
MULTI-PURPOSE CLEANING: Commercial grade cleaner and effective on all types of flooring surfaces. Sand, refinish, strip, scrub, wax,...
As an affiliate, we earn on qualifying purchases.
Preparing Your Concrete Surface for Accurate Marking

Before you start marking your concrete surface, it’s essential to guarantee it’s properly prepared. Begin by cleaning the area thoroughly to remove dust, dirt, and debris. Use a vacuum or a damp cloth to ensure the surface is free of loose particles. Any grease, oil, or stains should be cleaned with a degreaser or appropriate cleaner, as they can affect adhesion of marking materials. Check for uneven spots or cracks; these should be filled or smoothed out to guarantee a flat, even surface. If your concrete is glossy or sealed, lightly etch or sand the surface to improve grip. Proper preparation creates a clean, consistent base, ensuring your markings stay precise and true during the entire mapping process. Recognizing patterns of behavior in your surface conditions can help prevent future issues with markings.

HHQ Commercial Floor Scrubber Machine with Brushes and Pads, Heavy Duty Floor Cleaner Polisher and Buffer- Deep Cleaning Tile and Grout, Hardwood Floors and Carpets without Getting on Hands and Knees
Kit Included: 1 Orbital Floor Buffer & Scrubber Machine, 2 Polishing/ Stripping Pads, 3 Scrub Brushes, 1 Microfiber...
As an affiliate, we earn on qualifying purchases.
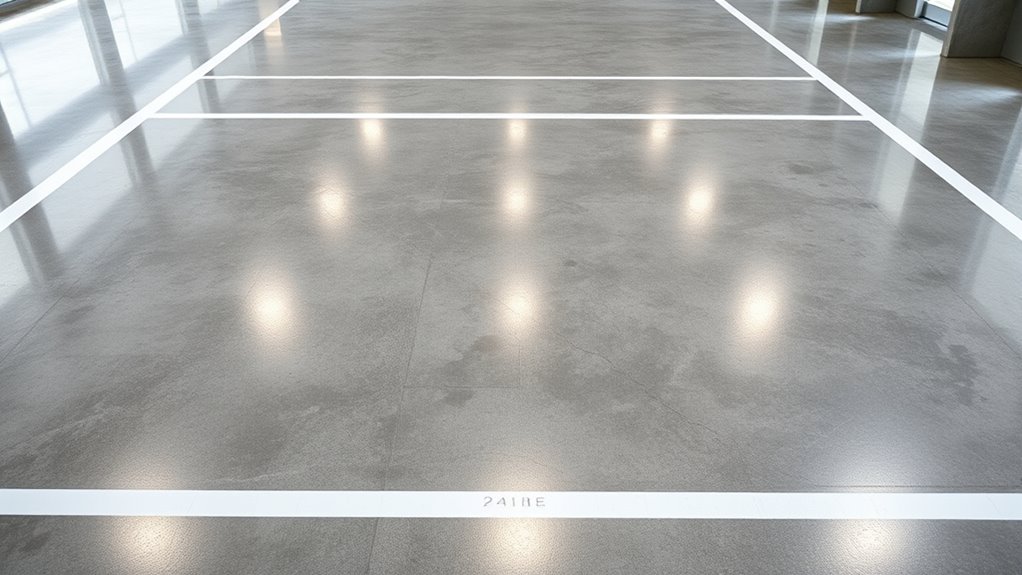
Planning Your Room Zones With Clear Layouts
Creating clear room zones starts with careful planning of your layout. Begin by measuring your space accurately, noting walls, doorways, and other features. Sketch a rough floor plan to visualize how each zone will fit. Consider the function of each area—living, dining, or workspace—and decide on their sizes accordingly. Use a scale drawing to help you see proportions and flow. Think about how foot traffic will move through the space, ensuring zones are logically arranged. Clear visual boundaries make your mapping process easier and more precise. Avoid rushing this step; a well-thought-out layout minimizes mistakes later. Incorporating space planning principles can further optimize your room zones for comfort and functionality. With a solid plan, you’ll be able to map your zones efficiently and achieve a professional-looking polished concrete finish.
Bissell Commercial BigGreen BGFS650 Hercules Scrub and Clean Floor Machine, Green
Brush Speed (Rpm): 2200 Rpm
As an affiliate, we earn on qualifying purchases.
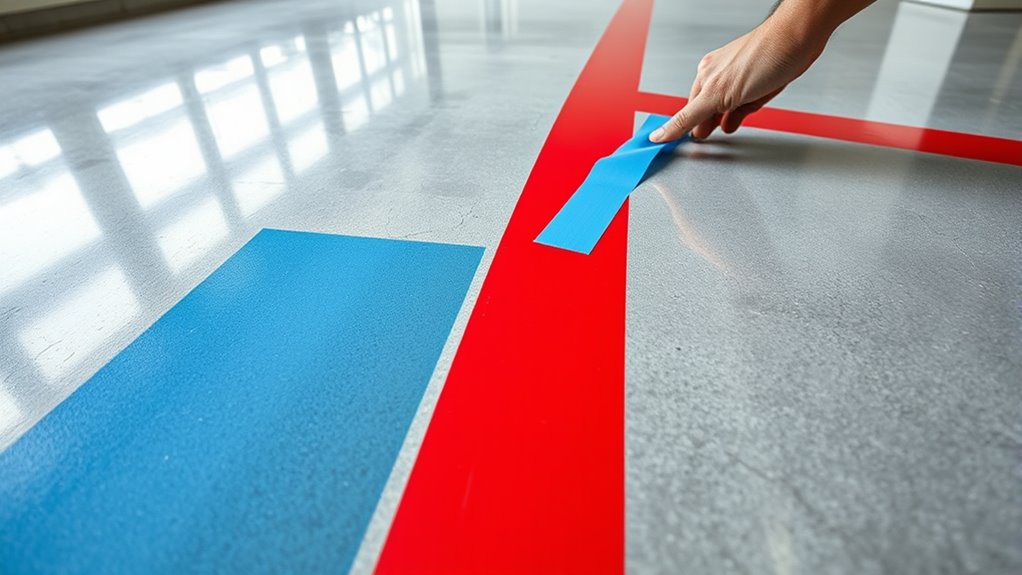
Using Tape and Markers for Initial Zone Outlines
Start by carefully placing painter’s tape along your planned lines to guarantee straight, clean edges. Choose markers that won’t bleed through the tape and make clear, visible marks on your surface. Proper technique in tape placement and marker use sets a strong foundation for a precise polished concrete map. Incorporating accurate room zones during this step ensures your project proceeds smoothly and with minimal adjustments later.
Precise Tape Placement Techniques
Achieving clean, sharp lines in polished concrete requires careful tape placement and marker use to outline your zones accurately. Start by measuring carefully, then mark key points along the edges of each zone with a pencil or light marker. Use high-quality painter’s tape, pressing it down firmly to guarantee it bonds well to the surface and prevents bleed-under. When applying tape, work slowly, aligning it precisely along your marked lines, and avoid overstretching it, which can cause gaps or wrinkles. For corners and curves, cut tape into manageable sections or use flexible tape to follow contours smoothly. Double-check your positioning before sealing the tape in place. Proper tape placement is vital for crisp, professional-looking zone boundaries in your polished concrete project. Incorporating proper workspace organization can also help in maintaining accuracy and efficiency throughout the process.
Marker Selection and Usage
Choosing the right markers and tape is essential for clear, accurate zone outlines in polished concrete. Use high-quality, permanent markers with fine tips for sharp, visible lines that won’t smudge easily. Oil-based or paint markers work best on concrete surfaces because they’re durable and resistant to moisture. For tape, select painter’s or masking tape that adheres well without damaging the surface when removed. Apply tape firmly along your marked lines to prevent bleeding or misalignment. Before drawing, assure the surface is clean and dry to improve adhesion. Keep your markers sharp for precise lines, and test them on a scrap piece or inconspicuous area first. Proper marker and tape choices make your zoning process smoother, leading to cleaner, more professional results. Additionally, understanding the target audience can help tailor your approach for better accuracy and satisfaction.

Battery Powered Walk Behind Mini Automatic Floor Scrubber Machine – Compact & Portable, 15” Cleaning Width, 90-Minute Runtime, 170 RPM – Ideal for Small Commercial Spaces, Offices, Retail & More
Compact & Efficient Cleaning – Designed for small commercial spaces, this mini automatic floor scrubber features a 15-inch...
As an affiliate, we earn on qualifying purchases.
Employing Laser Tools for Enhanced Precision

Using laser tools can markedly boost your accuracy when polishing concrete surfaces. These tools provide precise measurements, ensuring your zones are perfectly aligned and level. With laser levels and line generators, you can quickly mark out room boundaries and surface elevations with minimal effort. This reduces guesswork and avoids costly mistakes, saving you time and materials. Laser tools also enable you to work faster by offering real-time feedback, so adjustments are immediate. Imagine confidently achieving sharp, clean lines every time, giving your project a professional finish. Additionally, laser technology enhances measurement accuracy, ensuring your zones are precisely defined and reducing the need for rework.
Laser tools enhance accuracy, reduce mistakes, and speed up concrete polishing with real-time feedback and precise measurements.
- Feel the satisfaction of flawless, straight zones
- Experience confidence with instant, accurate readings
- Enjoy faster completion with streamlined measurement processes
Implementing Stenciling Techniques for Consistent Lines
To achieve clean, sharp lines, you need to focus on precise stencil placement. Proper alignment guarantees your patterns stay consistent throughout the project. With careful attention, your lines will look professional and polished every time.
Precise Stencil Placement
Achieving crisp, clean lines in polished concrete stenciling depends heavily on precise stencil placement. You need to align your stencil carefully, ensuring it’s straight and firmly pressed against the surface. Take your time to position it accurately before applying any adhesive or tape. Use a level or straightedge for perfect alignment, and double-check the placement from different angles. Proper positioning prevents gaps, overlaps, or crooked lines that can ruin your design. Additionally, securing the stencil properly can help maintain alignment throughout the application process.
Consistent Line Formation
Consistent line formation is essential for professional-looking stenciled concrete, and implementing specific techniques can make this process much smoother. Start by using a steady hand and maintaining a consistent pace when applying your stencil. Keep your tools, like brushes or rollers, at a uniform angle and pressure to avoid uneven lines. Mark key points or guide lines beforehand to help you stay aligned as you work. Practice your technique on scrap material to build control and confidence. When moving the stencil, do so smoothly without lifting or shifting it abruptly, which can cause jagged edges. If needed, use masking tape to secure the stencil in place, ensuring it doesn’t shift during application. Additionally, understanding potential pitfalls in adopting new payment technologies can help you anticipate and avoid common issues that might compromise your project’s quality. These practices help you achieve clean, crisp lines that elevate your finished project.
Verifying and Adjusting Zone Boundaries Effectively
Ensuring your zone boundaries are accurate is essential for a polished concrete project, as errors can lead to uneven surfaces or color inconsistencies. To verify boundaries, step back and review your layout from different angles, checking for misalignments. Use a straightedge or laser level to confirm straight lines and proper overlaps. Adjust boundaries promptly when you spot discrepancies, ensuring each zone aligns perfectly. Incorporate projector placement considerations during verification to optimize your zone definitions and achieve the best visual results.
Verify zone boundaries with a laser level or straightedge for a flawless concrete finish.
Remember, precision brings confidence and peace of mind. When you verify and tweak boundaries, you prevent costly rework later.
- Feel the satisfaction of a flawless, uniform finish
- Experience confidence in your craftsmanship
- Enjoy the pride of a job well done with perfect zones
Protecting Your Zones During the Polishing Process
Once your zone boundaries are verified and adjusted for accuracy, protecting those zones during the polishing process becomes the next priority. You’ll want to set up physical barriers such as tape, plastic sheeting, or foam edge protectors around each zone. These barriers prevent accidental damage from polishing equipment or debris. Be sure to clearly mark each zone with signage or color-coded tape, so you stay aware of your boundaries. If you’re working with multiple teams or equipment, communicate the boundaries clearly to everyone involved. Additionally, cover nearby fixtures, outlets, or vents with protective material to avoid dust or splatter. Taking these precautions guarantees your zones stay intact and clean, making the polishing process more efficient and reducing the need for rework or touch-ups later.
Final Touches: Ensuring Clean, Sharp Lines and Edges

Achieving clean, sharp lines and edges is the final step that elevates your polished concrete to a professional finish. Precision here guarantees your design stands out with clarity and sophistication. Use painter’s tape or edge guards to create crisp boundaries, and carefully remove them once the polishing is complete. Take your time to inspect every line, smoothing out imperfections with a fine grit pad or handheld tool. This attention to detail transforms your work from good to exceptional.
- Feel the satisfaction of flawless transitions that impress every viewer
- Enjoy the confidence of a pristine, professional appearance
- Celebrate your craftsmanship with sharp, clean edges that last
Frequently Asked Questions
How Do I Choose the Best Tools for Mapping Polished Concrete?
You should choose tools based on your project’s size and precision needs. Invest in a reliable laser distance meter for accuracy, and use a quality chalk line or painter’s tape for marking zones clearly. Consider a digital level or straightedge for ensuring flat surfaces. Opt for durable, easy-to-handle tools that suit your workspace. Prioritize tools with good reviews and proven durability to make mapping faster and more precise.
What Are Common Mistakes to Avoid During Zone Planning?
Think of zone planning as charting a course through uncharted waters—you don’t want to steer off course. Avoid common mistakes like overlooking surface variations, rushing through measurements, or ignoring future use. Double-check your data, account for expansion joints, and stay precise. If you navigate carefully, your polished concrete project will stay on course, resulting in a smooth, professional finish that meets your needs without costly rework or setbacks.
Can I Use Digital Tools for Room Zone Mapping?
Yes, you can definitely use digital tools for room zone mapping. They make the process faster and more precise, allowing you to visualize layouts clearly. You’ll appreciate features like measurement accuracy, drag-and-drop zones, and easy adjustments. Just guarantee you choose a user-friendly app or software that suits your project’s complexity. Digital tools help you avoid mistakes, save time, and achieve professional results effortlessly.
How Do I Correct Errors in Zone Boundaries After Marking?
To correct errors in zone boundaries after marking, review your digital map carefully. Use the editing tools in your mapping software to select the incorrect boundary and adjust it precisely. You can drag the lines to the correct positions or input exact measurements. Save your changes frequently, and double-check the zones to guarantee everything is accurate before proceeding with the polishing process. This assures your map remains precise and reliable.
What Safety Precautions Should I Take During the Mapping Process?
You should wear protective gear like gloves, goggles, and a dust mask to stay safe during mapping. Make sure your workspace is well-ventilated to avoid inhaling dust or fumes. Keep tools organized and handle sharp equipment carefully to prevent injuries. Also, be mindful of electrical hazards and avoid working near exposed wires. Staying alert and following safety protocols guarantees a smooth, accident-free mapping process.
Conclusion
Think of your polished concrete project as crafting a masterpiece on a blank canvas. With your tools as your brushes and your planning as your sketch, you’ve laid the foundation for a stunning result. As you finalize your zones, remember that precision is your guiding light, turning raw material into art. When you step back and see the clean lines and sharp edges, you’ll realize you’ve transformed the space with the finesse of a true artisan.