
To map salon floors like a pro, start by measuring your space accurately and using digital tools or graph paper to create a scaled layout. Clearly define zones such as styling stations, washbasins, retail, and reception, placing them strategically for ideal flow. Color-code or label each area to improve clarity. Review the layout from different angles, ensuring pathways are clear and zones are well-spaced. Keep these tips in mind, and you’ll discover how to design a functional, efficient layout—just keep exploring.
Key Takeaways
- Measure the entire salon space accurately, then create a scaled floor plan using graph paper or digital tools.
- Identify and clearly define main zones such as styling stations, washbasins, retail, reception, and break areas.
- Use color-coding or symbols to differentiate zones for quick visualization and easy adjustments.
- Strategically place high-traffic areas like retail near entrances and reception near the entrance for efficiency.
- Review the layout from multiple perspectives, checking for flow, safety, and practicality before finalizing.
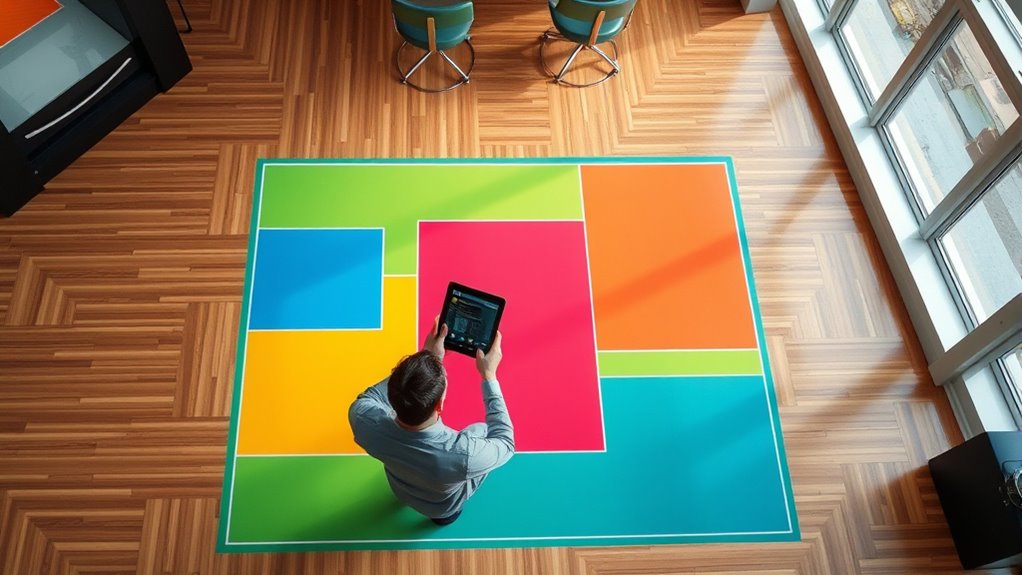
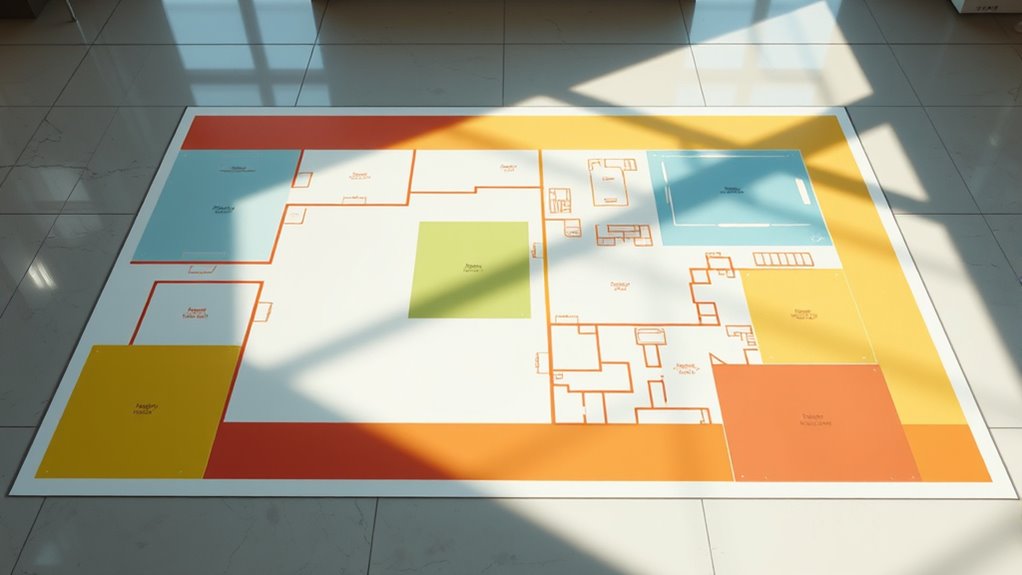
Mapping salon floors is crucial for creating efficient layouts that enhance workflow and customer experience. When you plan your space thoughtfully, you guarantee that every area serves a purpose, making daily operations smoother and more productive. The first step is to identify the main zones within your salon—styling stations, washbasins, retail areas, reception, and break spaces. Clearly defining these zones helps you visualize how clients and staff will move through the space, reducing confusion and bottlenecks. As you map out each zone, consider the natural flow of traffic; you want clients to move effortlessly from one area to another without feeling crowded or rushed.
Mapping salon zones optimizes flow, boosts efficiency, and enhances client experience through thoughtful space planning.
Start by measuring your entire salon and drawing a scaled floor plan. Use simple tools like graph paper or digital design software to create an accurate representation of your space. When you plot out each zone, think about the proximity of related areas. For instance, styling stations should be close to washbasins to streamline the process, but not so close that noise and water splashes disrupt client comfort. Allocate enough space for each station, allowing your staff to work comfortably without feeling cramped. Remember, a well-spaced layout not only looks professional but also minimizes accidents and improves overall safety.
Next, consider placing your retail section near the entrance or checkout area to encourage impulse purchases. The reception should be easily accessible, ideally near the entrance, to greet clients smoothly and handle check-ins efficiently. Break areas are often overlooked but are essential for staff morale; ensure they’re tucked away from the client zones but still accessible for quick breaks. As you finalize the zones, mark pathways clearly, indicating how staff and clients will navigate the space daily.
Using color-coding or symbols can help you quickly identify different zones on your map, making adjustments easier. Think about future expansion or changes—leave some space for growth or modifications without disrupting the overall flow. When you’re confident with your map, review it from different perspectives, imagining your staff and clients moving through each area. This perspective helps you spot potential issues like narrow walkways or awkward station placements. Incorporating space planning strategies ensures your layout remains adaptable over time.
Mapping your salon floor like a pro involves more than just drawing lines; it requires strategic thinking about functionality, safety, and customer comfort. With a precise, well-thought-out plan, you’ll create a layout that boosts efficiency, elevates the customer experience, and sets your salon up for long-term success.
B00276B4QE
As an affiliate, we earn on qualifying purchases.
As an affiliate, we earn on qualifying purchases.
Frequently Asked Questions
What Tools Are Best for Precise Room Zone Mapping?
You should use laser distance meters and digital floor mapping tools for precise room zone mapping. Laser meters quickly measure distances with high accuracy, while digital mapping software allows you to create detailed, scalable floor plans. Combining these tools helps you identify room boundaries accurately, saving time and reducing errors. Invest in reliable equipment like the Leica Disto or Planar for professional results every time.
How Do I Handle Irregularly Shaped Rooms?
Imagine shaping clay into a unique sculpture—that’s how you handle irregularly shaped rooms. You start by sketching the space’s outline on your floor plan, then use flexible measuring tapes or digital tools that adapt to curves and angles. Break the room into smaller sections, map each one accurately, and then connect them seamlessly. This way, your zones reflect the true contours, making your floor plan both precise and professional.
Can Map Salon Floors Accommodate Multi-Level Spaces?
Yes, map salon floors can accommodate multi-level spaces. You simply define each level separately within the software, allowing you to create accurate zone maps for stairs, elevators, or split-level areas. This way, you maintain precise control over each space, ensuring proper room zoning and navigation. You’ll find that managing multi-level layouts becomes seamless, helping you plan and visualize your salon’s design efficiently.
How to Troubleshoot Common Mapping Inaccuracies?
To troubleshoot common mapping inaccuracies, start by ensuring your scanner is calibrated correctly and the floor is well-lit and free of obstacles. Double-check that the room’s dimensions are input accurately. If errors persist, retrace your steps and re-scan problematic areas, ensuring consistent movement speed. Update your mapping software regularly and clear any background noise or interference that might disrupt the scanning process.
Is There a Way to Update Room Zones After Initial Mapping?
Did you know that 75% of mapping errors can be rectified easily? Yes, you can update room zones after initial mapping. Simply access your mapping software, select the zone editing tool, and adjust boundaries as needed. Save your changes, and the system recalibrates automatically. This way, you guarantee your salon layout stays accurate and efficient, adapting quickly to any changes in your space.

ACEGMET Laser Measure, 229ft/70m Laser Measurement Tool, S9 Room Laser Measuring Tool with 2 Bubble Levels, LCD Backlit Display, IP54 Waterproof, Pythagorean Mode for Distance, Area, Volume
Precision at Your Fingertips: ACEGMET laser measure delivers exact measurements with just one tap—effortlessly accurate for DIY projects…
As an affiliate, we earn on qualifying purchases.
As an affiliate, we earn on qualifying purchases.
Conclusion
By mastering the art of mapping salon floors, you become the cartographer of comfort, guiding each zone with confidence. Think of your plan as a compass, steering clients smoothly through your space’s hidden pathways. When you map with precision, you reveal a harmonious flow—like a well-tuned orchestra—where every note (or station) plays in perfect harmony. Embrace this skill, and watch your salon transform into a sanctuary of seamless beauty and efficiency.

Graph Paper Pad for Blueprint Drawings, Drafting, Engineering Drawing, and Planning – Graph Paper 11×17 Blueprint Quadrille Grid Paper Pads with Blue Lines, High Brightness 50 Sheets (1-Pack)
IDEAL FOR BLUEPRINT DRAWINGS – Our 11×17 graph paper pad is perfect for blueprint drawings, engineering drawings, drafting,…
As an affiliate, we earn on qualifying purchases.
As an affiliate, we earn on qualifying purchases.

Maped Color'Peps Magic Color-Change Markers x 8 + 2 Revealer Markers (844612)
Magic Revealer Markers instantaneously change in color like magic!
As an affiliate, we earn on qualifying purchases.
As an affiliate, we earn on qualifying purchases.