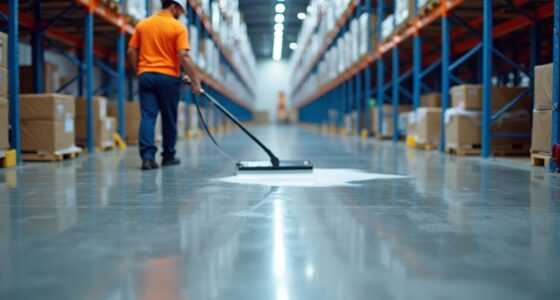

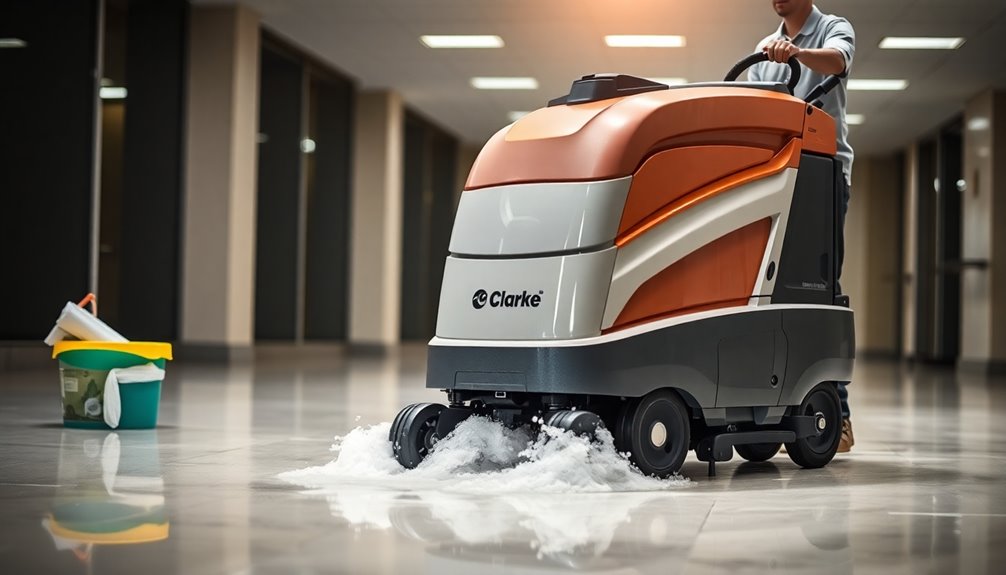
To use a Clarke floor scrubber, start by checking the recovery tank for debris and make sure the squeegee blades are in good condition. Fill the solution tank with a clean water and recommended cleaning solution mix. Set the vacuum and water settings, then activate the brushes. Adjust the squeegee for proper height, ensuring it sits flat against the floor. You'll find tips on adjusting squeegee and maintenance practices as you continue.
Key Takeaways
- Ensure the solution tank is filled with a clean water and recommended cleaning solution mixture before operation.
- Inspect and adjust the squeegee for proper height to maximize water pickup and avoid streaking.
- Familiarize yourself with the control interface to set power, vacuum, and water settings effectively.
- Activate the brushes using the dual triggers on either side of the machine for effective scrubbing.
- Regularly check and maintain the squeegee and tanks to ensure optimal performance and efficiency.

Bissell Commercial BigGreen BGFS650 Hercules Scrub and Clean Floor Machine, Green
Brush Speed (Rpm): 2200 Rpm
As an affiliate, we earn on qualifying purchases.
Preparing the Machine for Use
Before you start using the Clarke floor scrubber, make certain you've prepared the machine properly.
Begin by checking the recovery tank; it should be clean and free of debris. The wide opening makes it simple to remove any buildup.
Next, inspect the squeegee for obstructions, confirming the four-sided blades are in good condition. Flip them if necessary for peak performance.
Don't forget to verify that the removable float shutoff is installed correctly to prevent overfilling during operation.
Finally, familiarize yourself with the control interface, adjusting the main power, vacuum, and water settings as needed.
Also, make sure the pad holder is securely attached before you start, setting you up for an efficient cleaning session.

SUNMAX 22" Walk-Behind Commercial Floor Scrubber Machine, Cordless Battery Powered, 13.2/14.5-Gal Dual Tanks, Up to 5 Hours Runtime, 31" Squeegee, Hard Floor Cleaner for Tile, Concrete, Epoxy & VCT
Built for Daily Commercial Hard Floor Cleaning: Designed for warehouses, factories, schools, hospitals, retail stores, gyms, offices, and...
As an affiliate, we earn on qualifying purchases.
Filling the Solution Tank
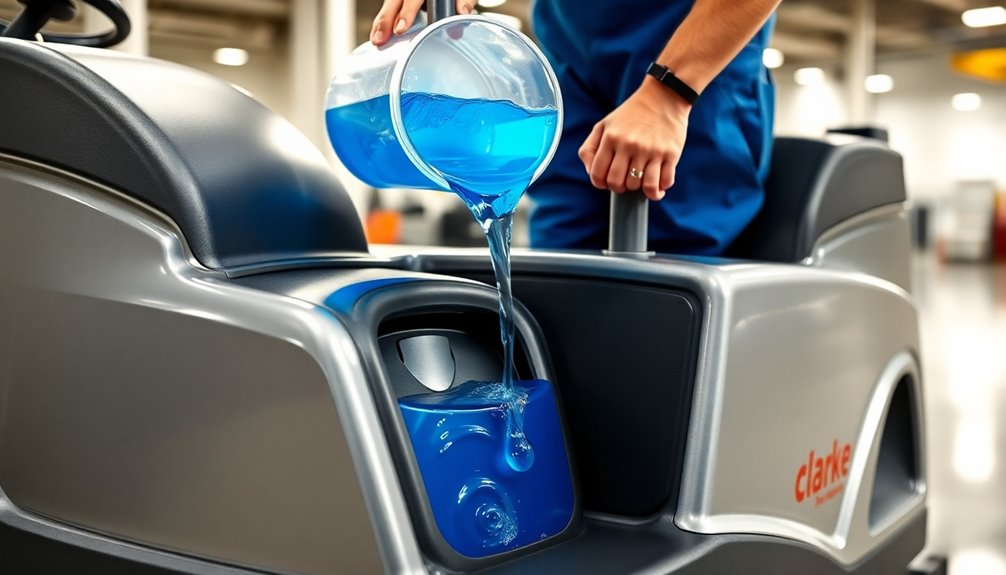
To fill the solution tank, start by locating the solution cap at the front of the machine for easy access.
Once you've confirmed the tank is empty, mix clean water with the recommended cleaning solution and pour it in through the wide opening.
Finally, make certain to securely close the cap to prevent any spills during use.
Locate Solution Cap
When it comes to filling the solution tank of your Clarke floor scrubber, finding the solution cap is a breeze.
You'll find it conveniently located at the front of the machine, making access simple and quick. To guarantee peak cleaning performance, it's important to fill the 13-gallon solution tank to the recommended level with the right cleaning solution mixed with water.
Before you start your cleaning tasks, take a moment to check the solution tank level to confirm there's enough cleaning solution available.
Once you've filled the tank, make sure to securely replace the solution cap to prevent any spills during operation.
Keeping these steps in mind helps maintain the efficiency of your scrubber.
Fill With Cleaning Solution
As you prepare to fill the solution tank of your Clarke floor scrubber, make sure the tank is clean and free of debris for peak performance.
Locate the solution cap at the front of the machine for easy access.
With the wide opening of the tank, pour in your chosen cleaning solution carefully to avoid spills or mess.
Be mindful not to exceed the tank's 13-gallon capacity; overfilling can lead to leaks and inefficiency.
Confirm you're using the appropriate cleaning solution for your specific needs, as this will optimize cleaning results.
Once you've filled the tank, you're almost ready to scrub!
Just remember to securely close the solution cap to prevent any leaks during operation.
Securely Close Cap
After filling the solution tank, securely closing the cap is important to prevent leaks during operation.
The solution cap is conveniently located at the front of the machine, making it easy to access. Before closing, always check the rubber gasket on the cap for wear or debris; this guarantees a tight seal.
Once you're ready, twist the cap clockwise until it's firmly in place, making sure it's snug and secure. Neglecting this step can lead to spills that not only waste solution but also create a mess on your floors.
Regularly inspect the solution tank for any damage, as maintaining its integrity is essential for peak performance and preventing unwanted leaks during use.

HHQ Commercial Floor Scrubber Machine, 13" Heavy Duty Orbital Floor Cleaner Buffer and Polisher- Deep Cleaning Hard Floors and Carpets with Ease, 3 Brushes & 3 Cleaning Pads, Orb-6
Deep Clean Floors/ Carpets Without Getting on Your Hands and Knees- Bring Your Bare Floors and Carpets Back...
As an affiliate, we earn on qualifying purchases.
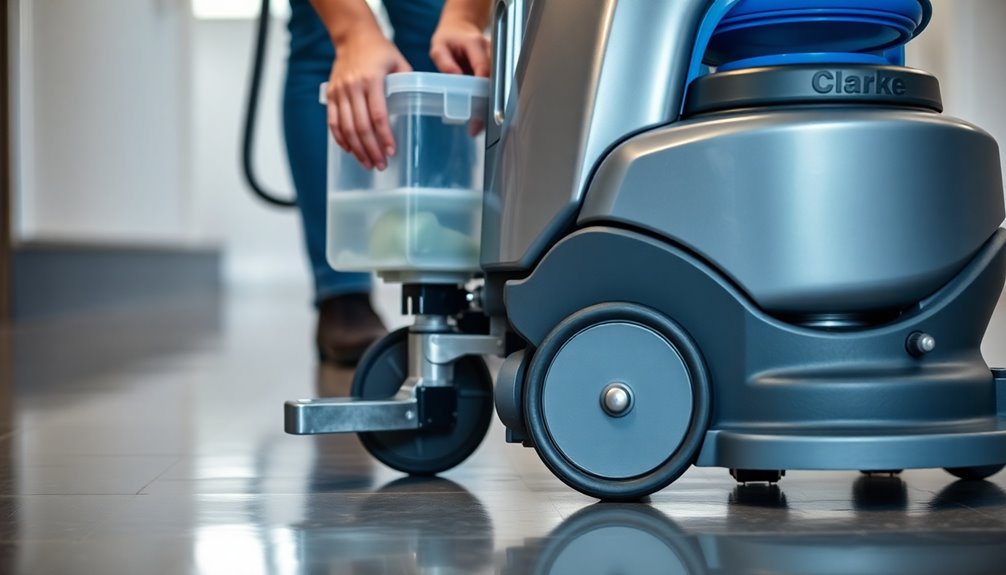
Checking the Recovery Tank

To keep your Clarke floor scrubber running smoothly, you'll need to check the recovery tank regularly.
Start by locating the tank and inspecting it for any debris or buildup.
After that, make certain to clean and maintain it properly to guarantee peak performance.
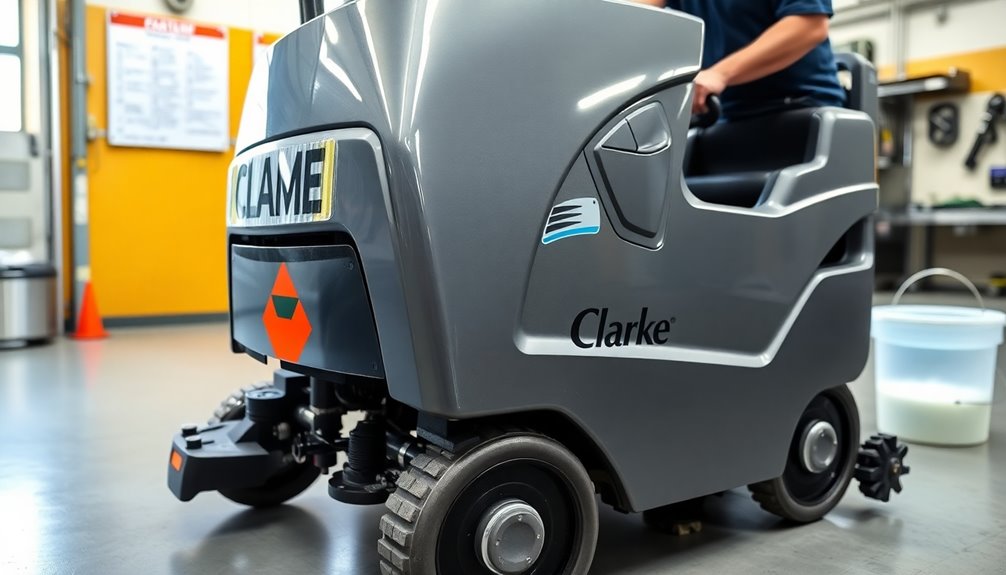
Locating the Recovery Tank
Locating the recovery tank on your Clarke floor scrubber is a straightforward task that guarantees peak performance.
To find it, simply tilt the machine back, allowing easy access to the wide opening at the back. This design not only facilitates cleaning but also makes inspection a breeze.
Inside, you'll notice a removable float shutoff, which helps prevent overflow and maintains ideal functionality.
It's essential to regularly check the recovery tank to verify it isn't full, as a full tank can hinder your machine's performance during operation.
For maintenance, the drain hose features a pinch mechanism that allows for controlled water release, simplifying your cleaning routine.
Keeping an eye on the recovery tank assures your scrubber runs efficiently.
Inspecting for Debris
Before you start scrubbing, it's vital to inspect the recovery tank for any debris or blockages that could compromise performance.
Begin by removing the wide opening cover and checking for any dirt or obstructions inside. Pay special attention to the removable float shutoff; accumulated debris here can hinder its function and affect suction.
After each use, make certain to empty the recovery tank using the drain hose with a pinch feature to control water release, preventing overflow or contamination.
Regularly cleaning the inside of the tank is important for peak suction and effective dirt collection.
Finally, always confirm the recovery tank is securely reattached and properly sealed before operating the scrubber to avoid leaks and performance issues.
Cleaning and Maintenance Steps
Checking the recovery tank regularly is essential for maintaining your Clarke floor scrubber's performance. Use the wide opening for easy access and guarantee peak operation while preventing overflow.
During your maintenance checks, inspect the removable float shutoff to confirm it's functioning properly; this feature helps prevent spills.
When it's time to empty the tank, utilize the drain hose with a pinch feature for a cleaner, more efficient water release.
After each use, make it a habit to clean the recovery tank to eliminate debris or buildup that could hinder future performance.
Finally, verify the squeegee is in good condition, as a well-maintained squeegee efficiently collects water, contributing to the overall effectiveness of the recovery tank.

Oreck Commercial Orbiter Hard Floor Cleaner Machine, Multi-Purpose Floor Cleaning, Random Orbital Drive, Wide Cleaning Path, 50-Foot Long Cord, ORB550MC, Gray/Red
MULTI-PURPOSE CLEANING: Commercial grade cleaner and effective on all types of flooring surfaces. Sand, refinish, strip, scrub, wax,...
As an affiliate, we earn on qualifying purchases.
Adjusting the Squeegee
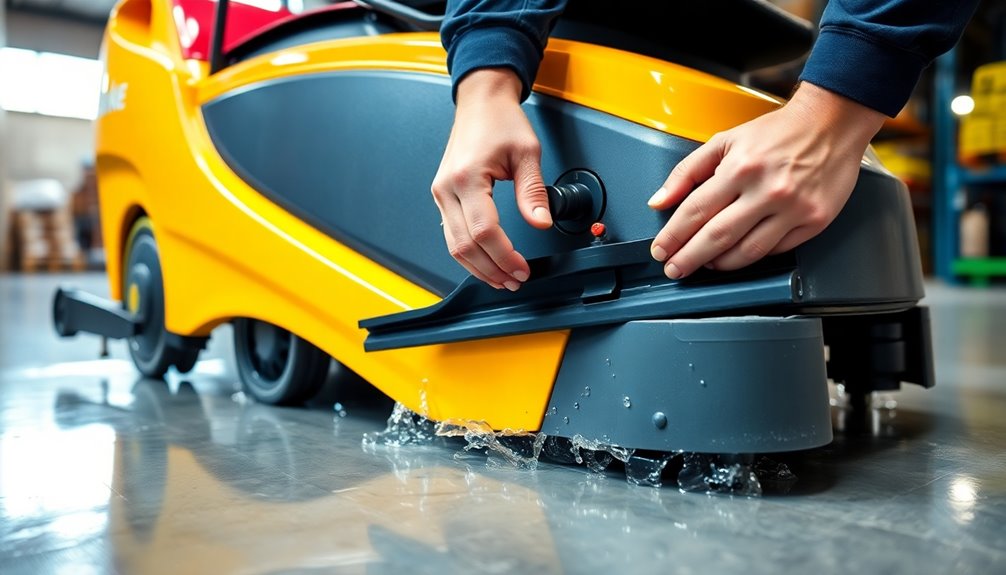
Adjusting the squeegee on your Clarke floor scrubber is essential for effective cleaning and water recovery. To get the best results, follow these steps:
- Locate the lever: Find the squeegee raise and lower lever in the middle of the machine for easy access while operating.
- Confirm proper alignment: Make sure the squeegee sits flat against the floor for peak water pickup.
- Check for obstructions: If something blocks the squeegee, remember it has a breakaway design to prevent damage.
Don't forget to regularly inspect the squeegee assembly and flip the blades using the tool-free clip mechanism for extended use.
This simple maintenance helps avoid streaking and guarantees your floors stay clean and dry!
Activating the Brushes
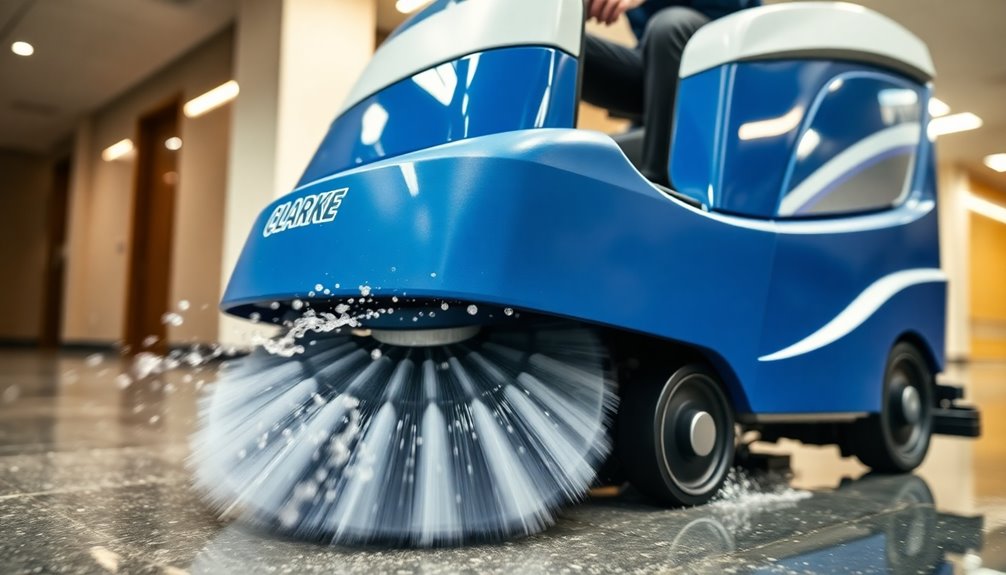
With the squeegee properly adjusted, you're ready to activate the brushes on your Clarke floor scrubber for effective cleaning.
First, verify the machine is powered on using the main power switch. Once it's on, locate the dual triggers on the left and right sides of the machine. Press either trigger to start the brush operation; they'll begin spinning immediately, ready to tackle various floor surfaces.
For the best results, make certain the solution tank is filled with the appropriate cleaning solution before activating the brushes.
When you need to stop the brushes, simply release the trigger. This feature allows for quick and easy control, making your cleaning process smooth and efficient.
Operating the Scrubber
Before you start scrubbing, make certain to fill the 13-gallon solution tank through the front cap and seal it properly.
Once that's done, adjust the main power switch and set the vacuum and water settings using the control interface for peak cleaning performance.
To activate the brushes, use the dual triggers on either side of the machine. This will guarantee effective scrubbing of the floor surface.
Here are a few tips for smooth operation:
- Always check the solution level before starting.
- Adjust the squeegee height as needed for proper water pickup.
- After use, tilt back the machine for easy access to components for maintenance.
Following these steps will help you achieve the best results with your Clarke Floor Scrubber.
Lowering the Squeegee After Use

After you finish using the Clarke Floor Scrubber, it's important to lower the squeegee to maintain its functionality.
First, verify the machine is turned off to prevent any accidental activation. Then, locate the squeegee raise and lower lever in the middle of the machine and pull it downwards.
The squeegee has a breakaway design, so it will slide off the bracket if it encounters any obstructions while lowering.
Once the squeegee is lowered, inspect the four-sided blades for any signs of wear. If needed, you can flip them using the tool-free clip for extended use.
Regularly lowering the squeegee after cleaning helps keep it in peak condition and ready for your next cleaning task.
Maintaining the Scrubber for Optimal Performance
Lowering the squeegee is just one part of keeping your Clarke Floor Scrubber in great shape.
Regular maintenance guarantees peak performance, so don't overlook these key tasks:
1. Clean the Tanks: Regularly clean the solution and recovery tanks to prevent buildup.
Check the removable float shutoff for proper function during cleaning.
2. Maintain the Squeegee: Flip the squeegee blades using the tool-free clip.
This simple action extends their lifespan and boosts cleaning efficiency.
3. Inspect the Pad Holder: Periodically Inspect the Pad Holder and replace it using the easy click mechanism to maintain effective scrubbing.
Always refer to the owner's manual for detailed maintenance instructions and troubleshooting tips.
Keeping up with these steps will help your scrubber perform its best!
Frequently Asked Questions
How Do You Operate a Floor Scrubber?
To operate a floor scrubber, start by filling the solution tank for best cleaning.
Adjust the squeegee height for effective water collection, then activate the brushes using the dual triggers.
As you scrub, keep an eye on the recovery tank and clean it regularly to guarantee strong suction.
For maintenance, tilt the machine back for easy access to components, allowing you to replace parts like the pad holder and squeegee blades without hassle.
Do Floor Scrubbers Really Work?
Do floor scrubbers really work? Absolutely!
When you use a floor scrubber, you combine scrubbing, rinsing, and vacuuming for a deep clean that mops just can't match. With features like adjustable scrubbing power and a design that navigates around obstacles, you'll notice a significant difference in cleanliness.
Plus, the large solution tank means you won't be constantly refilling. Regular maintenance keeps your scrubber performing at its best, ensuring you get those sparkling floors every time.
How Do You Use a Floor Scrubber Ride?
To use a floor scrubber ride, start by filling the solution tank with water and cleaning solution.
Adjust the squeegee height for proper floor contact. Then, engage the brushes using the triggers on the machine's sides.
As you scrub, keep an eye on the recovery tank to avoid overflow.
After finishing, tilt the machine back to access its components and clean the tanks regularly to guarantee it works effectively on future jobs.
Why Is My Floor Scrubber Machine Not Putting Out Water?
Why isn't your floor scrubber dispensing water?
First, check the solution tank for adequate cleaning solution; low levels can stop water flow.
Next, make certain the solution cap's tightly closed to prevent air leaks.
Inspect the solution lines for blockages or kinks, and confirm the float shutoff in the recovery tank is functioning correctly.
Finally, verify that the water settings on the control panel are properly adjusted for efficient dispensing during use.
Conclusion
Using a Clarke floor scrubber can greatly reduce cleaning time by up to 50%, making it an efficient choice for maintaining cleanliness in large spaces. By following the steps outlined, you'll guarantee your machine operates effectively and lasts longer. Remember, regular maintenance is key to superior performance. So, get started, keep your environment spotless, and enjoy the benefits of a well-maintained scrubber! Your floors will thank you for it.