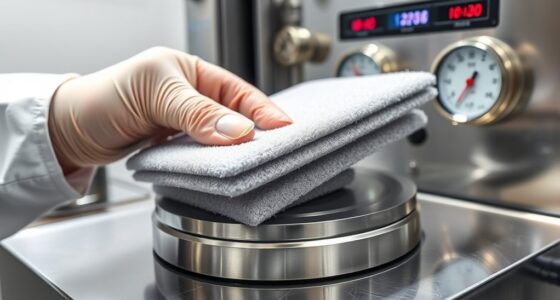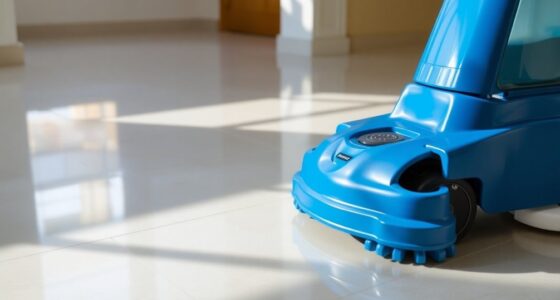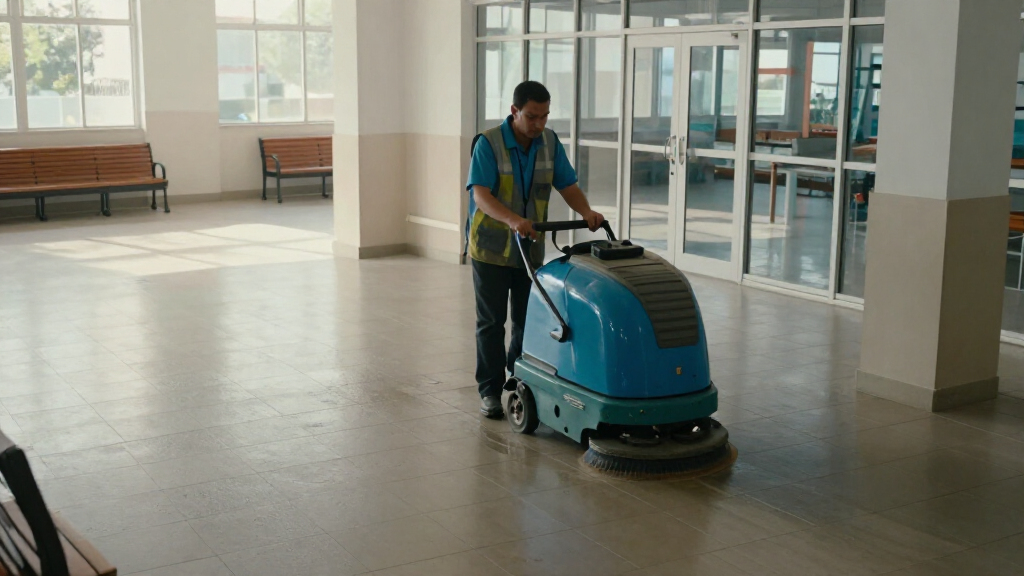

Use this guide to prepare an automatic floor scrubber, clean a compatible hard floor, and leave the machine ready for storage. It is for new operators working in a facility such as a shop, school, warehouse, or office. Allow 30-60 minutes for a small area; larger spaces take longer. You will learn how to check the floor and machine, choose the correct cleaning solution, scrub in orderly passes, and confirm that the floor and equipment are clean.

Get cleaning gear delivered free with Prime
- Fast, free delivery on millions of items
- Prime Video, Amazon Music and more included
- Member-only deals all year

KARHDIR Walk-behind Floor Scrubber Machine – 22" Cleaning Width
- ✔ Cleaning width: 22 in
- ✔ Suction width: 31.5 in
- ✔ Stated coverage rate: Up to 32,000 sq ft/h

Battery Powered Walk-Behind Mini Automatic Floor Scrubber – 15" Cleaning Width, 90-Minute Runtime, 170 RPM
- ✔ Cleaning width: 15 in
- ✔ Brush speed: 170 RPM
- ✔ Stated coverage rate: 12,900 ft²/h

Oreck Commercial Orbiter Hard Floor Cleaner
- ✔ Model: ORB550MC
- ✔ Cleaning path: 13 in
- ✔ Floor types: Hard floors and carpets
Difficulty: Beginner | Time: 30-60 minutes, depending on floor size
What You’ll Need
Tools & Materials:
- Automatic floor scrubber with the correct brushes or pads
- Manufacturer-approved cleaning solution
- Clean water, unless the machine connects to a water supply
- Wet-floor signs or barriers
- Personal protective equipment required by the product label or workplace rules
- Cleaning cloths and a waste-disposal point
Knowledge:
- Ability to identify the machine’s main controls and emergency stop
- Ability to read the cleaning solution label and machine instructions
- Basic awareness of workplace pedestrian and electrical safety
Check the machine manual and the chemical label before use. Confirm that the scrubber, brush or pad, and solution suit the floor material. Arrange access to a sink or approved drain for disposing of recovered water. Ask a supervisor for instruction if the machine is unfamiliar or the worksite requires operator training.
KARHDIR Walk-behind Floor Scrubber Machine – 22" Cleaning Width
The KARHDIR is the strongest match here for buyers who define a scrubber by coverage per shift and fewer refill stops. Its 22-inch cleaning path is the widest of the two tank-equipped walk-behind models, and the stated rate of up to 32,000 square feet per hour points toward larger, relatively open spaces. A 15.9-gallon solution tank and 18.5-gallon sewage tank support longer runs than the Dapper’s compact 1.2- and 1.5-gallon tanks, though actual productivity will depend on conditions and operating practices.That capacity comes with a substantial handling penalty: at 300 pounds, this is a floor machine for facilities that can store and move it without relying on stairs. The Dapper is much easier to transport and better suited to narrow, occupied spaces, while the KARHDIR’s 31.5-inch squeegee needs room to maneuver. Its brushless motor and corrosion-resistant polyethylene housing are useful design choices for regular commercial duty, but the available details do not specify runtime or charge time. We would choose it when a large hard-floor footprint matters more than portability, and skip it for small rooms or multi-level buildings without suitable equipment access.
Pros:
- 22-inch cleaning path is the widest among the automatic walk-behind scrubbers here.
- Large solution and sewage tanks can reduce refill and emptying interruptions.
- Brushless motor and corrosion-resistant polyethylene housing are designed for commercial use.
- Stated coverage rate makes it the throughput-oriented choice in this lineup.
Cons:
- At 300 pounds, it is difficult to move between floors or transport without planning.
- Its wide squeegee and overall dimensions need more maneuvering space than the compact Dapper.
- Runtime and charging time are not included in the provided specifications.
Best for: Facilities cleaning broad, open hard-floor areas that can accommodate a heavy walk-behind machine.
Not ideal for: Small businesses that must carry equipment upstairs, navigate tight aisles, or need a clearly specified runtime before purchase.
Bottom line: Choose the KARHDIR when tank capacity and broad-area coverage outweigh the challenge of moving a 300-pound machine.
“Choose the KARHDIR when tank capacity and broad-area coverage outweigh the challenge of moving a 300-pound machine.”
Battery Powered Walk-Behind Mini Automatic Floor Scrubber – 15" Cleaning Width, 90-Minute Runtime, 170 RPM
Where the KARHDIR is built around longer runs across open floor, the Dapper Supply mini scrubber puts easy handling and quieter operation first. At 22 pounds, it is far lighter than the 300-pound KARHDIR and measures 17 by 17 inches at its base, making it a more plausible fit for smaller offices, shops, and restaurants. Its stated 65 dB operating noise and 90-minute runtime also suit cleaning schedules that need to work around staff or customers.The tradeoff is capacity. A 15-inch cleaning width is narrower than the KARHDIR’s 22 inches, and the 1.2-gallon solution tank is small beside the larger machine’s 15.9-gallon tank. The Dapper is therefore a better match for shorter routes and tighter floor plans than for a large warehouse or long uninterrupted shift. Its separate recovery tank supports collection of used solution, but the 1.5-gallon capacity means operators should plan for service breaks. It is specified for hard floors, so the Oreck is the more relevant choice if carpet dry-cleaning is part of the job. We would favor Dapper when portability and daytime use matter more than minimizing tank stops.
Pros:
- At 22 pounds, it is much easier to transport and handle than the KARHDIR.
- Stated 65 dB noise level is suited to cleaning around people.
- Up to 90 minutes of runtime supports useful cleaning sessions between charges.
- Separate solution and recovery tanks provide a scrub-and-collect workflow for hard floors.
Cons:
- The 15-inch path covers less width per pass than the KARHDIR’s 22-inch path.
- Small 1.2-gallon solution and 1.5-gallon recovery tanks require more frequent attention.
- It is specified for hard floors and is not compatible with carpet or rugs.
Best for: Small commercial spaces that need a lightweight hard-floor scrubber for daytime or frequent spot cleaning.
Not ideal for: Large facilities that need broad coverage and long runs between refills, or buyers who need one machine for both carpet and hard floors.
Bottom line: The Dapper is the practical pick for compact, occupied spaces where easy transport and lower noise matter more than large tank capacity.
“The Dapper is the practical pick for compact, occupied spaces where easy transport and lower noise matter more than large tank capacity.”
Oreck Commercial Orbiter Hard Floor Cleaner
The Oreck Orbiter earns a place in this comparison for buyers whose work goes beyond routine scrubbing. Its random-orbit head is designed to avoid obvious brush marks and swirls, and the machine can scrub, strip, wax, polish, and sand hard floors as well as dry-clean carpets. That range gives it a different role from the KARHDIR and Dapper, both of which are presented as battery-powered, tank-equipped walk-behind scrubbers.For automatic floor scrubbing specifically, that distinction matters. The provided Oreck details list a 13-inch cleaning path and an induction motor, but do not specify onboard solution or recovery tanks, battery operation, or a stated coverage rate. It should be considered a versatile floor machine, not a direct substitute for the two automatic scrubbers when the priority is applying cleaning solution and collecting it in a single pass. Compared with Dapper, Oreck offers carpet capability and more finishing tasks, but the pads are sold separately and different work may require different pads. We would select it for a maintenance team that values task flexibility and understands the pad workflow, rather than a buyer seeking the simplest automatic scrub-and-recover routine.
Pros:
- Supports scrubbing, stripping, waxing, polishing, and sanding hard floors.
- Can dry-clean carpets, unlike the two hard-floor-focused walk-behind scrubbers.
- Random-orbit action is designed to reduce brush marks and swirls.
- Compact 13-inch path can suit tighter spaces and detail work.
Cons:
- Cleaning pads are sold separately, and different tasks may call for different pads.
- The provided specifications do not list solution or recovery tanks or a coverage rate.
- Its multi-task floor-machine workflow differs from automatic scrub-and-recover operation.
Best for: Facilities teams that need one machine for varied hard-floor maintenance and occasional dry carpet cleaning.
Not ideal for: Buyers who specifically need an automatic scrubber with listed solution and recovery tanks for routine one-pass cleaning.
Bottom line: Choose the Oreck for flexible floor maintenance and carpet dry-cleaning, while selecting a tank-equipped walk-behind if automatic scrubbing is the main requirement.
“Choose the Oreck for flexible floor maintenance and carpet dry-cleaning, while selecting a tank-equipped walk-behind if automatic scrubbing is the main requirement.”
As an Amazon Associate we earn from qualifying purchases.
Before You Start
Keep people away from the work area while the floor is wet. Place wet-floor signs at entrances and other approach points before cleaning. Pick up loose debris first; grit, cables, and small objects can obstruct the machine, scratch the floor, or clog its suction system. Do not use the scrubber on carpet, untreated wood, or any surface the machine manual excludes. Avoid mixing chemicals or using more detergent than the label directs. If the machine has a damaged cord, leaking tank, loose brush, or faulty control, tag it out of use and report it.
Step-by-Step Instructions
Step 1: Check the work area
Walk the area and remove loose rubbish, dust, grit, and objects that could catch under the brush or wheels. Move furniture where practical, and mark obstacles that cannot be moved. Check for deep standing water, oil, or other spills that need a separate cleanup method. Put wet-floor signs at entrances and block off the cleaning route so people do not walk through it.
Tip:Plan a route that finishes near an exit or another dry area. Leave enough room to turn without striking shelves, walls, or equipment.
Check: Confirm that the route is clear, people can see the signs, and obstacles or spills that need special handling have been addressed.
Step 2: Inspect the scrubber
Park the machine on a level surface and switch it off before inspection. Check the housing, wheels, brush or pad holder, squeegee blades, hoses, and tanks for visible damage or blockage. Confirm that the recovery tank is empty and that its lid and seals are clean and seated properly. Check the battery charge or power supply as described in the manual. Fit the brush or pad specified for the floor and cleaning task.
Tip:Use only accessories approved for the model. A worn pad, damaged squeegee, or incorrect brush can leave streaks or damage the surface.
Check: Confirm that the machine is clean enough to inspect, has no visible damage or leaks, and has the correct brush or pad fitted securely.
Step 3: Prepare the cleaning solution
Read the solution label and the scrubber manual. Add clean water to the solution tank using the specified fill point, temperature, and fill level. Measure detergent according to the label and add it in the order the manufacturer specifies. Do not guess the amount, combine products, or pour solution into the recovery tank. Close the tank cap.
Tip:Excess detergent can leave a slippery film and create extra foam in the recovery tank. If the machine requires a particular low-foam product, use that type.
Check: Confirm that the solution tank contains the correct mixture and amount, and that the cap is closed without drips or spills.
Step 4: Set up the machine
Release the transport or parking lock if the manual requires it. Lower the brush or pad and squeegee into their operating positions. Check that the recovery hose is connected and that the suction path is clear. Adjust the handle, seat, or control settings for a comfortable operating position. Set the solution flow and brush pressure to the manual’s starting recommendations for the floor and level of soil.
Tip:Start with the manufacturer’s standard settings. Increase flow or pressure only when the floor and the cleaning result call for it.
Check: Confirm that the brush and squeegee are in position, hoses are connected, and the controls are set for the floor type.
Step 5: Test a small area
Start the machine as directed in the manual and scrub a small, inconspicuous section. Move slowly enough for the brush and suction system to work, keeping a steady path. Check the cleaned strip for soil removal, streaks, residue, or any change to the floor’s appearance. Stop and adjust the settings if the surface reacts poorly or water is not being collected.
Tip:For a new floor type or cleaning solution, get approval for the test area before continuing across the room.
Check: Check that the test patch looks clean and unchanged, with little or no visible water left behind.
Step 6: Scrub the floor in steady passes
Drive or guide the scrubber along the planned route at a steady walking pace. Overlap each pass slightly so narrow untreated lines do not remain between paths. Keep the squeegee aligned with the direction of travel, and avoid sharp turns while the brush is down. Watch the floor, people, and machine as you work. Pause to remove an obstacle or change course safely rather than driving over it.
Tip:Do not rush to cover the area. Moving too quickly can leave soil behind or prevent the squeegee from collecting solution.
Check: Check that the cleaned lanes join without missed strips, and that the floor behind the machine is mostly dry and free of visible soil.
Step 7: Monitor tanks and cleaning results
Pause the machine periodically to check the solution level, recovery tank, and floor. Stop when the recovery tank reaches its limit or the machine signals that it needs attention. Turn the scrubber off before opening a tank. Empty and rinse the recovery tank at an approved disposal point, then refill the solution tank if needed. Resume only after closing the tanks and checking the route.
Tip:Foam or a sudden loss of suction can indicate a full tank, a blocked hose, a poorly seated lid, or unsuitable detergent.
Check: Check that the machine is collecting dirty water, no warning indicator is active, and the tanks are below their fill limits.
Step 8: Finish the floor and check it
Complete the remaining passes, then make a final visual inspection from several angles. Check edges, corners, and areas around obstacles for missed soil or standing water. If the manual allows it, make another pass with the solution flow off to collect remaining water. Keep the signs in place until the floor is dry enough for normal foot traffic.
Tip:Do not remove signs just because the scrubber has passed. Some floors need extra drying time, especially in cool or poorly ventilated areas.
Check: Confirm that the cleaned surface has an even appearance, no visible puddles, and no missed strips. Keep the floor closed until it is dry before people return to the area.
Step 9: Empty and clean the machine
Park on a level surface, switch off the scrubber, and follow the manual’s shutdown steps. Empty the recovery tank at an approved disposal point and rinse it. Empty any unused solution as the manual directs; do not pour chemicals into a drain unless the site permits it. Clean the squeegee blades, brush or pad, and accessible screens or filters. Wipe spills from the machine and leave tank lids open only if the manual recommends this for drying.
Tip:Wear the protective equipment listed for handling recovered water and cleaning products. Avoid spraying water into electrical components or controls.
Check: Confirm that the tanks are empty and rinsed, the brush and squeegee are free of debris, and the machine has no visible drips.
Step 10: Store the scrubber safely
Return the machine to its designated storage area and connect the charger or arrange charging as stated in the manual. Raise the brush and squeegee if the manufacturer recommends it for storage. Report any fault, leak, or unusual noise to the responsible person before another operator uses the machine. Remove the wet-floor signs only when the floor is dry and safe for traffic.
Tip:Leave the machine where it will not block exits, walkways, or access to safety equipment.
Check: Confirm that the scrubber is stored in its assigned place, charging or ready for charging, and any maintenance issue has been reported.
Common Mistakes to Avoid
- Using too much detergent or the wrong product. — Read both the product label and machine manual, measure the stated amount, and use a compatible low-foam solution when required.
- Driving too fast or leaving gaps between passes. — Move at a steady pace and overlap each lane slightly. Inspect the floor as you work so you can correct missed strips.
- Starting with a full or poorly sealed recovery tank. — Check that the tank is empty, the lid and seals sit correctly, and the suction hose is connected before starting.
- Removing wet-floor signs before the floor has dried. — Keep signs in place after scrubbing and check the surface before reopening the area to foot traffic.
Troubleshooting
Problem: The scrubber leaves water behind.
Solution: Stop and check whether the recovery tank is full, the squeegee blades are dirty or worn, and the suction hose or filter is blocked. Refit loose connections and clean or replace parts as the manual directs.
Problem: The machine leaves streaks or a sticky film.
Solution: Check for excess detergent, a dirty brush or pad, and solution that is unsuitable for the floor. Empty and rinse the tanks if needed, prepare the correct mixture, and test a small area again.
Problem: The brush does not rotate or the machine stops during use.
Solution: Switch off the machine and follow the manual’s fault-check steps. Check for a jammed brush, low battery, or warning indicator. Clear debris only when the machine is off; report a fault that persists.
Problem: The recovery tank foams or a warning light appears.
Solution: Stop, switch off the machine, and inspect the tank level and solution used. Empty and rinse the recovery tank, check the filter, and use the detergent type and dose specified for the scrubber.
What Success Looks Like
The floor has an even, clean appearance with no missed lanes or visible puddles, and it is dry before signs are removed or normal traffic resumes. The machine has no active fault indicator, its tanks and cleaning parts have been emptied or rinsed as directed, and it is parked or charging in the assigned storage area.
Next Steps
Record the cleaning task if your workplace uses a log, including any machine fault or floor area that needs follow-up. Replace worn pads or squeegee blades according to the manual and site schedule. Follow the machine’s charging and maintenance instructions before its next use. Ask a supervisor for help if the floor remains slippery, the machine repeatedly loses suction, or a warning returns after basic cleaning.
Frequently Asked Questions
How fast should I move the scrubber?
Use the speed recommended in the manual and keep a steady pace. If the floor remains wet or soil is left behind, slow down and check the squeegee, brush, and solution settings.
Can I use ordinary household floor cleaner?
Only use it if the scrubber manufacturer and the product label both permit it. Some cleaners create foam or residue that can interfere with water recovery or leave the floor slippery.
Should I scrub a floor more than once?
Make another pass when the test area or inspection shows that soil remains. Use the machine settings and method approved for the floor, and avoid increasing brush pressure without checking the manual.
What should I do if the floor still feels slippery?
Keep the area closed and the signs in place. Check for detergent residue, remaining water, or an existing floor condition. Rinse or reclean only if the floor and machine instructions allow it, then ask the site supervisor to inspect the surface before reopening it.