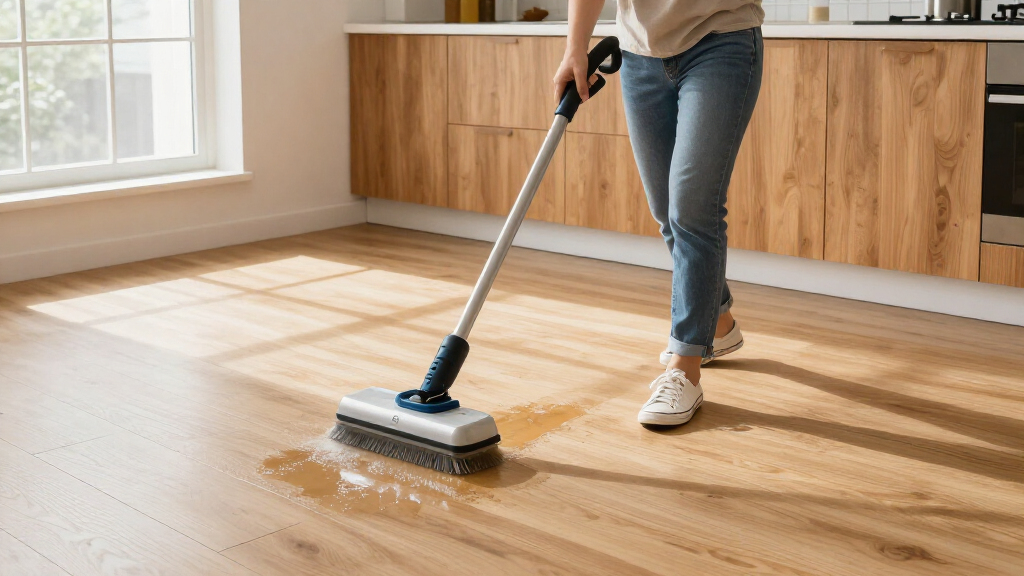

Use this guide to clean a sealed hard floor with a cordless floor scrubber and leave the machine ready for its next use. It is for first-time users and anyone who needs a practical routine for preparing the floor, choosing a cleaning solution, operating the scrubber, and cleaning its parts afterward. Most rooms take 30-60 minutes, including setup and cleanup; drying time varies by floor and room conditions.

Get cleaning gear delivered free with Prime
- Fast, free delivery on millions of items
- Prime Video, Amazon Music and more included
- Member-only deals all year

Qimedo Cordless Electric Mop M3, 6000mAh, 2-in-1 Power Scrubber & Mop
- ✔ Brand: Qimedo
- ✔ Model: YD-QJS1804SS-PRO1
- ✔ Battery: 6000 mAh; description states two batteries
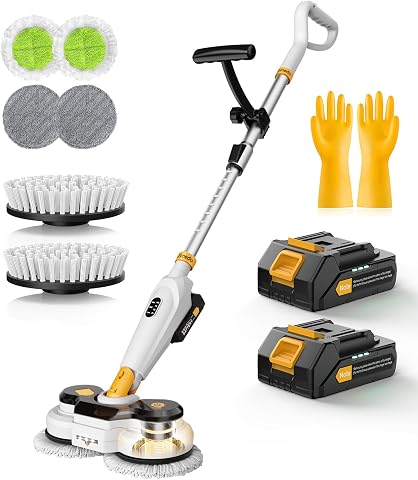
Qimedo Cordless Electric Mop M3, 6000mAh, 2-in-1 Floor Scrubber & Spin Mop
- ✔ Brand: Qimedo
- ✔ Model: YD-QJS1804SS-PRO1
- ✔ Battery: Two 6000 mAh batteries; 21V listed

VMAI Cordless Electric Floor Scrubber and Mop
- ✔ Brand: VMAI
- ✔ Power: Cordless; dual rotating motors
- ✔ Battery: Detachable and removable; capacity not stated
Difficulty: Beginner | Time: 30-60 minutes
What You’ll Need
Tools & Materials:
- Cordless floor scrubber with its supplied brush or pad
- Manufacturer-approved charger
- Cleaning solution compatible with both the machine and floor
- Measuring cup if the solution must be diluted
- Broom or vacuum
- Clean water
- Lint-free cloth or towel
- Wet-floor sign or another way to keep people off the damp area
Knowledge:
- Basic ability to operate a powered household appliance
- Ability to identify the floor type or check the flooring manufacturer’s care instructions
Read the scrubber manual and the cleaner label before starting. Product models vary: tank locations, controls, solution ratios, brush types, and drying methods are not universal. Follow the instructions for your machine and floor when they differ from this guide. Do not use a scrubber on carpet, untreated wood, or any surface the floor maker or scrubber maker says to avoid.
Qimedo Cordless Electric Mop M3, 6000mAh, 2-in-1 Power Scrubber & Mop
The Qimedo M3 earns the top spot because it is the only pick here that explicitly extends its cleaning range from floors to bathtubs. Its IPX7-rated brush head is described as submersible, giving buyers a way to tackle bath surfaces without treating the unit like a floor-only appliance. Three modes reach 800 RPM, so the scrubber offers a more clearly specified power range than VMAI.Its adjustable 49-inch handle and rotating head are designed to reduce bending, and the listed two-battery setup supports up to 420 minutes on low speed. That long figure needs context: higher-speed use reduces runtime, and the description does not give a separate duration for those modes. Compared with the B0H9KC7C8Z, this model has a slightly shorter handle but gains stated bathtub capability; the other Qimedo’s description specifically excludes tubs and submersion. We would skip this pick if you want a clearly documented lightweight unit, since no weight is provided and it may feel heavy during extended use.
Pros:
- Brush head is rated IPX7 and described as suitable for bathtub cleaning.
- Three selectable speeds reach 800 RPM.
- Adjustable 49-inch handle and rotating brush head help limit bending.
- Includes eight brush and cloth attachments and lists a 2.5-hour charging time.
Cons:
- Runtime drops significantly at higher speeds.
- No weight information is provided, and extended use may feel heavy.
- The 49-inch handle is shorter than the other Qimedo model’s stated 50-inch reach.
Best for: Buyers who want one cordless scrubber for hard floors and bathtub cleaning, with selectable speed and an adjustable handle.
Not ideal for: Shoppers who need a stated lightweight design, or who expect maximum-speed cleaning to last as long as the low-speed runtime claim.
Bottom line: Choose this Qimedo when bathtub compatibility matters as much as powerful cordless floor scrubbing.
“Choose this Qimedo when bathtub compatibility matters as much as powerful cordless floor scrubbing.”
Qimedo Cordless Electric Mop M3, 6000mAh, 2-in-1 Floor Scrubber & Spin Mop
For buyers focused on uninterrupted floor cleaning, this Qimedo M3 has the most explicit battery package in the lineup: two 6000 mAh batteries and a stated low-speed runtime of up to 420 minutes. It shares the other Qimedo’s three modes and 800 RPM maximum, so its advantage is not a higher listed spin speed; it is the combination of battery provision, a 50-inch telescopic handle, and floor-focused cleaning features.The removable 450 ml tank and spray function let us apply water as needed, while the display shows battery percentage and mode. Those details make it easier to monitor a cleaning session than the VMAI’s simpler on-demand spray description. There is a meaningful limit: the product information says this unit is not suitable for tubs or submersion. If your cleaning list includes bathtub surfaces, the B0GDWFR23L is the more suitable Qimedo. Runtime is also stated for low speed, so we should not assume the same endurance at 800 RPM.
Pros:
- Two 6000 mAh batteries are listed in the supplied specifications.
- 50-inch telescopic handle provides the longest stated reach here.
- Three modes reach 800 RPM, with a display for battery percentage and mode.
- Removable 450 ml water tank and spray function support controlled application.
Cons:
- Description says the unit is not suitable for tubs or submersion.
- Up to 420 minutes applies to low-speed cleaning; higher-speed runtime is not stated.
- Compared with the bathtub-capable Qimedo, its surface versatility is narrower.
Best for: Floor-focused buyers who value a two-battery setup, a longer telescopic handle, and a removable spray tank.
Not ideal for: Anyone who wants a scrubber for bathtub cleaning or needs a submersible brush head.
Bottom line: Pick this M3 for long-reach floor cleaning and its listed two-battery package, provided you do not need bathtub use.
“Pick this M3 for long-reach floor cleaning and its listed two-battery package, provided you do not need bathtub use.”
VMAI Cordless Electric Floor Scrubber and Mop
VMAI takes a floor-care-first route instead of competing with Qimedo on stated spin speed. Its dual rotating motors work with both scrubbing brushes and soft mop pads, giving buyers a choice between more assertive cleaning and a gentler contact surface for sealed hard floors. The detachable battery can be charged separately or replaced, a practical design difference from the Qimedo listings, which emphasize battery capacity and runtime.On-demand spray helps control moisture, while swivel steering, self-propelled movement, and front LEDs aim to make floor passes easier to guide. That combination may suit routine maintenance better than a model chosen primarily for high RPM. The tradeoff is less certainty about capacity: the supplied description gives no RPM, battery duration, or charging time. A spare battery is sold separately, and the stated surface guidance is limited to sealed hard floors. Compared with either Qimedo, VMAI offers the clearest soft-pad option but less documented reach and power.
Pros:
- Includes scrubbing brushes and soft pads for different floor-care tasks.
- Detachable battery can be charged separately or replaced.
- Swivel steering, self-propelled design, and LED headlights support maneuvering.
- On-demand spray helps control moisture on sealed floors.
Cons:
- A spare battery is sold separately.
- No RPM, runtime, or charging-time figures are supplied.
- Surface suitability beyond sealed hard floors is not stated.
Best for: People cleaning sealed hard floors who want both brush and soft-pad attachments, controlled spray, and steering assistance.
Not ideal for: Buyers who need stated RPM or runtime figures, bathtub compatibility, or confirmed suitability for surfaces beyond sealed hard floors.
Bottom line: Choose VMAI for flexible brush-and-pad cleaning on sealed floors, accepting that its power and endurance are less specified.
“Choose VMAI for flexible brush-and-pad cleaning on sealed floors, accepting that its power and endurance are less specified.”
As an Amazon Associate we earn from qualifying purchases.
Before You Start
Move small furniture, rugs, cables, and loose objects out of the cleaning area. Keep children and pets away while the scrubber is running and while the floor is wet. Check the battery indicator and charge the machine if needed; charging time varies by model. Do not use a damaged charger, frayed cable, cracked tank, or machine that leaks. If the floor has loose grit, remove it first so the brush does not drag particles across the surface. Open a window if the cleaner label calls for ventilation.
Step-by-Step Instructions
Step 1: Check the floor and scrubber
Confirm that the floor is sealed and approved for powered scrubbing. Check the manual for restrictions on tile, stone, vinyl, laminate, or sealed wood. Inspect the brush or pad for embedded grit, loose parts, or wear. Make sure the recovery tank and clean-water tank are seated correctly and that the battery has enough charge for the area.
Tip:Test an unfamiliar cleaner or floor combination in a small, hidden spot. Wait for the patch to dry and check for discoloration, dulling, or a changed surface feel.
Check: The floor type is permitted by the manuals, the brush is clean and attached, the tanks fit firmly, and the battery indicator shows enough charge.
Step 2: Clear and dry-clean the area
Move furniture and rugs, then sweep or vacuum the floor. Pick up visible debris by hand. Pay attention to corners and edges, where hair, grit, and crumbs collect. If there is a sticky spill, remove as much as possible with a cloth before using the scrubber.
Tip:Do not use the scrubber to collect large debris unless the manual specifically allows it. Debris can clog the intake, mark the floor, or interfere with the brush.
Check: No loose stones, sand, hair clumps, cables, or other items remain in the path you plan to clean.
Step 3: Fit the correct brush or pad
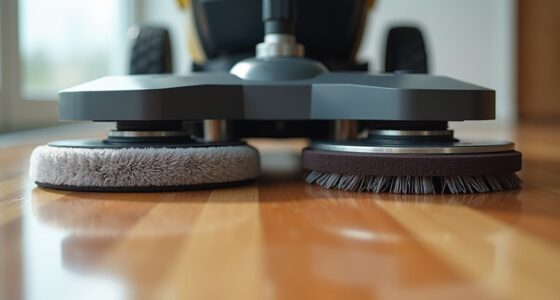
Turn the scrubber off and follow the manual to attach the brush or pad made for your floor. Match the part to the flooring and the cleaning job; a soft pad may suit routine cleaning, while a more abrasive brush may be intended only for tougher surfaces. Lock the part into place as directed and check that it does not wobble.
Tip:Do not substitute a brush or pad because it looks similar. An abrasive attachment can scratch a delicate finish.
Check: The attachment is the approved type for the floor and sits securely on the scrubber.
Step 4: Fill the clean-water tank
Remove the clean-water tank if the manual calls for it. Add the specified amount of water and, if permitted, the approved cleaning solution at the labeled dilution. Use the measuring marks or a measuring cup rather than estimating. Close the cap, wipe up drips, and reinstall the tank until it seats securely.
Tip:Never add bleach, solvents, wax, foaming products, or homemade mixtures unless the scrubber and floor instructions expressly allow them. Excess foam can reach parts that are not designed for it.
Check: The tank is below its fill limit, the cap is closed, the correct solution ratio is used, and no water leaks from the machine while it stands upright.
Step 5: Plan a route and protect the area
Choose a route that lets you finish near an exit without walking over the freshly cleaned floor. Place a wet-floor sign at the entrance or ask others to stay out. If possible, divide a large room into manageable sections so you can check tank levels and battery status between them.
Tip:Follow the floor maker’s guidance on standing water. Some materials can swell or stain if liquid sits on them.
Check: Your route covers the room without trapping you behind a wet section, and other people know to avoid the work area.
Step 6: Start the scrubber and clean in steady passes
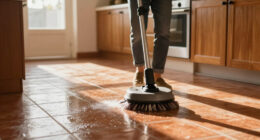
Turn the machine on as described in the manual and check for unusual noise, vibration, or leakage. Hold the handle as directed and guide the scrubber forward at a steady walking pace. Overlap each pass slightly so narrow strips are not missed. Use the machine’s normal cleaning mode for routine soil; use a stronger mode only when the manual recommends it for your floor. Avoid pushing down hard or leaving the brush spinning in one place.
Tip:Keep the machine moving. Stopping over one spot can leave excess moisture or affect the finish. For edges, use the scrubber only as close as its design allows; finish inaccessible corners with a cloth.
Check: The machine moves smoothly, applies and recovers liquid as intended, and the cleaned path has no missed strips or puddles.
Step 7: Pause to check tanks and battery
Stop the machine if the clean-water tank runs low, the recovery tank reaches its limit, or the battery indicator signals low power. Turn it off before removing tanks. Empty the recovery tank into an appropriate drain, rinse it if the manual directs, and refill the clean-water tank using the same labeled ratio. Refit both tanks before restarting.
Tip:Do not keep operating with a full recovery tank. Some models stop recovering liquid at capacity, which can leave the floor wetter.
Check: The recovery tank is below its limit, the clean-water tank has enough liquid for the next section, and the machine restarts without an alert.
Step 8: Finish the floor and let it dry
Complete the remaining passes, then switch the scrubber off. Look across the floor from several angles for streaks, missed patches, or standing liquid. If the manual permits, make a dry pass or use a clean, dry cloth to remove excess moisture. Keep people and pets off the floor until it is dry to the touch.
Tip:Drying time depends on how much liquid was used, ventilation, and the floor material. Do not guess that the floor is safe based only on its appearance.
Check: The surface has no visible puddles or residue, and it is dry before normal foot traffic resumes.
Step 9: Empty, rinse, and store the scrubber
Turn the machine off and remove the tanks according to the manual. Empty dirty water, rinse the recovery tank and filter if permitted, and wash the brush or pad as directed. Remove hair and fibers from the brush. Wipe the housing and tank openings with a damp cloth; do not immerse the powered unit. Let washable parts dry fully before reassembly. Store the machine upright in a dry place and charge it according to the battery instructions.
Tip:Leaving dirty water in the tank can cause odor and buildup. Do not seal damp parts in a closed compartment.
Check: The dirty-water tank is empty, washable parts are clean and dry, the machine is free of drips, and it is stored as the manual directs.
Common Mistakes to Avoid
- Using a cleaner that foams too much or is not approved for the floor. — Check both manuals and the cleaner label; measure the stated dilution and use only compatible products.
- Starting before removing grit and loose debris. — Sweep or vacuum first, especially near entryways, corners, and under furniture.
- Holding the brush in one place or pressing down hard. — Use steady, overlapping passes and let the machine’s brush do the work.
- Putting the scrubber away with dirty water or damp parts. — Empty the recovery tank, clean washable parts, and let them dry before storage.
Troubleshooting
Problem: The scrubber will not start.
Solution: Check the battery charge, power switch, tank seating, and any safety lock or alert described in the manual. Turn the unit off before reseating tanks. Stop using it if the battery, charger, or housing appears damaged.
Problem: The machine leaves the floor very wet.
Solution: Stop and check whether the recovery tank is full, the suction opening or filter is blocked, or a tank is seated incorrectly. Clean or reseat parts as instructed, then test on a small area. Do not continue if liquid is leaking.
Problem: The floor has streaks or sticky residue after drying.
Solution: Check that the cleaner was diluted correctly and approved for the surface. Rinse the tank and brush if residue may have built up. Follow the floor instructions for a clean-water pass or hand wipe, then let the area dry.
Problem: The brush stops, makes an unusual noise, or leaves marks.
Solution: Switch off the machine and inspect the brush for wrapped hair, trapped debris, or damage. Remove obstructions as directed and refit the attachment. Replace a worn or damaged part; stop if the noise continues.
What Success Looks Like
The floor is evenly cleaned, with no visible grit, missed strips, puddles, or cleaner residue after drying. The surface has no new scratches, dull patches, or discoloration. The recovery tank is empty, washable parts are clean and dry, and the scrubber is stored according to its manual.
Next Steps
After each use, check the brush, filter, tank seals, and battery for wear or buildup. Follow the manual’s schedule for replacing pads and filters, and charge the battery using the supplied method. For persistent stains, damaged flooring, leaks, or unusual machine behavior, stop and consult the floor maker or scrubber support team before another cleaning session.
Frequently Asked Questions
Can I use a cordless floor scrubber on hardwood?
Only if the floor is sealed and both the floor maker and scrubber manual approve that surface and attachment. Use the specified low-moisture method, and do not let liquid sit on the floor.
Can I put any floor cleaner in the tank?
No. Use only products permitted by the scrubber manual and suitable for the floor. Some cleaners foam or leave residue that can affect recovery or the surface. Follow the label’s dilution directions.
How many passes should I make?
Use the number of passes recommended by the manual and cleaner label. For routine soil, one steady pass over each strip may be enough; overlap slightly. For a stubborn spot, use an approved method rather than repeatedly scrubbing one place.
What should I do if the floor stays wet?
Stop, turn off the machine, and check the recovery tank, filter, intake, and tank seating. Clear a blockage only as the manual permits. Keep people off the area until it dries; contact support if recovery remains poor.
Do I need to clean the scrubber after every use?
Yes. Empty the recovery tank and clean the brush, filter, or other washable parts as the manual directs. Drying these parts before storage helps limit odor and buildup.