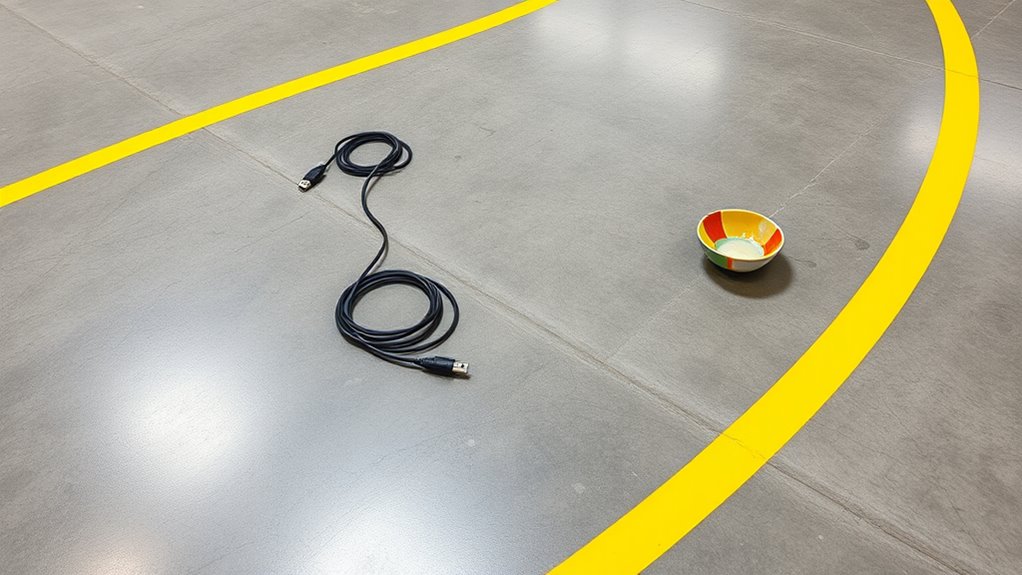

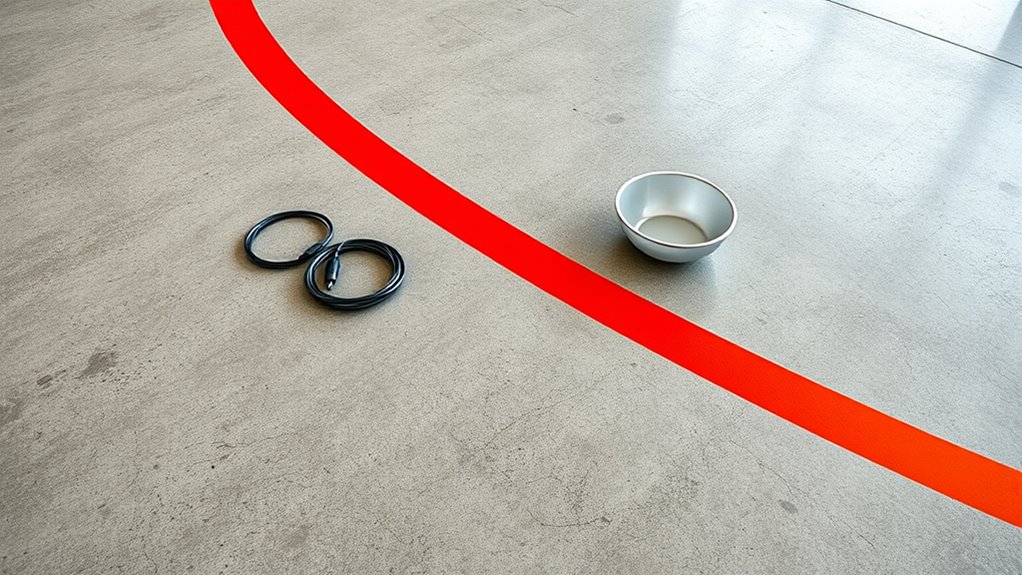
To keep cords and bowls safe on polished concrete, mark no-go lines using durable, high-contrast materials like epoxy-based paints or textured tapes that stand out and stay put. Clearly define high-risk zones and pathways with bright colors and tactile cues to prevent slips or trips. Regularly inspect and reapply markings as needed, ensuring they remain visible and effective. For detailed tips on creating and maintaining these safety lines, continue exploring best practices.
Key Takeaways
- Clearly delineate high-risk zones with contrasting, durable markings to prevent cords and bowls from encroaching into unsafe areas.
- Use color-coded floor markings and symbols to guide safe pathways and restrict access to hazard zones.
- Regularly inspect and reapply line markings and signage to maintain visibility and effectiveness against wear and chemical damage.
- Incorporate textured tapes or anti-slip additives in markings for added traction and safety on polished surfaces.
- Maintain wide, unobstructed no-go pathways and ensure proper lighting to enhance visibility and safety during all shifts.

Oreck Commercial Orbiter Hard Floor Cleaner Machine, Multi-Purpose Floor Cleaning, Random Orbital Drive, Wide Cleaning Path, 50-Foot Long Cord, ORB550MC, Gray/Red
MULTI-PURPOSE CLEANING: Commercial grade cleaner and effective on all types of flooring surfaces. Sand, refinish, strip, scrub, wax,...
As an affiliate, we earn on qualifying purchases.
Assessing High-Risk Zones on Your Concrete Surface
To effectively assess high-risk zones on your concrete surface, start by inspecting areas prone to damage or wear, such as high-traffic pathways or locations with heavy equipment. Look for cracks, chips, or uneven spots that could weaken the surface or create tripping hazards. Pay close attention to edges and corners, which often experience more stress. Check for signs of oil, grease, or chemical spills, as these can make the floor slippery and compromise its integrity. Note areas with standing water or frequent moisture, since these increase the risk of deterioration. Document any damage or problem spots so you can prioritize repairs or marking efforts. Regular inspections help you identify potential hazards early, ensuring your floors remain safe and durable over time. Incorporating proper maintenance routines, including cleaning and exfoliation, can further prolong the surface’s lifespan and safety.

HHQ Commercial Floor Scrubber Machine with Brushes and Pads, Heavy Duty Floor Cleaner Polisher and Buffer- Deep Cleaning Tile and Grout, Hardwood Floors and Carpets without Getting on Hands and Knees
Kit Included: 1 Orbital Floor Buffer & Scrubber Machine, 2 Polishing/ Stripping Pads, 3 Scrub Brushes, 1 Microfiber...
As an affiliate, we earn on qualifying purchases.
Selecting the Right Marking Materials for Polished Floors

Choosing the right marking materials is vital for your polished floors’ safety and longevity. You need options that are durable, highly visible, and provide good contrast against the surface. Additionally, consider non-slip materials to guarantee markings stay effective without creating hazards. Incorporating color accuracy in your markings ensures consistent visibility under different lighting conditions.
Durable Marking Options
What makes a marking material truly durable on polished concrete floors? First, it must adhere strongly without peeling or cracking over time. Second, it should resist abrasion from foot traffic and equipment. Finally, it needs to withstand cleaning chemicals without fading or deteriorating. To achieve this, consider options like epoxy-based paints, which bond well and last long; thermoplastic markings, known for durability and quick installation; and polyurethane coatings, which offer excellent wear resistance. These materials are designed to withstand the constant use and cleaning routines typical of polished floors. Moreover, understanding the offensive security tactics employed by ethical hackers can help in choosing the most resilient markings. Selecting the right durable marking ensures your lines stay clear and intact, helping keep cords and bowls safely in place without frequent touch-ups or repairs.
Visibility and Contrast
Have you considered how essential visibility and contrast are for effective floor markings on polished concrete? High contrast makes markings stand out, reducing accidents and guiding people safely. Bright colors like yellow or white work well against dark floors, while darker markings may blend in. Choose materials with reflective or matte finishes to match lighting conditions and floor shine. Test your options in the actual environment to ensure clarity from different angles. Proper contrast helps everyone quickly identify boundaries, walkways, or hazards, especially in busy or dimly lit areas. Incorporating visual cues into your markings can further enhance their effectiveness for all users.
Non-Slip Materials
Selecting the right non-slip materials for polished concrete floors is essential to guarantee safety without compromising appearance. You need materials that provide traction while blending seamlessly with the surface. First, consider textured tapes or decals designed specifically for polished surfaces—they’re durable and offer excellent grip. Second, look for epoxy or urethane coatings with anti-slip additives; these can be applied directly and maintain a sleek look. Third, utilize rubber or silicone mats in high-traffic areas or around hazards; they’re easy to install and remove. Prioritize materials that won’t wear down quickly, ensuring they stay effective over time. Additionally, incorporating anti-slip additives into coatings can further enhance traction on polished surfaces. By choosing the appropriate non-slip options, you enhance safety without sacrificing the polished aesthetic of your floors.
Bissell Commercial BigGreen BGFS650 Hercules Scrub and Clean Floor Machine, Green
Brush Speed (Rpm): 2200 Rpm
As an affiliate, we earn on qualifying purchases.
Designing Effective No-Go Pathways and Boundaries
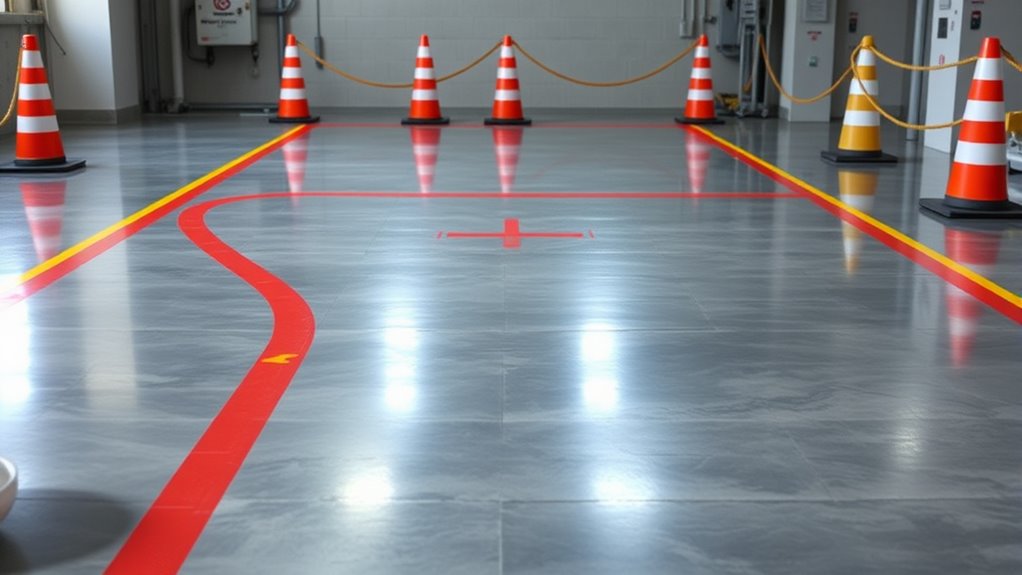
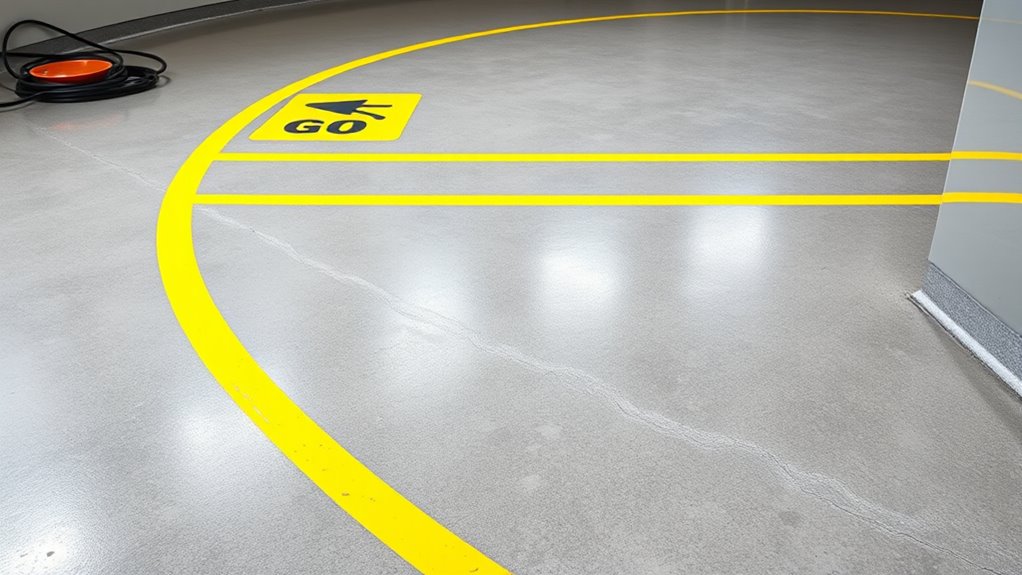
Designing effective no-go pathways and boundaries on polished concrete surfaces requires careful planning to guarantee safety and clarity. Start by clearly defining high-risk areas, such as where cords, bowls, or equipment are frequently used. Use contrasting colors or textures to make boundaries stand out, ensuring they’re visible even in low light. Keep pathways unobstructed and wide enough for easy navigation, especially in busy areas. Incorporate visual cues like arrows or symbols to guide movement and prevent accidental crossings. Test the visibility and understanding of your boundaries from different angles and distances. Incorporate rustic lighting to enhance visibility during nighttime or low-light conditions. Consistency is key; maintain the same style and placement throughout the space. Properly designed pathways help prevent accidents and keep everyone aware of safe zones, reducing the risk of slips or trips on polished surfaces.

Bissell BigGreen BGFS5000 Portable Two Brush Floor Scrubber & Polisher, Polypropylene, 13"" W x 7"" D x 44"" H, White & Green
A small portable scrubbing machine that is perfect for cleaning brick, carpet, ceramic, concrete, cork, hard wood, laminate,...
As an affiliate, we earn on qualifying purchases.
Applying and Maintaining Durable Line Markings
Applying and maintaining durable line markings on polished concrete surfaces requires careful preparation and the right materials to guarantee longevity. First, clean the surface thoroughly to remove dust, debris, and oil, ensuring proper adhesion. Second, choose high-quality, epoxy or urethane-based paints designed for concrete, resistant to wear and chemical damage. Third, apply the markings with precise tools, following manufacturer instructions for thickness and drying time. To sustain the lines, regularly inspect for wear or fading and touch up as needed. Keep the surface clean to prevent dirt buildup that can damage the markings. Proper sealing and sealing maintenance also help protect the lines from moisture and chemicals, extending their lifespan. Additionally, understanding the importance of surface preparation and correct application techniques is crucial for achieving durable results. Consistent upkeep ensures your markings stay clear and effective over time.
Incorporating Visual Cues for Enhanced Safety

Using bright color coding and clear floor markings helps you quickly identify safe pathways and hazard zones. Strategic placement of signs guides movement and prevents accidents in busy areas. Incorporating these visual cues keeps your environment safer and more efficient. Additionally, incorporating wall organization systems can further enhance visual clarity and order in your space.
Bright Color Coding
Have you ever wondered how bright color coding can markedly improve safety on polished concrete surfaces? Using vivid colors creates immediate visual cues that alert you to potential hazards or safe zones. To maximize effectiveness, consider these steps:
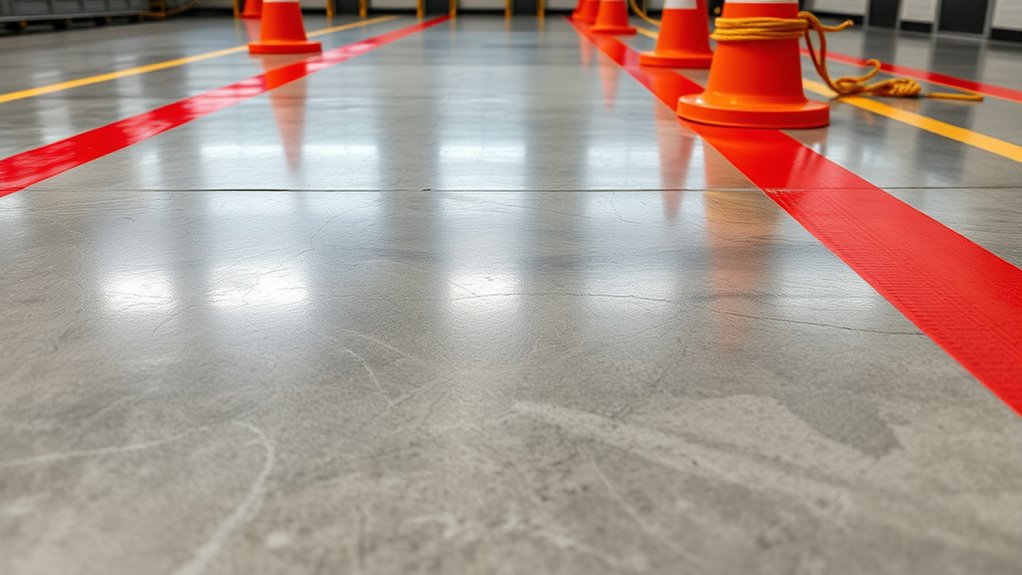
- Apply bold, contrasting colors like yellow or red to highlight no-go zones or danger areas.
- Use consistent color schemes throughout the workspace to prevent confusion.
- Pair colors with symbols or signage for added clarity, reinforcing the visual message.
- Incorporate visual cues to enhance recognition and understanding of safety zones.
Bright color coding draws attention quickly, reducing the risk of accidents. It helps you and others recognize restricted areas, cords, or spills at a glance. When implemented correctly, it creates a safer environment and minimizes hazards on polished concrete floors.
Clear Floor Markings
Clear floor markings serve as essential visual cues that guide movement and indicate hazards effectively. They help you quickly identify restricted areas, walkways, and zones where cords or equipment shouldn’t intrude. Using brightly colored lines or patterns, you can delineate safe pathways, keeping your staff aware of potential dangers. These markings should contrast sharply with the polished concrete surface to guarantee visibility at all times. Regularly inspect and maintain the markings to prevent fading or wear that could reduce their effectiveness. By clearly defining safe zones and hazard areas, you reduce the risk of accidental trips or damage to cords and bowls. Proper floor markings foster a safer environment, making it easier for everyone to navigate and avoid dangerous zones seamlessly. Incorporating visual cues through floor markings is an effective way to enhance overall safety and promote awareness in your workspace.
Strategic Placement of Signs
Strategic placement of signs is essential for maximizing safety on polished concrete surfaces. You want signs where they’re clearly visible and catch attention quickly. First, position signs near high-traffic areas, such as entrances and exits, so everyone notices them as they move through. Second, place signs at eye level, ensuring they’re easy to read without obstruction. Third, use contrasting colors and bold lettering to make signs stand out against the polished surface. This visual contrast draws attention and reinforces safety messages. By thoughtfully positioning signs, you guide foot traffic safely around cords and bowls, reducing accidents. Proper placement not only warns but also reminds everyone to stay vigilant, making your space safer for everyone.
Regular Inspection and Reapplication of No-Go Lines
Regular inspection and reapplication are essential to maintaining the integrity of No-Go Lines on polished concrete surfaces. You should check the lines regularly for signs of wear, fading, or damage, especially in high-traffic areas. If you notice the lines starting to fade or peel, reapplying the markings promptly prevents accidents and keeps safety clear. Use appropriate materials designed for polished concrete to guarantee durability and visibility. Keep a schedule for inspections, such as monthly or quarterly, depending on usage. Reapplication is quick and straightforward if you follow the manufacturer’s instructions. Doing this consistently assures that your safety zones remain visible and effective, reducing the risk of cords or bowls causing accidents. Regular maintenance helps you preserve a safe environment for everyone.
Frequently Asked Questions
How Often Should No-Go Lines Be Refreshed for Maximum Safety?
You should refresh no-go lines every six months to guarantee maximum safety. Regular updates help identify any worn or faded markings that could cause accidents. Keep an eye on high-traffic areas and replace lines promptly if they become less visible. Consistent maintenance maintains clear boundaries, preventing trips and injuries. By staying proactive with your no-go lines, you create a safer environment for everyone working or walking in the space.
What Are the Best Colors to Maximize Visibility on Polished Concrete?
You should choose bright, high-contrast colors like yellow, orange, or neon green to maximize visibility on polished concrete. These colors stand out against the reflective surface, making no-go lines easily noticeable. Use bold, thick markings for clarity and guarantee they’re well-maintained and refreshed regularly. This way, you create a clear, effective visual barrier that keeps cords and bowls safe, reducing trip hazards and accidents.
Can No-Go Lines Be Customized for Different Industrial Environments?
Absolutely, no-go lines can be tailored for different industrial environments. For example, in a manufacturing plant, you might use bright yellow lines near heavy machinery to warn workers of danger zones. In a food processing facility, eco-friendly green lines could mark clean zones. Customization helps guarantee safety protocols match specific hazards, making it easier for everyone to recognize and respect boundaries, reducing accidents and improving overall safety.
How Do Weather Conditions Affect the Durability of Line Markings?
Weather conditions can substantially impact the durability of line markings. In wet or humid environments, moisture can weaken the adhesive or cause the paint to wash away, reducing visibility. Extreme temperatures, both hot and cold, can cause the markings to crack, peel, or fade over time. To guarantee longevity, you should choose weather-resistant materials and apply them during ideal conditions, maintaining them regularly for the best results.
Are There Eco-Friendly Options for Marking Materials on Polished Floors?
Yes, you can choose eco-friendly marking options for polished floors. Look for water-based or low-VOC paints, which emit fewer pollutants and are safer for the environment. You might also consider chalk or biodegradable tapes, which are easily removable and leave minimal residue. These options help you maintain safety and visibility while reducing your ecological impact, ensuring your space stays sustainable and compliant with green building standards.
Conclusion
By clearly marking no-go lines on your polished concrete, you create a safety net that keeps cords and bowls out of harm’s way. Think of these boundaries as the guiding stars of your workspace, leading everyone safely through potential hazards. Regular inspections and touch-ups ensure your safety map stays sharp and reliable. With these simple steps, you’ll turn your concrete surface into a well-orchestrated space where safety shines bright like a lighthouse guiding the way.