I remember the first weekend I let a robot cleaner loose in my house — excitement mixed with a nagging worry that it would disappear under a couch forever. You may have felt that same tug: hopeful about reclaiming time from chores, but wary of tangled cords, lost maps, or a Roomba wedged under low furniture. This guide gives practical robot-vacuum-setup-tips so your smart vacuum mapping actually saves you time instead of creating new tasks.
Good robot vacuum mapping starts with simple choices: where you place the dock, how you clear floors, and which areas you mark as no-go. Brands like ECOVACS DEEBOT, iRobot Roomba, and Wyze use different sensors — LiDAR, cameras, or bump-based logic — so your robot vacuum setup should match the tech it uses. Follow these steps to reduce stuck runs and make mapping cleaner and more reliable.
Key Takeaways
- Proper robot-vacuum-setup-tips cut the time you spend fixing stuck runs and untangling brushes.
- Smart vacuum mapping depends on dock placement, clear pathways, and correct sensor care.
- Different models (ECOVACS, iRobot, Wyze) need slightly different setup choices based on navigation type.
- Address common failure modes early: low-clearance furniture, cords, tassels, and high-pile rugs.
- A clean, well-prepared first map run helps your vacuum save accurate maps and dock reliably.
Why mapping matters for your robot vacuum and cleaning time

Mapping gives your robot a layout of your home so it can plan routes and target problem areas. With a stored map, your device spends less time repeating the same spots and more time covering missed areas. This improves robot navigation efficiency and leads to measurable cleaning time savings for busy households.
How mapping reduces manual intervention
When a vacuum knows room boundaries and obstacles, you intervene less. You can set no-go zones for low-clearance couches, secure areas with cords, and block off stair edges. That control helps reduce manual intervention and limits the need to rescue a stuck unit mid-cycle.
Impact on household chore time (U.S. time-use context)
Americans average roughly 1.89 hours per day on housework. A mapped robot cuts the minutes you spend freeing units and redoing missed cleaning. Over weeks, this adds up to real cleaning time savings and frees time for higher-priority tasks.
Mapping vs random navigation: fewer stuck runs and more consistent coverage
Random or bump-and-go vacuums wander until they hit an obstacle, which raises the chance of getting stuck on thresholds, rugs, or cords. Mapped navigation follows planned paths, yields more consistent coverage, and lowers the odds of repeated interruptions. You get predictable cycles and better overall robot navigation efficiency.
Choosing the best dock location for reliable returns
Place your robot’s base where it can see and reach it easily. The dock serves as a fixed point for mapping and homing, so pick a spot with clear approach paths and steady lighting when possible. Small changes in position during the first runs can make a big difference in reliable docking later.

Follow basic dock placement tips to reduce failed returns. Manufacturers often suggest leaving about 1.5–3 feet of space on each side and roughly 4 feet in front. That recommended docking clearance gives the robot room to align, correct its angle, and push onto the charging contacts without bumping furniture.
Clearance requirements around the dock
Give the base an open approach. Side space prevents scraping and misalignment. Front space lets the vacuum correct its path as it reverses or pushes forward into the charger. If you must place the charger location near furniture, temporarily move items during the initial mapping run so the robot can learn the exit and return paths.
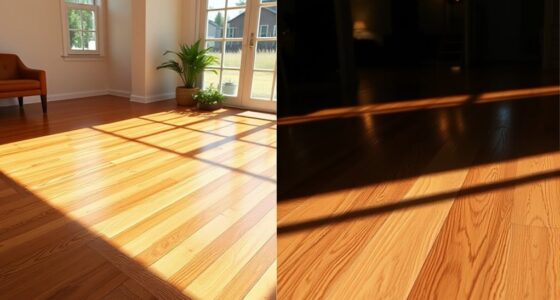
Hard floor vs carpeted placement and docking reliability
Placing the dock on a hard surface usually improves contacts and alignment. A dock on hard floor reduces slippage and keeps the station steady. Plush carpet can tilt the base or hide the charging pads, which leads to missed docks and partial charges.
Avoiding stairs, tight corners, and low-light trap areas
Keep the base away from stair edges and cramped corners. Stairs create confusing geometry for navigation and risk accidental falls for errant robots. Tight corners limit available approach vectors. For models using optical sensors, provide some ambient light near the charger location so the robot can find its home. LiDAR systems handle low light better, but clear space still matters.
| Placement Factor | Recommended Distance | Why it helps |
|---|---|---|
| Side clearance | 1.5–3 ft | Prevents side collisions and allows angle correction during docking |
| Front clearance | At least 4 ft | Provides room for approach, reversing, and final alignment |
| Floor type | Hard floor preferred | Improves contact reliability and prevents base tilt |
| Lighting | Ambient light for optical models | Makes sensor-based docking more reliable |
| Avoid | Stairs, tight corners | Reduces confusion, prevents falls and failed returns |
Preparing rooms before the first map run
Before your robot starts its first mapping sweep, take a few minutes for simple pre-map room prep. These quick steps cut down on stuck runs and protect the motor and brushes from damage.

Start by a fast scan to clear small hazards from floors and low gaps. Small screws, nails, Lego pieces, and sharp objects can jam wheels or scratch floors. Remove toys, loose change, and remotes from under sofas and tables so the bot can pass narrow spaces without stalling.
Next, tidy cords in entertainment areas and home offices. Cables that trail across the floor are common tangle points for brushes and wheels. Use clips, cord covers, or twist ties to anchor cables off the path and reduce trips for both your vacuum and family members.
Check for water hazards near pet bowls, plant saucers, and bathroom mats. Empty or elevate pet bowls and move any open liquids away from the route. Vacuuming moisture can ruin sensors and motors, so eliminate spill risks before the map run.
Block off stairs and fragile zones during the first mapping pass. Close doors, place lightweight gates, or set up temporary barriers so mapping focuses on intended areas and avoids accidental falls.
Use the short checklist below to speed your pre-map room prep. It helps you tackle high-risk spots fast and keeps mapping efficient.
| Task | Why it matters | Quick fix |
|---|---|---|
| Clear small hazards | Prevents jams, scratches, and brush damage | Pick up screws, toys, and loose items before starting |
| Tidy cords | Stops tangles and wheel wrap-ups | Use clips, cord channels, or lift cables off the floor |
| Secure pet bowls | Avoids water hazards that can short motors | Remove bowls or place them on a mat away from the route |
| Clear under furniture | Prevents stalls in narrow gaps | Move remotes and toys; check for small debris under couches |
| Block stairs and edges | Protects the robot from falls during mapping | Use doors, baby gates, or temporary barriers |
Using furniture adjustments to prevent wedging under sofas
Low-clearance sofas and coffee tables cause many stuck runs. You can make small furniture adjustments to create safe, consistent routes for your robot. Aim for at least 4 inches of clearance so most slim robot vacuums can pass beneath without getting trapped.

Raising low-clearance furniture with risers or leg extensions
If your couch sits too low, use furniture risers, caster replacements, or threaded leg extensions to raise furniture by a few inches. These options let you raise furniture without reupholstering or buying new pieces. Lightweight plastic risers from Home Depot or solid wood blocks work well for long-term solutions.
Rearranging chairs, bar stools, and crossbars for clear pathways
Chairs and stools with crossbars create trap points. Move them into clusters or tuck them under tables so the robot sees a continuous opening. Test routes during a mapping run to confirm the bot can pass freely and avoid narrow gaps that cause wedging.
Temporary blockers and how they teach your vacuum boundaries
Place temporary blockers like pool noodles, books, or purpose-built furniture blockers where you want to keep the robot out. Use them during mapping so the unit learns restricted spots and updates the map accordingly. These physical barriers help teach boundaries and reduce repeat errors.
When you combine small raises, smarter layouts, and temporary blockers you reduce stuck runs and keep cleaning on schedule. Periodically check clearance after redecorating to keep pathways clear for your robot vacuum.
Optimizing sensor performance and routine maintenance
Keeping your robot vacuum in top shape starts with a few simple habits. Regular care helps the unit read rooms correctly, avoid false cliffs, and dock reliably. A short weekly check prevents small problems from becoming frequent stuck runs.

Wipe optical and cliff sensors with a dry, lint-free cloth to remove dust and smudges. Clean sensors before major mapping runs and after heavy shedding seasons. Proper sensor maintenance reduces misreads that can send the robot into tight spots or stop it from crossing thresholds.
Remove hair, string, and debris from main brushes, side brushes, and wheel assemblies. Good brush maintenance keeps traction steady on hardwood and carpet. If brushes bind, the robot may spin in place, stall, or report navigation errors.
Inspect caster and drive wheels for trapped fibers and grit. Clear wheel hubs and axle areas so the robot moves smoothly. Clean wheels often to improve localization during mapping and to lengthen the life of the drive motor.
Empty the dustbin and replace filters on schedule. A full bin shifts weight and can change how sensors read surfaces. Keeping the bin and filters fresh supports consistent mapping and better cleaning results.
Keep your app and firmware updates current. Brands like Ecovacs and iRobot release firmware updates that can improve navigation and docking behavior. Apply firmware updates when available to get sensor tweaks and smarter pathing.
If your model offers sensor calibration or sensitivity settings, follow the manufacturer guide. Some Roomba and DEEBOT models let you mask or adjust sensors to avoid false cliff detections under low-clearance furniture.
| Maintenance Task | How Often | Why It Helps |
|---|---|---|
| Wipe cliff and optical sensors | Weekly | Prevents false cliffs and improves mapping accuracy |
| Remove debris from brushes and wheels | Weekly or after heavy hair accumulation | Maintains traction, prevents stalls, and reduces stuck runs |
| Empty bin and change filters | After each large clean or biweekly | Keeps weight balance stable and suction consistent |
| Inspect caster wheel and wheel hubs | Monthly | Improves mobility and mapping localization |
| Install firmware and app updates | When released | May improve navigation, docking behavior, and sensor sensitivity |
Virtual barriers, no-go zones, and app mapping best practices
Use your robot’s app mapping features to keep trouble spots off limits. Draw clear no-go zones around couches, pet beds, baby gates, and delicate decor so the bot learns where not to enter. Many apps prompt you to save maps after a complete run; accept that prompt so learned areas are retained.

If the app can’t reach a shadowed corner, add physical boundaries. Magnetic strips and infrared virtual walls work well for edges or thresholds. iRobot virtual wall emitters and magnetic tape for compatible models give tangible limits where digital signals fall short.
Split large open spaces into smaller virtual rooms inside the app. That makes scheduling easier and reduces repeated mapping. When you split rooms, the robot spends less time re-scanning one big area and more time cleaning targeted zones.
For multi-floor households, create a separate map for each level and save maps before moving the bot. Carry the dock and run a full mapping cycle per floor so the app records accurate layouts. If your model struggles to save partial data, map in smaller chunks and let it finish and save each segment.
Combine digital and physical strategies for best results. Use app mapping to mark delicate areas and add magnetic strips where the robot tends to slip or wedge. This layered approach cuts stuck runs and makes routine cleaning smoother for you and your family.
Handling rugs, tassels, and high-pile carpet problems

Rugs change how your robot navigates. Long pile and loose edges can trap brushes and wheels, so plan rug handling before your first run.
When to roll up or restrict access to shag rugs
If your model struggles with shag rugs, roll them up or block access during scheduled cleans. Shag rugs with deep fibers often tangle brushes and stop progress. Use app-based no-go zones or a simple door barrier to keep the robot on solid floor until you test performance.
Taping tassels and securing fringe to prevent tangles
Tassels and fringe are common snag points. Tape them down or stitch a small hem to secure tassels. Magnetic strips work well if you prefer a removable solution. Secure corners to avoid edge-curl that can trip the bumper or wheels.
Choosing a robot height and wheel design to cope with thresholds
Robot wheel design matters for transitions. Models with larger, grippier wheels and higher clearance handle thresholds better. If rug height approaches the robot’s clearance, restrict access or pick a model with stronger drive motors and taller wheel travel. Measure common thresholds and compare them to the robot’s specs before you buy.
| Issue | Quick fix | When to consider a new model |
|---|---|---|
| High-pile shag rugs | Roll up rug or set no-go zone | Brushes stall or suction drops on every run |
| Loose tassels and fringe | Tape down tassels or hem edges | Repeated tangles that require manual cleaning |
| Low clearance at thresholds | Add a ramp or block access | Robot cannot climb common thresholds in your home |
| Edge-curl and corner snags | Secure corners with double-sided tape | Edges lift and cause frequent stops |
| Frequent rug-to-floor transitions | Test robot on transition and monitor runs | Robot wheel design shows slipping or stalling |
Dealing with mapping interruptions, battery limits, and map retention
Mapping interruptions can derail a learning run, especially when your robot hits a mid-map battery issue. You want predictable behavior: the bot should finish a section, find the dock, and save the floor plan. Small steps before and during mapping cut down on lost progress and repeated retries.

If the robot runs out of charge mid-map, watch how the model reacts. Many Roomba and ECOVACS models will return to the dock, recharge, and resume automatically. If yours does not, carry it to the dock, charge, then restart the mapping run from the app. This hands-on fix reduces failed attempts that can trigger map loss.
Divide large areas into smaller mapping chunks. Block off rooms you’ve already mapped and let the robot finish one zone at a time. This method helps you save partial maps and improves long-term map retention for models that struggle to store incomplete runs.
When you map, place the dock on hard flooring and keep it in plain view of the robot’s sensors. A visible dock simplifies docking and helps avoid repeated failures. If docking fails, nudge the robot’s front slightly to guide alignment or move the dock a few inches to a clearer spot while you observe.
Persistent failures require a checklist: update firmware and the companion app, confirm the dock is unobstructed, and retry mapping in shorter sessions. If the vacuum keeps erasing maps after failed docks, contact brand support—iRobot, ECOVACS, Wyze, and others track such issues and issue fixes.
Use temporary physical barriers to control where the robot travels while you troubleshoot. Simple items like low boxes or a short board make the device avoid problem areas. You can block already-mapped zones and force the bot to complete a new outline before you hit the save prompt in the app.
Watch the app during that first outline. Most apps prompt you to save a new area when the robot finishes a sweep. Don’t dismiss that prompt if you want stable map retention. For models with poor auto-save behavior, hit the save button immediately after a solid perimeter run.
Below is a quick comparison to help you pick the right immediate action when a mapping interruption occurs.
| Problem | Immediate Action | Why it helps |
|---|---|---|
| Robot stops from mid-map battery | Carry to dock or let it auto-return, then charge and resume | Prevents repeated failed attempts and preserves learned path data |
| Map not saved after partial run | Map smaller zones, finish one, then accept the save prompt | Incremental saves increase the chance of permanent map retention |
| Repeated failed docking | Reposition dock on hard floor, clear line of sight, nudge robot during alignment | Reduces docking troubleshoot cycles and avoids map erasures |
| Device forgets maps intermittently | Update firmware, contact manufacturer, use temporary barriers until fixed | Firmware often restores stability; barriers reduce mapping errors in the meantime |
robot-vacuum-setup-tips for specific brands and models
Picking the right setup steps depends on the model and navigation tech your robot uses. Start with a small test run to see how it maps your space. That quick run reveals lighting needs, trouble spots, and whether virtual barriers will help.

ECOVACS DEEBOT: using the HOME app and no-go zones effectively
Use the ECOVACS HOME app to draw accurate boundaries and save multiple floor maps. Set DEEBOT no-go zones around couches, pet bowls, and fringe rugs before full runs. On older DEEBOT models that rely on bump navigation, place temporary physical blockers under furniture edges to prevent wedging.
Keep firmware current to improve pathing and map retention. If a DEEBOT seems to miss areas, re-run mapping after moving the dock to a more visible spot in the room.
iRobot Roomba: dock placement, optical sensors, and light considerations
Follow Roomba dock tips by leaving clear space: about 1.5–3 feet on each side and roughly 4 feet in front. Many Roomba models use optical cues for localization and need ambient light to perform at their best. Leave a lamp on or open shades during learning runs for better accuracy.
Use iRobot virtual wall emitters for persistent blocked zones. If your Roomba struggles to find the dock, check for reflective floors or clutter near the base that can confuse sensors.
General differences: LiDAR, camera, and bump-and-go navigation strategies
Choose your approach based on technology. LiDAR models map well in low light and give consistent room shapes. Camera-based robots need light for clear visuals and work best when windows or lamps stay on during mapping.
If you own a bump-and-go model, plan a more hands-on prep routine. Use physical boundaries, pick up cords, and secure tassels to cut stuck runs. Compare LiDAR vs camera for your home: LiDAR tolerates dark hallways, camera-based units need ambient light for detail.
Match your robot-vacuum-setup-tips to the navigation system. That keeps day-to-day cleaning smoother and cuts down on rescue missions.
Conclusion
Start with a clear dock location and a quick room prep to set your robot up for success. Tidy cords, remove small hazards, and raise or block low-clearance furniture so your robot can learn clean paths. These simple robot-vacuum-setup-tips pay off with fewer stuck runs and more consistent coverage across daily cleaning cycles.
Keep sensors, wheels, and brushes clean and update firmware and apps regularly. Use manufacturer tools—no-go zones in the ECOVACS HOME app, Roomba’s mapping features, or Wyze’s boundary settings—to create better robot mapping and protect tricky areas like rugs and thresholds. Small adjustments during that first map run prevent repeat problems later.
Plan for battery limits by scheduling mapping when you can monitor the first few runs, and save maps when your model supports them. With a few minutes of setup and routine care, you’ll get a reliable robot vacuum that reduces chore time, mirrors U.S. time-use gains, and returns better results across brands like ECOVACS DEEBOT, iRobot Roomba, and Wyze.