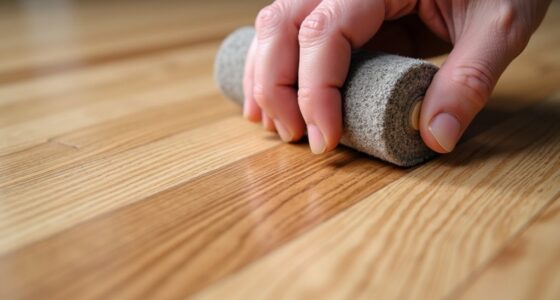
Use this guide to prepare a cordless electric floor scrubber, clean a compatible floor without soaking or scratching it, and care for the machine afterward. It is written for first-time users and assumes you can safely handle a household cleaning appliance. Cleaning time depends on room size, floor condition, and the scrubber model; charging may take longer, so check the manual before starting.

Get cleaning gear delivered free with Prime
- Fast, free delivery on millions of items
- Prime Video, Amazon Music and more included
- Member-only deals all year
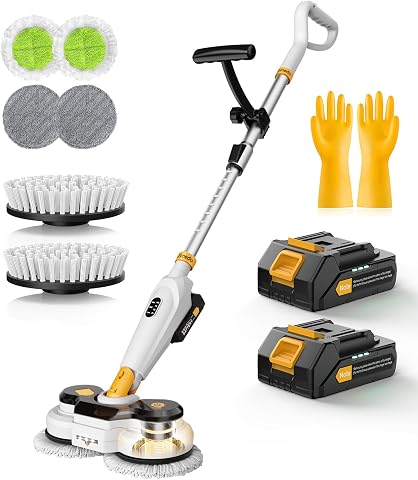
Qimedo M3 Cordless Electric Mop and Floor Scrubber
- ✔ Speed modes: 400, 600, and 800 RPM
- ✔ Water tank: Removable, 450 ml
- ✔ Battery: Two 21 V rechargeable batteries

EWORK Cordless Electric Floor Scrubber with Water Feed
- ✔ Motor: Brushless
- ✔ Voltage and batteries: 20V; two 2Ah batteries
- ✔ Speeds: 200 RPM and 400 RPM

VMAI Cordless Electric Floor Scrubber and Mop with Detachable Battery
- ✔ Motor: Dual-spin
- ✔ Battery: Detachable; spare battery sold separately
- ✔ Attachments: One pair of scrubbing brushes and two pairs of soft pads
Difficulty: Beginner | Time: 30–60 minutes, plus charging time
What You’ll Need
Tools & Materials:
- Cordless electric floor scrubber with its charger
- Manufacturer-approved brush or pad for the floor
- Compatible floor cleaner, if the manual permits one
- Clean water and a bucket, if required by the model
- Broom or vacuum
- Dry cloth
Knowledge:
- Basic ability to operate a battery-powered household appliance
- Ability to identify the floor material and check its care instructions
Read the scrubber manual and the floor manufacturer’s care instructions before adding liquid or choosing a brush. Some machines are designed for dry scrubbing, while others dispense liquid or collect dirty water. Do not use a wet scrubber on a floor that can be damaged by moisture, such as unsealed wood, unless both manufacturers approve it.
Qimedo M3 Cordless Electric Mop and Floor Scrubber
The Qimedo M3 makes the strongest all-around case for homes that want cordless scrubbing without attaching a hose. Its removable 450 ml tank and targeted spray let us apply water where the floor needs it, and the three speed modes—400, 600, and 800 RPM—provide more adjustment than the two-speed EWORK. The LED light and smart battery display also make it easier to see the cleaning mode and remaining charge while working.Its listed runtime of up to 420 minutes on low speed with two batteries is a standout claim in this group; EWORK provides no runtime estimate, and VMAI’s detachable battery can be extended with a spare only if purchased separately. That stated runtime applies to low speed, however, so it should not be read as an expectation for sustained high-speed scrubbing. The 50-inch handle and 90-degree head adjustment support access beneath some fixtures, but the M3 is not intended for tubs or immersion, and its spray button is not meant for prolonged spraying. For broad head-angle positioning and hose-fed cleaning, EWORK is the more flexible alternative.
Pros:
- Three cleaning modes reach up to 800 RPM for different cleaning intensity needs.
- Removable 450 ml tank and targeted spray avoid dependence on a garden hose.
- Two rechargeable batteries and a stated low-speed runtime of up to 420 minutes.
- LED light and battery display make controls and charge easier to monitor.
Cons:
- Not intended for tubs or immersion in water.
- The spray button should not be held for prolonged spraying.
- The listed 420-minute runtime is for low speed, not a stated high-speed runtime.
Best for: Households seeking a self-contained scrubber with adjustable speed, targeted water application, and a stated low-speed runtime.
Not ideal for: Buyers who need continuous water feed, plan to use the machine in or around tubs, or expect to spray continuously.
Bottom line: For an adaptable cordless scrubber with onboard water and the clearest runtime information in this lineup, the Qimedo M3 is our most balanced pick.
“For an adaptable cordless scrubber with onboard water and the clearest runtime information in this lineup, the Qimedo M3 is our most balanced pick.”
EWORK Cordless Electric Floor Scrubber with Water Feed
The EWORK is the most configurable tool in this comparison. Four interchangeable heads cover stiff brushing, softer brushing, mop-pad cleaning, and scouring, while eight locking angles let us set the head from -15 to 90 degrees. Its telescopic handle extends from 45 to 59 inches, which helps when moving between floors, walls, and corners. Compared with Qimedo’s three speeds and 90-degree head adjustment, EWORK places more emphasis on changing the tool and locking its position.The garden hose connection with handle-mounted water control suits extended wet cleaning where a steady supply is more useful than a small onboard tank. It also means a hose must be available, making the setup less self-contained than Qimedo’s tank or VMAI’s on-demand spray. The brush head is rated IPX7 and the motor chamber IPX5, but those ratings do not remove the need to follow product care instructions. Two 2Ah batteries are included, yet no runtime estimate is given; Qimedo provides more useful runtime guidance. EWORK is our pick when attachments, reach, and a hose connection matter more than compact water storage.
Pros:
- Four tool-free interchangeable heads support brushing, mopping, and scouring tasks.
- Eight locking angles and a telescopic 45–59-inch handle improve reach and positioning.
- Hose-fed water with handle-mounted control supports continuous wet cleaning.
- Two speed settings and waterproof ratings for the brush head and motor chamber.
Cons:
- Continuous water-fed cleaning requires a garden hose.
- Each battery is 2Ah, and no runtime estimate is provided.
- The two speed settings offer fewer choices than Qimedo’s three modes.
Best for: Buyers who want several head types, a long adjustable handle, and continuous water-fed cleaning for varied surfaces and tasks.
Not ideal for: People without convenient garden hose access or buyers who need a published runtime estimate before choosing.
Bottom line: Choose EWORK when head variety, adjustable reach, and hose-fed water matter more than a self-contained tank or clear runtime estimate.
“Choose EWORK when head variety, adjustable reach, and hose-fed water matter more than a self-contained tank or clear runtime estimate.”
VMAI Cordless Electric Floor Scrubber and Mop with Detachable Battery
The VMAI is aimed at buyers who want one cordless tool for scrubbing and gentler floor care. Its dual-spin motors, a pair of scrubbing brushes, and two pairs of soft pads offer a clearer shift between deeper cleaning and polishing than the Qimedo’s listed replacement-brush accessories. The manufacturer specifies sealed hardwood, laminate, vinyl, tile, marble, and grout, so this is the most explicitly floor-focused choice in the lineup.Its swivel steering, self-propelled operation, adjustable height, and LED headlights are useful when maneuvering across rooms or targeting dirt along a path. On-demand spray also keeps water application close to the cleaning head. Unlike EWORK, it does not depend on a hose; unlike Qimedo, the supplied information does not state a runtime or speed range. The detachable battery can be charged separately, but extending a session requires buying a spare battery separately. We would choose VMAI over the others for sealed-floor care and maneuverability, but skip it for unsealed materials or when published runtime figures are essential to the decision.
Pros:
- Scrubbing brushes and soft pads support both deeper cleaning and gentler polishing.
- Detachable battery can be removed for charging or replaced with a separately purchased spare.
- Self-propelled operation and swivel steering help guide the scrubber across rooms.
- On-demand spray and front LED headlights support targeted cleaning.
Cons:
- Specified for sealed hard floors, limiting its fit for other surface types.
- A spare battery for longer cleaning sessions is sold separately.
- The provided specifications do not state runtime or motor speed.
Best for: Owners of sealed hard floors who want to alternate between scrubbing and softer polishing with a maneuverable mop-style machine.
Not ideal for: Buyers with unsealed flooring, those seeking a stated runtime or speed range, or anyone expecting a spare battery in the box.
Bottom line: For sealed floors where soft-pad polishing and easy steering are priorities, VMAI offers the most focused floor-care setup in this group.
“For sealed floors where soft-pad polishing and easy steering are priorities, VMAI offers the most focused floor-care setup in this group.”
As an Amazon Associate we earn from qualifying purchases.
Before You Start
Charge the battery as directed and check whether it is removable or must stay installed. Keep the charger away from water. Move rugs, cords, toys, and loose objects out of the cleaning area. Check the brush or pad for grit, wear, or damage; trapped debris can scratch a floor. If you have not used the machine on this flooring before, test it in a small, hidden spot and allow the area to dry before proceeding.
Use only a cleaner approved for the scrubber and floor. Never mix cleaning products, and do not pour liquid into openings that are not marked for filling.
Step-by-Step Instructions
Step 1: Check the floor and choose an attachment
Identify the floor type and confirm that the scrubber and its brush or pad are approved for it. Fit the softest suitable attachment that can handle the soil. A stiff brush or abrasive pad can mark delicate finishes, while a soft pad may not remove heavy buildup from textured tile.
Tip:Check the attachment label and manual rather than choosing by appearance alone. If the floor has a coating, follow the coating maker’s care directions too.
Check: The selected attachment is clean, undamaged, securely fitted, and approved for the floor.
Step 2: Clear debris and prepare the room
Sweep or vacuum the floor to remove grit, crumbs, and hair. Pick up rugs and small objects, move furniture where practical, and secure loose cables away from the scrubber’s path. Plan an exit route so you do not have to walk across a damp area.
Tip:Dry debris can collect around a rotating brush and scratch the floor. Remove it before wet cleaning.
Check: The work area is clear, and no visible grit or loose objects remain in the planned path.
Step 3: Inspect and assemble the scrubber
Turn the scrubber off before attaching the brush or pad. Inspect the battery, handle, tank, seals, and brush area for cracks, loose parts, or residue. Install the attachment and battery as shown in the manual, then check that each part locks into place. Do not operate a machine with a damaged battery or loose attachment.
Tip:Keep hands away from the brush area while the machine is powered. Some models can start as soon as a trigger or control is pressed.
Check: The handle, battery, tank, and attachment are seated securely, with no visible damage.
Step 4: Fill the tank if your model uses liquid
Use the fill opening identified in the manual. Add the recommended amount of water and, only if permitted, the specified floor cleaner. Follow the product label for dilution; concentrated cleaner can leave a film or harm a floor. Close the cap firmly and wipe up spills before inserting or powering the machine.
Tip:If the manual says the scrubber is for dry use, skip filling it. Do not add bleach, solvents, wax, or foaming products unless the manufacturer explicitly approves them.
Check: The tank is filled only to its marked limit with an approved solution, or remains empty for dry use.
Step 5: Power on and check the controls
Move the scrubber to a clear patch of floor, stand behind the handle, and switch it on using the manual’s sequence. Confirm that the brush runs smoothly and that any liquid flow or suction control behaves as expected. Turn it off immediately if you hear an unusual grinding sound, see liquid leaking, or feel strong vibration.
Tip:Keep the brush clear of clothing, fingers, and cables during this check.
Check: The machine starts without warning lights, leaks, unusual noise, or excessive vibration.
Step 6: Test a small area
Scrub a small, inconspicuous patch using light pressure and a slow pass. Use the lowest effective setting if your model has adjustable speed or water flow. Stop, switch the machine off, and inspect the patch after it dries. Look for dullness, color change, swelling, residue, or scratching before cleaning the whole room.
Tip:A wet surface can hide streaks and finish changes. Let the test patch dry fully before judging it.
Check: The dry test area looks unchanged and clean, with no residue or visible damage.
Step 7: Scrub the floor in overlapping passes
Start at the farthest point from your exit. Guide the scrubber in steady, overlapping passes, letting the brush do the work rather than pressing down hard. Move at a pace that matches the machine’s instructions. Keep the brush moving when it is running, and avoid holding it over one spot, which can wear or mark a finish.
Tip:For sticky or set-in soil, make an additional slow pass instead of increasing pressure. Do not let cleaning solution dry on the floor.
Check: The cleaned sections have consistent coverage, and no standing liquid or missed dirty strips remain.
Step 8: Manage dirty water and pauses
Watch the tank level and any full-tank indicator while cleaning. Pause and switch the machine off before emptying or refilling a tank. Empty collected dirty water into an appropriate drain, rinse the tank if residue is present, and reinstall it securely. If the battery warning appears, stop and recharge according to the manual rather than forcing the machine to continue.
Tip:Do not tip a powered scrubber to reach under furniture. Turn it off and follow the manual’s guidance for edges and low spaces.
Check: The machine resumes with tanks fitted correctly, and the brush or liquid flow works normally.
Step 9: Finish the floor and let it dry
Turn the scrubber off when the floor is clean. If the machine leaves excess moisture, use its approved pickup or drying mode, or wipe the area with a clean, compatible cloth. Keep people and pets off the floor until it is dry, and ventilate the room if the floor-care instructions allow it.
Tip:Standing water can damage seams and finishes. Blot puddles promptly, especially near wood, laminate edges, and transitions between materials.
Check: The floor has no pools, visible cleaner film, or slippery patches, and it dries evenly.
Step 10: Clean the scrubber and store it
Switch off the machine and disconnect the charger if connected. Remove the brush or pad as directed, clear away hair and debris, and rinse washable parts only if the manual allows it. Empty and rinse the tanks, wipe the housing with a damp cloth, and dry parts fully before reassembly or storage. Charge and store the battery as specified by the manufacturer.
Tip:Do not immerse the motor housing or rinse electrical contacts. Store the scrubber upright in a dry place where the brush will not be crushed.
Check: The tanks are empty, debris is removed, washable parts are dry, and the machine is stored with its battery cared for as directed.
Common Mistakes to Avoid
- Using a brush or cleaner that is too abrasive or strong for the floor. — Check both the floor care instructions and scrubber manual, then test a hidden area before full use.
- Skipping sweeping or vacuuming before scrubbing. — Remove loose grit first so the rotating brush does not drag particles across the surface.
- Using too much liquid or leaving the machine stationary while the brush runs. — Use the approved fill amount, keep passes moving, and blot any puddles promptly.
- Storing the scrubber with a wet brush or dirty water in the tank. — Empty the tank and dry washable parts after each use to limit odor and residue.
Troubleshooting
Problem: The scrubber will not start.
Solution:
Switch it off, check that the battery is charged and locked in place, and confirm that the tank and brush assembly are installed as required. Review the manual for a reset or safety interlock. Stop using the machine if the battery is swollen, cracked, or unusually hot.
Problem: The brush spins slowly or the machine leaves dirty streaks.
Solution:
Switch off the scrubber and remove hair, grit, or tangled fibers from the brush. Check for a worn attachment, low battery, or a full dirty-water tank. Reinstall the parts and make another light pass on a small area.
Problem: The scrubber leaves too much water or cleaner behind.
Solution:
Reduce the liquid setting if available, check that the tank is not overfilled, and confirm that the pickup system is fitted and unobstructed. Use only the labeled dilution. Wipe up standing liquid and let the floor dry before walking on it.
Problem: The floor looks cloudy or streaked after drying.
Solution:
Cleaner residue or dirty solution may be left on the surface. Empty and rinse the tanks, use a clean attachment, and follow the floor maker’s directions for a rinse pass. Avoid adding more cleaner until the residue is removed.
What Success Looks Like
The floor is visibly cleaner with consistent coverage, no new scratches or finish changes, no standing water or sticky film, and no unsafe slippery areas. The scrubber is switched off, its dirty water is emptied, and its washable parts are clean and dry for storage.
Next Steps
After the floor dries, return furniture and rugs only when their undersides and the floor are dry. Empty and clean tanks after each use, remove hair from the brush, and inspect pads for wear before the next session. Follow the manual’s battery charging and storage guidance. Repeat cleaning when the floor needs it, using a dry sweep between sessions to limit grit.
Frequently Asked Questions
Can I use a cordless floor scrubber on hardwood?
Only if the scrubber and the floor manufacturer approve that exact use. Use a soft attachment and minimal moisture on sealed hardwood. Avoid wet scrubbing on unsealed wood, damaged finishes, or floors with open seams.
Can I use regular floor cleaner in the scrubber?
Use it only when the scrubber manual permits it and the cleaner is compatible with the floor. Follow the cleaner’s dilution instructions. High-foam, wax, bleach, or solvent products can damage the machine or leave residue.
How much pressure should I apply?
Use light guiding pressure and let the brush do the work. If soil remains, make another slow pass or use an approved setting instead of pressing down, which can strain the machine and mark the floor.
What should I do if the floor is still wet after scrubbing?
Stop adding liquid, check the water setting and pickup system, and use an approved drying or pickup mode if available. Blot pools with a compatible cloth and keep people off the area until it is fully dry.
How often should I clean the brush and tank?
Empty the dirty-water tank and clear debris from the brush after each use. Rinse washable parts only as the manual allows, then dry them before storage. Replace worn pads or brushes when cleaning performance drops or the maker’s service guidance calls for it.