Use this guide to prepare an electric floor scrubber, clean a compatible hard floor, and put the machine away safely. It is intended for beginners using a walk-behind or compact scrubber in a home, workshop, or small commercial space. Allow 30-60 minutes for setup, cleaning, and cleanup; a larger or heavily soiled floor may take longer. Follow the machine manual and the flooring manufacturer’s care instructions whenever they differ from general guidance.

Get cleaning gear delivered free with Prime
- Fast, free delivery on millions of items
- Prime Video, Amazon Music and more included
- Member-only deals all year

Qimedo Cordless Electric Mop M3, 2-in-1 Floor Scrubber with 6000mAh Battery
- ✔ Brand: Qimedo
- ✔ Model: YD-QJS1804SS-PRO1
- ✔ Battery capacity: 6000mAh

BISSELL SpinWave Hard Floor Expert Corded Spin Mop Cleaner, Model 20393
- ✔ Brand: BISSELL
- ✔ Model: 20393
- ✔ Power: Corded electric

Bissell BigGreen Hercules Scrub and Clean Floor Machine, Green
- ✔ Brand: Bissell BigGreen
- ✔ Brush speed: 2200 RPM
- ✔ Dimensions: 11 x 8 x 41 inches
Difficulty: Beginner | Time: 30-60 minutes
What You’ll Need
Tools & Materials:
- Electric floor scrubber with a compatible brush or pad
- Approved floor-cleaning solution
- Clean water, if the machine uses a solution tank
- Wet-floor signs or barriers
- Broom, dust mop, or vacuum
- Protective footwear and any protective equipment specified by the machine or chemical labels
- A grounded outlet or charged battery, depending on the machine
Knowledge:
- Basic familiarity with the machine’s controls and emergency stop
- Ability to identify the floor material and check its cleaning instructions
- Ability to read the detergent label and machine manual
Check the manual for approved floors, pad or brush types, detergent, tank limits, charging requirements, and operating instructions. Do not use a scrubber on carpet, untreated wood, or a surface the manufacturer says is unsuitable. Keep people and pets out of the work area, and plan a route to an accessible drain or waste-water disposal point if the machine recovers dirty solution.
Qimedo Cordless Electric Mop M3, 2-in-1 Floor Scrubber with 6000mAh Battery
The Qimedo M3 earns our top spot because it combines two useful cleaning approaches in one cordless machine: powered scrubbing and mopping. Its three listed speed settings—400, 600, and 800 RPM—give us room to adjust the cleaning action rather than running at one fixed setting. Eight included attachments, split between soft-bristle brushes and replaceable cloth brushes, also make it more adaptable than the BigGreen Hercules, whose listed package centers on a brush and pads.Its adjustable telescopic handle and 45-degree brush-head adjustment are practical for cleaning floors and reaching angled areas, while the display shows battery level and selected mode. The IPX7-rated brush head is listed as immersible for cleaning, but that rating should not be taken to mean the whole machine can be submerged. Compared with the corded SpinWave, the M3 does not need an outlet during use, which is helpful when moving between rooms or cleaning far from sockets.There are qualifications behind the cordless appeal. The stated runtime of up to 420 minutes depends on two batteries at low speed; the supplied description also lists a 6000mAh battery and a 2.5-hour charging time, so buyers should confirm what battery configuration is included. The handle is described as 50 inches in the specifications but 49 inches in the title. This makes the M3 our broadest-use pick, not the simplest one: buyers who want straightforward sealed-floor pad cleaning may prefer the SpinWave, while those who only need a lightweight bare-floor machine may not need the Qimedo’s attachment range.
Pros:
- Combines mopping and scrubbing in a cordless design.
- Three speed settings reach a listed maximum of 800 RPM.
- Includes eight brush and cloth attachments.
- Adjustable handle, angled head, and battery/mode display support controlled cleaning.
Cons:
- The 420-minute runtime claim requires two batteries and low-speed operation.
- The listed handle length conflicts between 49 and 50 inches.
- The provided details do not specify a floor compatibility list for every attachment.
Best for: Households wanting cordless scrubbing and mopping with adjustable speed and multiple brush or cloth options.
Not ideal for: Buyers who need an unambiguous long-runtime battery package, prefer a simple fixed-pad system, or need confirmed suitability for a specific delicate floor finish.
Bottom line: We recommend the Qimedo M3 for buyers who want the most flexible cordless setup, provided they verify battery contents and floor compatibility before choosing attachments.
“We recommend the Qimedo M3 for buyers who want the most flexible cordless setup, provided they verify battery contents and floor compatibility before choosing attachments.”
BISSELL SpinWave Hard Floor Expert Corded Spin Mop Cleaner, Model 20393
The SpinWave is the clearest choice for buyers whose routine centers on sealed hard floors. Rather than interchangeable brush heads, it uses powered spinning pads, with two scrubby pads and four soft-touch pads included. On-demand spray control lets us apply solution when needed instead of dispensing continuously, which can help keep cleaning more deliberate around furniture, edges, or areas that need less moisture.Compared with the cordless Qimedo, the SpinWave trades freedom from a power outlet for a defined pad-based system and a removable clean-water tank. Its washable, reusable pads make it easier to keep a regular cleaning rotation, and the included trial-size formulas provide a starting point for the intended surfaces. Swivel steering and a lightweight design are aimed at navigating around furniture and baseboards; the listing also describes the machine as designed for minimal noise. These features make it more specialized than the Qimedo’s multi-attachment approach, but potentially more straightforward for sealed wood, tile, laminate, linoleum, rubber floor mats, and pressed wood.The main limitation is fundamental: this is a corded cleaner for specified hard-floor surfaces, not a universal scrubber. We need an outlet within reach, and the sealed-floor guidance means it is not the pick for carpet or unsealed flooring. Against the BigGreen Hercules, the SpinWave offers more explicit floor compatibility and controlled solution delivery, while the Hercules is described more broadly for bare floors and lists a higher brush RPM. We would choose the SpinWave for pad-based maintenance, not simply because it has a powered motor.
Pros:
- Powered spinning pads reduce the need for manual scrubbing.
- On-demand spray gives control over where cleaning solution is applied.
- Includes six washable pads in scrubby and soft-touch styles.
- Swivel steering and a removable clean-water tank support routine hard-floor cleaning.
Cons:
- The cord requires an accessible power outlet during cleaning.
- Designed for specified sealed hard floors, not all surfaces.
- Pad-based cleaning is less adaptable to different tasks than the Qimedo’s brush and cloth attachment assortment.
Best for: People cleaning sealed hard floors who want rotating pads, washable replacements, swivel steering, and on-demand solution spray.
Not ideal for: Anyone who needs cordless operation, plans to clean carpet, or cannot confirm that their floor surface is sealed and compatible.
Bottom line: We would choose the SpinWave when our floors are sealed hard surfaces and we value reusable pads and controlled spray more than cordless reach.
“We would choose the SpinWave when our floors are sealed hard surfaces and we value reusable pads and controlled spray more than cordless reach.”
Bissell BigGreen Hercules Scrub and Clean Floor Machine, Green
The BigGreen Hercules is our compact pick for buyers who want a lightweight machine aimed at bare floors, without the broader attachment system of the Qimedo or the spray-and-pad setup of the SpinWave. Its listed weight is 8.5 pounds, and its 11-by-8-inch dimensions make it the most clearly compact option in this group. An adjustable handle and protective bumper are useful for navigating around household obstacles, especially when maneuverability matters more than a range of specialized cleaning modes.Its listed brush speed is 2200 RPM, higher than the Qimedo’s maximum of 800 RPM. We would not treat that number as proof that it cleans better: the machines use different formats, and the available information does not provide a directly comparable cleaning test. The Hercules is described as suitable for bare floor surfaces and can be used with compatible Bissell BigGreen Commercial floor polish for a high-sheen finish. That polishing step is an optional use case, not an automatic result of running the machine.Compared with the SpinWave, the Hercules has less detail about specific compatible floor finishes and does not list on-demand solution spray or multiple washable pad types. Compared with the Qimedo, it gives up cordless operation and the mix of brush and cloth attachments. Its strength is therefore narrow but useful: simple, lighter bare-floor scrubbing. Skip it if we need carpet cleaning, a purpose-built sealed-floor pad system, or the flexibility to switch among several attachment types.
Pros:
- Listed weight of 8.5 pounds supports easier handling.
- Compact 11-by-8-inch dimensions and adjustable handle aid maneuverability.
- Protective bumper helps when working around household obstacles.
- Can be used with compatible floor polish for a high-sheen finish.
Cons:
- Designed for bare floors rather than carpet.
- A high-sheen result depends on using compatible floor polish.
- Offers less documented flexibility than the Qimedo and less explicit surface guidance than the SpinWave.
Best for: Buyers seeking a lightweight, compact electric machine for bare-floor cleaning and maneuverability around the home.
Not ideal for: Households needing carpet cleaning, cordless reach, a range of interchangeable attachments, or clearly specified sealed-floor spray cleaning.
Bottom line: The BigGreen Hercules makes sense when compact handling and bare-floor use are the priorities, but its narrower role places it behind the more adaptable Qimedo and the more clearly specified SpinWave.
“The BigGreen Hercules makes sense when compact handling and bare-floor use are the priorities, but its narrower role places it behind the more adaptable Qimedo and the more clearly specified SpinWave.”
As an Amazon Associate we earn from qualifying purchases.
Before You Start
Inspect the floor for loose debris, cables, thresholds, and objects that could catch under the brush or block the recovery squeegee. Check whether the floor needs a small test patch: this is a good idea on unfamiliar or delicate finishes. Use only detergent approved for the machine and floor. Never mix cleaning chemicals, and do not add bleach or a foaming product unless both the machine manual and product label specifically allow it. If using a corded model, use the power supply and cable arrangement specified by its manual; keep the cord away from the brush and wet areas.
Step-by-Step Instructions
Step 1: Clear and mark the work area
Move furniture and loose objects out of the cleaning path. Sweep, dust-mop, or vacuum the floor to pick up grit, hair, and larger debris. Put wet-floor signs at each entrance and block access to the area while you work.
Tip: Loose grit can scratch a finish or clog the pickup system. Do not rely on the scrubber to collect stones, paper, or other large debris.
Check: The route is clear, the floor has no visible loose debris, and people can see that the area is being cleaned.
Step 2: Inspect the scrubber
Switch the machine off and disconnect it from power, or remove the key if the model has one. Check the body, controls, tanks, hoses, brush or pad holder, and recovery squeegee for damage or blockages. Confirm that the brush or pad is the right type and size for your floor and machine. Attach it as the manual directs.
Tip: Do not use a machine with a damaged cable, leaking tank, loose brush, or faulty emergency stop. Arrange repair before cleaning.
Check: The correct cleaning attachment is secure, tanks and hoses are intact, and the controls appear ready for use.
Step 3: Prepare the cleaning solution
Read the detergent label and machine instructions. Measure the approved cleaner at the stated dilution, then add it to the solution tank with water if the manual directs you to do so. Keep below the tank’s fill line and close the cap securely. If the machine uses a separate chemical system, follow that system’s filling instructions instead.
Tip: Too much detergent can leave a sticky film, create excess foam, or interfere with water recovery. Never pour concentrate directly onto the floor.
Check: The tank contains the correct solution at the specified level, with no spills around the cap or fill area.
Step 4: Set up power and controls
For a battery model, check the charge indicator and fit the battery as the manual directs. For a corded model, inspect the plug and cable, then connect it to the approved outlet without creating a trip hazard or letting the cable enter the machine’s path. Set the brush pressure, water flow, and other controls to the manufacturer’s recommended starting settings for your floor.
Tip: Do not operate with wet hands near a plug or connector. Keep the cable behind and clear of the scrubber if the manual permits operation while plugged in.
Check: The machine powers on without a warning signal, and the selected settings match the floor and cleaning attachment.
Step 5: Test a small patch
Choose a discreet area and make a short pass using the planned settings. Watch how the machine moves and check that the floor is not being scratched, dulled, or left with excess water. Stop and adjust the pad, brush, or settings if the result is unsuitable.
Tip: Allow the test area to dry enough to inspect its finish before treating the whole floor, especially on polished or coated surfaces.
Check: The test patch looks clean after drying, with no visible damage, unusual residue, or standing water.
Step 6: Scrub the floor in steady, overlapping passes
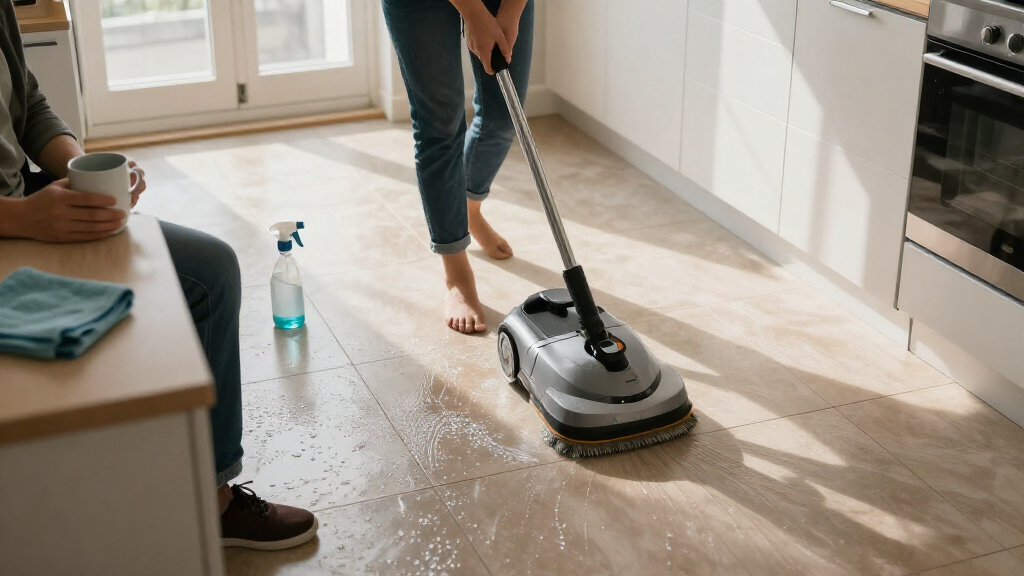
Start at the far end of the area and work toward the exit so you do not walk over the cleaned floor. Lower the brush or pad and start solution flow only as the manual instructs. Move at a steady walking pace in straight, overlapping lanes. Keep the scrubber under control, turn slowly, and avoid striking walls, furniture, or thresholds. On a heavily soiled area, make another pass rather than holding the machine stationary.
Tip: Do not let the brush spin in one place, since this can damage some finishes. If the machine leaves wet streaks, stop and check the recovery system before continuing.
Check: The lanes are evenly cleaned, the machine is recovering dirty water as intended, and the floor is not left with pools or persistent streaks.
Step 7: Stop and manage the tanks as needed
When the solution tank is low or the recovery tank is full, stop scrubbing and switch off the machine as directed. Empty and rinse the recovery tank at an approved disposal point, and refill the solution tank only with the measured mixture. Secure the caps before restarting.
Tip: Do not discharge dirty solution into a storm drain. Follow local rules and site procedures for disposal.
Check: The recovery tank is below its limit, the solution supply is sufficient, and both tanks are closed without leaks.
Step 8: Finish the area and inspect the result
Complete the remaining lanes, then switch off the brush and solution flow. Make a final recovery pass if the manual allows it and the floor has damp patches. Keep the area closed while it dries; use air movement only if suitable for the site and floor.
Tip: Do not remove wet-floor signs just because the machine has passed. Foot traffic on a damp floor can cause slips and leave marks.
Check: The cleaned floor has no visible soil or detergent film, and no puddles remain. The surface is dry before normal access resumes.
Step 9: Clean and store the machine
Switch off and unplug the machine, or remove its key, before servicing it. Empty and rinse both tanks, clean the brush or pad holder and squeegee, and remove debris from hoses or filters as the manual directs. Let parts dry as specified. Store the machine in a dry, secure place and recharge the battery according to its instructions.
Tip: Wear gloves when handling dirty water or used pads. Do not reach under a brush while the machine is connected to power.
Check: The tanks are empty, the pickup parts are free of visible debris, the machine is safely disconnected, and it is stored ready for its next use.
Common Mistakes to Avoid
- Using the wrong pad, brush, or detergent for the floor. — Check the floor care instructions and machine manual, then test an inconspicuous patch before cleaning the full area.
- Adding too much cleaner or an unapproved foaming product. — Measure the product at the label’s dilution and use only a cleaner approved for the machine.
- Scrubbing over grit or stopping with the brush running in one spot. — Remove loose debris first, keep the scrubber moving, and make another pass over stubborn soil.
- Allowing people to walk through a wet work area. — Place signs at entrances, restrict access, and wait until the surface is dry before removing barriers.
Troubleshooting
Problem: The scrubber leaves water behind or makes wet streaks.
Solution:
Stop the machine. Check that the recovery tank is not full, the squeegee is correctly fitted and clean, and the recovery hose and filter are not blocked. Inspect the squeegee blade for wear or damage. Resume only after correcting the issue.
Problem: The machine does not start or the brush does not turn.
Solution:
Switch it off and check the battery charge or approved power connection, safety switch, and emergency stop. Check for a jammed brush only after disconnecting power or removing the key. Follow the manual’s reset procedure; do not bypass a safety device.
Problem: The floor feels sticky or shows a dull film after drying.
Solution:
Excess detergent or poor recovery may have left residue. Rinse the tanks, use the correct dilution, and clean the area again with the method approved for the flooring. Check that the squeegee is collecting solution properly.
Problem: The scrubber leaves scratches, scuffs, or an unexpected change in sheen.
Solution:
Stop immediately. Check for trapped grit, a worn or incorrect pad, excessive brush pressure, or an unsuitable cleaner. Do not continue until the floor and attachment have been checked; contact the floor or machine supplier if the cause is unclear.
What Success Looks Like
The task is complete when the full work area has been scrubbed evenly, visible soil and cleaner residue are gone, and dirty solution has been recovered without leaving puddles. The floor should be dry before people return. The machine should be switched off, cleaned, and stored with no leaks or loose debris.
Next Steps
Record any repair needs or unusual cleaning results for the next operator. Replace worn pads or squeegee blades according to the manual, and recharge a battery model as directed. Clean the machine after each use; repeat floor cleaning when visible soil or the site’s maintenance schedule calls for it. If the floor finish changes or a machine fault returns, stop using the equipment and ask the flooring or machine supplier for guidance.
Frequently Asked Questions
Can I use an electric floor scrubber on any hard floor?
No. Some machines, brushes, pads, and detergents can harm delicate coatings, untreated wood, or other sensitive surfaces. Check both the machine manual and floor care instructions, and test a small hidden patch first.
Do I need to sweep before using the scrubber?
Yes. Remove grit, hair, and larger debris first. A scrubber is intended to wash the floor, not to replace dry debris removal; loose material can scratch the surface or block the pickup system.
How much detergent should I add?
Use the dilution printed on the approved product and follow the machine’s filling directions. Do not guess or add extra cleaner to tackle stubborn soil. Make another pass with the correct solution if needed.
How long should the floor take to dry?
Drying time depends on the floor, airflow, room temperature, and how well the machine recovered water. Keep the area closed until it is dry to the touch and safe for foot traffic; do not use a fixed time as a substitute for checking.
Can I keep using the machine if the squeegee leaves water behind?
No. Stop and inspect the recovery tank, hose, filter, and squeegee. Continuing can leave a slip hazard. Resume only when the machine is picking up solution correctly.