
To give your new home’s grout lines a fresh look in just one afternoon, start with a thorough cleaning using a grout cleaner or baking soda paste and a stiff brush to remove dirt and stains. Once dry, apply a quality grout sealer to protect against future messes. If needed, repair any cracks or uneven areas with a re-grouting kit. With these simple steps, you can quickly refresh your tiled surfaces and keep them looking new—plus, you’ll discover more tips along the way.
Key Takeaways
- Begin with thorough cleaning using specialized grout cleaner or baking soda mixture to remove dirt and stains.
- Allow grout to dry completely before applying a high-quality grout sealer to protect against future damage.
- Repair damaged or uneven grout by re-grouting or filling gaps with a repair kit for a fresh, uniform look.
- Reseal new grout after drying to enhance durability and maintain a clean, crisp appearance.
- Regular maintenance, including cleaning and sealing, keeps grout lines looking new and prevents costly repairs.

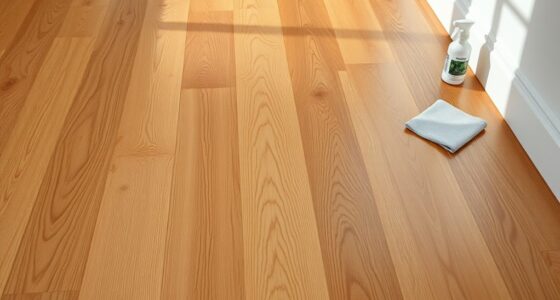
When moving into a new home, you might notice that the grout lines between your tiles appear uneven or cracked. This is common, especially if the previous owner didn’t take care of grout maintenance or if the home has settled. Fortunately, you can refresh the look of your tile work in just an afternoon with a few simple steps. The key is to focus on grout cleaning first, then seal the tiles to prevent future damage and keep everything looking crisp.
Start with grout cleaning. Use a specialized grout cleaner or a mixture of baking soda and water to scrub out stains, dirt, and mold. An old toothbrush or a grout brush works well for getting into those tight lines. Be thorough—you want to remove any debris or buildup that dulls the appearance of your grout. Once you’ve scrubbed, rinse the area with clean water and wipe it dry. This step not only improves appearance but also prepares the surface for effective tile sealing. Additionally, choosing a hydrocolloid material for patches can promote faster healing if you decide to repair damaged grout or tile areas.
Tile sealing is your next move. After cleaning, make sure the grout is completely dry. Applying a quality grout sealer creates a protective barrier against moisture, stains, and dirt. Follow the instructions on the sealer—usually, you’ll brush or spray it onto the grout lines and then wipe away any excess. Sealing your grout lines now prevents future cracks and discoloration. It also makes cleaning easier down the line, as dirt and grime won’t penetrate as deeply.
If your grout lines are cracked or uneven, you might consider re-grouting or filling in the gaps with a grout repair kit. This step can be done if you want a more uniform look or if the existing grout is beyond cleaning. Applying fresh grout can transform the appearance of your tiled area, making it look almost new. After the new grout dries, don’t forget to seal it, just like the original lines.
This simple reset process is quick—most of it can be done within a few hours—and it markedly enhances your space’s appearance. Maintaining your grout through regular grout cleaning and sealing is the best way to keep your tiles looking fresh and to avoid costly repairs later. You’ll be surprised how much a little effort can restore your new home’s tiled surfaces, giving you that crisp, clean look you want from the moment you move in.

Oreck Commercial Orbiter Hard Floor Cleaner Machine, Multi-Purpose Floor Cleaning, Random Orbital Drive, Wide Cleaning Path, 50-Foot Long Cord, ORB550MC, Gray/Red
MULTI-PURPOSE CLEANING: Commercial grade cleaner and effective on all types of flooring surfaces. Sand, refinish, strip, scrub, wax,...
As an affiliate, we earn on qualifying purchases.
Frequently Asked Questions
How Long Does a Grout Line Reset Typically Take?
A grout line reset usually takes about a few hours, depending on the size of your area and the condition of your grout. You should consider your preferred grout color options and plan for cleaning frequency afterward to maintain its fresh look. Regular cleaning keeps the grout lines pristine, making the reset last longer. With proper planning, you can have your grout looking like new in just an afternoon.
What Tools Are Essential for a Grout Line Refresh?
Think of your tools as a painter’s palette for a fresh canvas. You’ll need a grout cleaning brush or scrubber to lift dirt, a spray bottle for cleaning solution, and a grout sealer to safeguard your work. A small trowel or applicator ensures even sealing. These tools work together to refresh your grout lines, making them look new and vibrant with minimal effort.
Can I Do a Grout Reset Without Professional Help?
Yes, you can do a grout reset without professional help by following DIY tips for grout maintenance. Start by cleaning the existing grout thoroughly, then remove any loose or damaged grout using a grout saw or scraper. Apply fresh grout, ensuring it fills all gaps evenly. After it cures, seal the grout to prevent stains and future damage. With patience and proper tools, you can achieve a fresh, clean look on your own.
How Often Should Grout Lines Be Reset in a New Home?
Think of your grout lines as the foundation of your home’s style—they need regular love. Generally, you should reset or re-seal grout every 1-2 years, especially with frequent cleaning. This keeps the color options vibrant and prevents stains. Use sealing techniques that suit your grout type, and consider a grout reset if you notice cracks or discoloration. Regular maintenance keeps your floors fresh and beautiful for years to come.
Are There Any Safety Precautions for DIY Grout Cleaning?
When cleaning grout yourself, always wear safety gear like gloves and goggles to protect your skin and eyes from chemical splashes. Follow chemical precautions by reading labels carefully and using the recommended amount of cleaner. Make certain there is good ventilation in the area to avoid inhaling fumes. Keep children and pets away during cleaning, and wash your hands thoroughly afterward to prevent any irritation or accidental ingestion.
Bissell Commercial BigGreen BGFS650 Hercules Scrub and Clean Floor Machine, Green
Brush Speed (Rpm): 2200 Rpm
As an affiliate, we earn on qualifying purchases.
Conclusion
Resetting your grout lines in a new home is quick and satisfying—almost like giving your space a fresh start in just an afternoon. When you focus on proper cleaning and sealing, you prevent future stains and keep your grout looking new longer. It’s a simple step that makes a big difference, proving that a little effort now can save you time and money later. So go ahead, refresh those grout lines—your home will thank you for it.

HHQ Commercial Floor Scrubber Machine with Brushes and Pads, Heavy Duty Floor Cleaner Polisher and Buffer- Deep Cleaning Tile and Grout, Hardwood Floors and Carpets without Getting on Hands and Knees
Kit Included: 1 Orbital Floor Buffer & Scrubber Machine, 2 Polishing/ Stripping Pads, 3 Scrub Brushes, 1 Microfiber...
As an affiliate, we earn on qualifying purchases.
MR.SIGA Heavy Duty Grout Scrub Brush with Long Handle, Shower Floor Scrubber for Cleaning, Tile Scrub Brush with Stiff Bristles
HEAVY DUTY & LONG LASTING - MR.SIGA grout brush is built with durable plastic and sturdy steel pole,...
As an affiliate, we earn on qualifying purchases.